Ah, birthday cake—the centerpiece of any celebration. Now, when you think of a cake that bridges both nostalgia and indulgence, the chocolate vanilla birthday cake springs to mind. This cake is like a warm hug from your childhood. Pair it with a scoop of vanilla ice cream, a dollop of whipped cream, or fresh berries, and you’ve got a showstopper. This cake doesn’t just look good; it tastes even better.
What is A Chocolate Vanilla Birthday Cake?
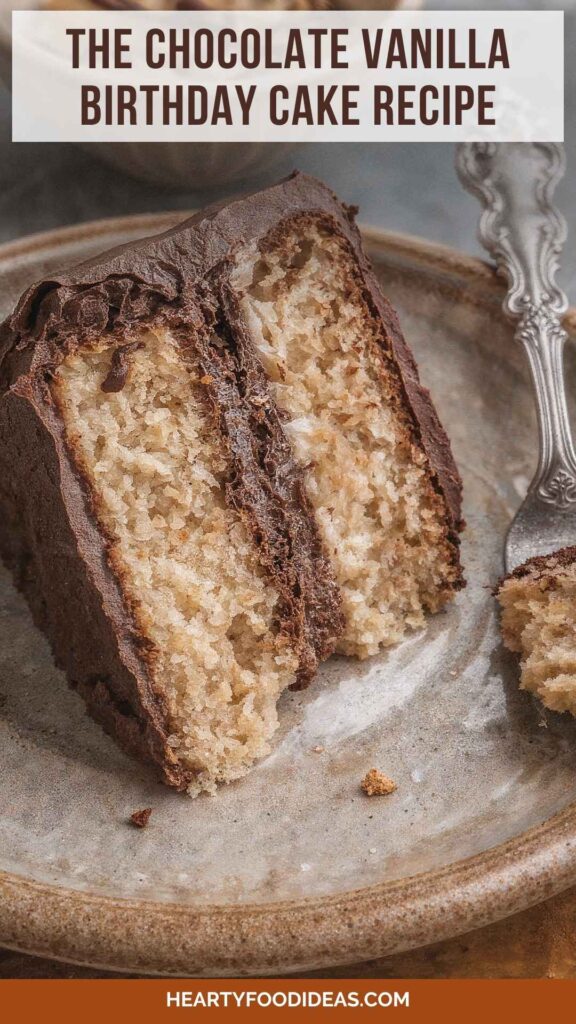
At its core, a chocolate vanilla birthday cake is a delightful contradiction, merging rich chocolate flavors with the light, sweet essence of vanilla. This cake typically consists of layers of tender chocolate and vanilla-flavored cakes, often layered with chocolate buttercream. The two flavors complement each other beautifully, offering a delicious balance that makes this cake palatable for everyone. It’s perfect for any birthday celebration, bringing together friends and family for a slice of joy.
Why This Recipe Works
Creating the perfect chocolate vanilla birthday cake isn’t about guesswork. It’s a science, and there are solid reasons why this recipe stands out. Let’s break it down:
1. Balanced Flavors:
The harmony between chocolate and vanilla is essential. The chocolate provides richness, while the vanilla lightens things up, ensuring your taste buds are consistently engaged. This cake delivers both expected and unexpected flavor experiences, making each bite delightful.
2. Moist and Tender Texture:
Thanks to the combination of butter, oil, and cornstarch, this cake maintains an incredibly moist and tender crumb. That’s essential for any good birthday cake! No one wants a dry disappointment when it's time to sing “Happy Birthday.”
3. Versatility:
You can tailor this cake to your liking. Want to add fresh fruit? Go for it! Craving more chocolate? Double up on the cocoa! This recipe provides a solid base, making it easy to adjust and adapt based on the occasion or dietary needs.
4. Simple Yet Elegant Presentation:
Decorating this cake is straightforward. The chocolate buttercream frosting glides on smoothly and can be dressed up with sprinkles, fresh berries, or elegant piping. It looks as good as it tastes, making it a feast for both the eyes and the palate.
With these reasons in mind, you’re well on your way to baking a showstopper. Next, let’s gather our ingredients.
Ingredients You'll Need to Make This Dish
Getting the right ingredients is crucial for success. Here’s what you’ll need to create this masterpiece:
For the Cake Batter:
- 2⅓ cups all-purpose flour, sifted: Sifting ensures a light texture.
- ¼ cup cornstarch: This adds tenderness to the crumb.
- 2½ teaspoons baking powder: The leavening agent that gives the cake lift.
- ½ teaspoon fine sea salt: Helps enhance all the flavors.
- 1¼ cups white granulated sugar: Sweetness is key!
- ½ cup softened butter: For that rich, buttery flavor.
- ½ cup neutral oil: Ensures moisture and tenderness.
- 3 large eggs: Vital for structure and richness.
- 1½ tablespoons pure vanilla extract: Adds wonderful flavor.
- 1½ cups milk (dairy or plant-based): Liquid for the batter’s balance.
- 1 teaspoon almond extract: Provides a unique nutty aroma.
For the Chocolate Buttercream Frosting:
- 1½ cups butter, softened: For a creamy, spreadable texture.
- 1¼ cups unsweetened cocoa powder: The star ingredient for chocolate flavor.
- 2¾ to 3 cups powdered sugar (sifted): Sweetens and thickens the frosting.
- 1 teaspoon pure vanilla extract: To enhance the overall chocolate flavor.
- 2 tablespoons brewed espresso or strong coffee: Adds depth without overwhelming coffee flavor.
- Milk (dairy or dairy-free), as needed: Adjusts frosting consistency.
How to Make This Chocolate Vanilla Birthday Cake
Let’s roll up our sleeves and get baking! Here’s a step-by-step guide to making this scrumptious cake.
Step 1: Preheat the Oven
It’s time to fire up that oven! Preheat it to 350°F (175°C). Grab your baking pans and grease them with butter or line them with parchment paper for easy removal later.
Step 2: Prepare the Dry Ingredients
In a large mixing bowl, whisk together the all-purpose flour, cornstarch, baking powder, and fine sea salt. This blends everything evenly and makes for great cake texture.
Step 3: Cream the Butter and Sugar
In another bowl, beat the softened butter and white sugar until the mixture is light and fluffy. This step is crucial because it incorporates air, which helps the cake rise beautifully.
Step 4: Add the Eggs and Extracts
Next, add the eggs, one at a time, mixing well after each addition. Stir in the vanilla and almond extracts to infuse your batter with even more flavor.
Step 5: Incorporate the Dry and Wet Ingredients
Now, alternate adding the dry mix and the milk into the creamed butter mixture, starting and ending with the dry ingredients. This method creates a smoother batter without overmixing.
Step 6: Measure and Pour
Divide the cake batter evenly between the prepared pans. Use a kitchen scale for precision, or rely on your best guess if you’re feeling adventurous.
Step 7: Bake
Place the pans in the preheated oven and bake for 25-30 minutes, or until a toothpick inserted in the center comes out clean.
Step 8: Cool the Cakes
Once baked, remove the pans from the oven. Cool the cakes in the pans for about 10 minutes before transferring them to a wire rack to cool completely.
Step 9: Make the Chocolate Buttercream Frosting
In a large bowl, beat the softened butter until creamy. Gradually add the cocoa powder and powdered sugar, mixing on low until it’s well combined. Pour in the espresso and vanilla, then add milk until the desired consistency is reached.
Step 10: Frost the Cake
Once your cakes are cooled, it’s time to assemble! Place one layer on your serving plate. Spread a generous layer of chocolate buttercream on top. Add the second cake layer and frost the top and sides.
Step 11: Decorate
Add any decorations—sprinkles, fresh fruit, or additional piping of frosting. Make it your own!
Tips & Tricks
- Leveling the Cake: After the cakes cool, level the tops with a serrated knife for easier stacking.
- Chill the Frosting: If the frosting feels too soft, chill it for a short time to firm it up before frosting the cake.
- Try Different Flavors: Consider swapping out the vanilla extract for something unique, like orange or mint, for a twist.
- Add Fillings: For an added surprise, layer in fruit preserves or chocolate ganache between the cake layers.
- Don’t Rush Cooling: Ensure the cakes cool completely before frosting to prevent the frosting from melting.
Note: Nutrition values may vary based on specific ingredients used and portion sizes.
How Do You Store the Leftovers?
If you find yourself with leftover cake (which may be a miracle in itself), here’s how to store it. Wrap individual pieces in plastic wrap or aluminum foil, and place them in an airtight container. This will keep the cake fresh for about 3-5 days at room temperature. For longer storage, consider freezing the cake. Just slice it, wrap each piece tightly, and freeze. It can last for up to three months in the freezer—when the craving hits, just thaw overnight in the fridge!
What Sides Would Complement Chocolate Vanilla Birthday Cake?
To elevate your birthday cake experience, consider the following sides:
1. Vanilla Ice Cream:
Nothing beats the classic pairing of a warm slice of chocolate vanilla birthday cake with a scoop of creamy vanilla ice cream. The cold, smooth texture juxtaposes perfectly with the cake's richness.
2. Fresh Berries:
A medley of fresh berries—strawberries, raspberries, or blueberries—adds a refreshing and slightly tart contrast. They not only enhance the cake's flavors, but also provide a pop of color on the plate.
3. Whipped Cream:
A dollop of lightly sweetened whipped cream can elevate the dish from delicious to ethereal. Flavored whipped cream like vanilla or a touch of almond can also add an extra zing.
What Alternatives Can You Use for the Ingredients if They Are Not Present in Your Kitchen?
Sometimes, you find yourself in a baking bind, but don’t fret. Here are alternatives you can use:
1. Flour Alternatives:
If you’re out of all-purpose flour, you can combine equal parts of whole wheat flour or almond flour. They provide unique flavors and textures.
2. Butter Substitutes:
Use coconut oil or vegan butter as a substitute for regular butter. They work well for those seeking dairy-free options while maintaining richness.
3. Plant-Based Milk:
In a pinch, any non-dairy milk—like oat, almond, or coconut milk—can easily replace regular milk without sacrificing flavor.
4. Decor Alternatives:
For frosting, consider a cream cheese frosting for a tangy twist, or a whipped ganache for an ultra-chocolatey finish.
Conclusion
There you have it! The chocolate vanilla birthday cake is not just a dessert—it’s a celebration on a plate. With its balanced flavors, delightful texture, and customizable nature, it’s a cake that promises to bring smiles and sweet memories. Whether you’re baking for a birthday, an anniversary, or just because you crave a treat, this cake is bound to impress.
Next time you’re planning a celebration, remember this cake. It's an invitation to blend flavors, creativity, and joy. Let the baking begin!
You’ll also like the following recipes!