
Blueberry Pie With Frozen Berries Recipe
Every time I tried making pie at home, I'd end up with a watery mess in the bottom of the crust. The filling would be runny, the crust would turn soggy, and I'd feel defeated before I even sliced into it. Sound familiar? I grew up watching my mother make magic in her kitchen, but pie seemed like the one thing I just couldn't master. Then I learned the secret: it's not about the berries themselves—it's about how you prepare the filling before it meets your crust. This blueberry pie recipe changed everything for me, and I'm so excited to share it with you. If you love berry desserts, you'll also enjoy my this simple cake, which uses a similar philosophy of letting fruit shine through proper technique.
Servings 10
Calories 179kcal
Ingredients
- 1 kilogram frozen blueberries (no need to thaw
- 1 large egg plus 1 tablespoon water for an egg wash that creates a beautiful golden top
- ½ teaspoon sea salt enhances all the berry flavors
- 100 gram granulated sugar adjust based on berry sweetness; less if berries are already sweet, more if they're tart
- 1 tablespoon coarse sugar for sprinkling optional, adds textural contrast
- 2 pre-made pie crusts or homemade double pie crust enough for bottom and top
- 1 tablespoon unsalted butter optional, but creates a silky mouthfeel
- 2 tablespoon fresh lemon juice brightens the berry flavor beautifully
- ½ tablespoon lemon zest adds citrus aromatics without extra liquid
- 30 gram cornstarch this is your thickening powerhouse
- ¼ teaspoon ground cinnamon optional, but adds lovely warmth
Instructions
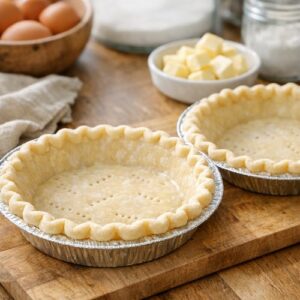
Step 1: Prepare Your Pie Crusts
- Remove your pie crusts from the refrigerator about 15 minutes before you need them. If you're using store-bought crusts, let them sit at room temperature. If you've made your own (which I always encourage), they should be properly chilled. Cold dough is essential—it prevents your crust from shrinking during baking and helps create those flaky layers we all love. While your dough comes to temperature, preheat your oven to 375°F (190°C). Place one crust into a 9-inch pie dish, letting it settle naturally without stretching. You want it to fit comfortably without stress.
Step 2: Combine Your Dry Ingredients and Aromatics
- In a small bowl, whisk together your cornstarch, sugar, salt, and cinnamon (if using). This step is important because it distributes the cornstarch evenly throughout your sugar mixture, preventing lumps when you add it to your berries. Take your time here—clumpy cornstarch will create lumps in your filling. You can also do this step directly in your cooking pan, but I prefer mixing it separately so I know everything is properly combined before heat comes into play.
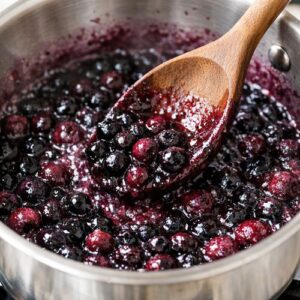
Step 3: Begin Cooking Your Filling on Low Heat
- Pour your frozen blueberries into a large saucepan. Don't add the butter yet—we'll do that at the end. Sprinkle your cornstarch mixture over the berries, then add the lemon juice and lemon zest. Now here's the critical part: place this pan over very low heat and stir gently and consistently for about 3 to 5 minutes. You're not trying to cook the berries—you're just beginning to wake them up. As the temperature slowly rises, the berries will start releasing their beautiful juices. This gentle start prevents the cornstarch from cooking too quickly at the bottom of the pan. Stir often, reaching into the bottom corners where heat collects.

Step 4: Increase Heat and Stir Continuously
- Once you can see that the berries have released some liquid and the mixture is starting to warm (after about 5 minutes on low), turn your heat up to medium. Continue stirring regularly—and I mean regularly. This is not the time to check your phone or step away. The cornstarch needs constant attention to dissolve properly and thicken evenly. You're looking for the mixture to begin bubbling around the edges, which usually takes 5 to 7 minutes depending on your stove. Keep your wooden spoon moving through the mixture, scraping the bottom and sides.
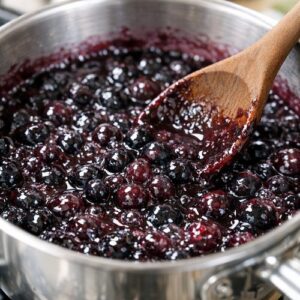
Step 5: Boil and Achieve Glossy Perfection
- Once you see small bubbles beginning to form, let the mixture bubble gently while you continue stirring for exactly 1 full minute. This is where the magic happens. The cornstarch is now fully activated by heat, and it's thickening your berry liquid. You'll notice the mixture transforms from cloudy to clear and glossy—this is your visual cue that the cornstarch has done its job. The filling will look almost jewel-like when you lift your spoon. If it still looks cloudy and thin, give it another 30 seconds of boiling, but usually 1 minute is perfect.
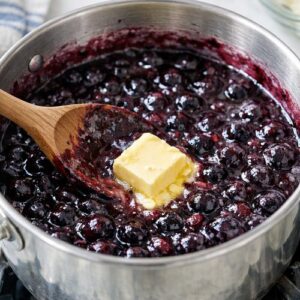
Step 6: Add Richness and Cool Your Filling
- Remove your pan from the heat immediately after that final minute of boiling. Stir in your tablespoon of butter if you're using it. The residual heat will melt it perfectly, and it adds a subtle richness that makes people ask what your secret ingredient is. Pour this gorgeous filling into a large bowl or shallow dish. Let it cool completely to room temperature—this is non-negotiable. If you pour hot filling into your pie crust, the bottom will turn soggy and the eggs in your crust won't set properly. I usually give it 45 minutes to an hour. If you're short on time, you can make this filling 1 or 2 days ahead and refrigerate it in an airtight container. Cold filling is actually easier to work with when you're assembling your pie.
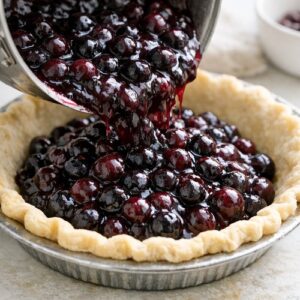
Step 7: Assemble Your Pie
- Once your filling is completely cool, pour it into your waiting bottom crust. Don't overfill—leave about ¼ inch of space at the top. Any excess filling can be gently warmed and served alongside your pie. Place your second pie crust on top, either as a traditional full crust or cut into strips for a lattice pattern if you're feeling creative. Trim the edges so they're even, then crimp them firmly between your thumb and forefinger. This seals the crusts together and creates that beautiful finished look.
Step 8: Create a Golden Top
- In a small bowl, whisk together your egg and 1 tablespoon of water to create an egg wash. Brush this all over your top crust with a pastry brush, being generous but not sloppy. This creates that beautiful golden-brown finish everyone loves. If you have coarse sugar, sprinkle a little over the top now. Make 4 small slits in the top crust with a sharp knife to allow steam to escape during baking—this helps prevent your crust from puffing up unevenly.
Step 9: Bake Until Perfect
- Place your pie on a baking sheet (this catches any drips and makes cleanup easier) and bake at 375°F (190°C) for 40 to 50 minutes. You're looking for a crust that's deep golden brown, not pale or dark. Halfway through baking, if the crust is browning faster than the filling is cooking (you'll see it browning too quickly), tent it loosely with aluminum foil. Let the pie cool on a wire rack for at least 2 hours before slicing. This allows the filling to set completely and makes cutting clean, beautiful slices possible.