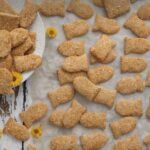
Homemade Goldfish - Hearty Food Ideas
If you're anything like me, the very mention of goldfish conjures up fond memories of childhood. Those small, crunchy snacks were a snack-time staple—an ocean of joy in every bite. But let’s be honest: store-bought versions can be a bit...well, bland. That's where homemade goldfish take center stage. They’re not just a nostalgic snack. They’re a blank canvas for flavors and textures.
Let me take you on a journey through the art of crafting your own goldfish crackers right in your kitchen. You’ll be amazed at how simple ingredients can come together to create something absolutely delicious. Whether you’re preparing for a party, a family movie night, or simply wanting to indulge, these homemade goodies will not disappoint.
Servings 70
Calories 100kcal
Ingredients
- 1 cup plain all-purpose flour
- 1/4 teaspoon fine sea salt
- 1/2 teaspoon smoked paprika
- 1/4 teaspoon dried onion flakes
- 1/4 teaspoon garlic granules
- 1/4 teaspoon Dijon mustard powder
- 6 tablespoons 6 chilled salted butter, cut into 1/2-inch cubes
- 3 cups coarsely shredded sharp cheddar about 8 ounces
- 1-2 tablespoons ice-cold water
- Flaky finishing sea salt, for sprinkling optional
Instructions
Step 1: Prepare Your Dough
- In a large mixing bowl, combine the flour, fine sea salt, smoked paprika, dried onion flakes, garlic granules, and Dijon mustard powder. Use a fork or a whisk to mix the dry ingredients thoroughly. This step is crucial—allow your flavor components to mix evenly.
Step 2: Incorporate the Butter
- Next, add the chilled butter cubes to your dry mixture. This is where you get your hands a bit dirty. Use your fingertips to rub the butter into the flour mixture until it resembles coarse crumbs. The key here is to work quickly, keeping the mixture cold. This will help create that desired flaky texture in your goldfish.
Step 3: Add the Cheese
- Now comes the star of the show: the cheese. Fold in the coarsely shredded cheddar, ensuring it’s well combined with your dough. The cheese will add both flavor and richness, so don’t skimp on this step.
Step 4: Form the Dough
- Slowly add in the ice-cold water, one tablespoon at a time, mixing until the dough holds together. You want it to be pliable without becoming sticky. Once you achieve the right consistency, form the dough into a ball, wrap it in plastic wrap, and refrigerate for about 30 minutes. This resting period allows the flavors to meld and the dough to firm up.
Step 5: Roll and Cut
- After chilling, preheat your oven to 350°F (175°C). Once your oven reaches temperature, take the dough out and let it sit for a few minutes. On a floured surface, roll out the dough to about 1/8 inch thick. Grab a fish-shaped cutter or a simple knife to cut out your goldfish shapes. Place them on a parchment-lined baking sheet, leaving some space in between.
Step 6: Bake
- Sprinkle a little flaky sea salt over the top of your goldfish before placing them in the oven. Bake for 10-12 minutes or until they are golden brown. Keep an eye on them, as baking times can vary depending on your oven. You want them to be crunchy but not burnt.
Step 7: Cool and Enjoy
- Once they’re baked, remove them from the oven and let them cool on a wire rack. After they’ve cooled, they’re ready to devour!
Notes
- Keep It Cold: Make sure to keep your butter cold throughout the process. It’s crucial for that crispy texture.
- Experiment with Flavors: Feel free to substitute or add spices according to your preference—try adding a pinch of cayenne for spice or some Italian herbs for an herbaceous twist.
- Use Different Cheeses: While cheddar is a classic choice, mixing in Gruyère or Parmesan can add another layer of flavor.
- Shape Variations: If fish aren’t your thing, you can cut them into other shapes. Stars, hearts—get creative!
- Batch Cooking: Make a large batch and store in an airtight container. They stay fresh for weeks, making them the ultimate snack.