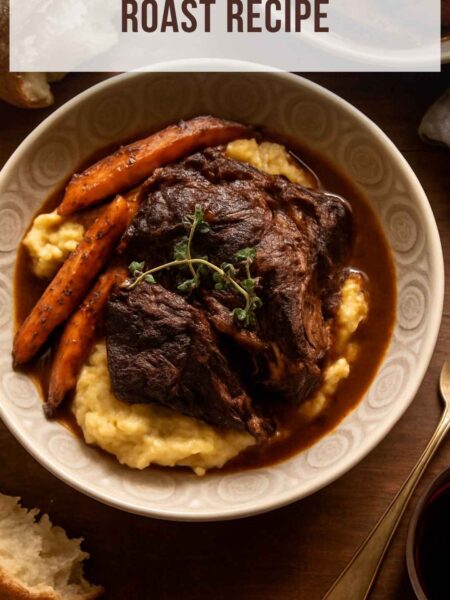
I’ve had my fair share of chili disasters. You know the ones: overly salty, too watery, or even bland despite well-meaning intentions. After many trials, I finally nailed a chunky beef chili recipe that brings joy to the table. It’s thick, savory, and packed with flavor. Friends rave about it. Families gather around the stove as it simmers. Honestly, it’s the epitome of comfort food.
Today, I want to share not just my recipe but the story behind it. My goal is simple: to turn you into a chili master. So, grab your apron, and let’s get started on something delicious!

What is Chunky Beef Chili?
Chunky beef chili is a satisfying dish featuring bite-sized pieces of beef swimming in a thick, well-seasoned broth. Unlike smoother variations, this version makes texture a priority. Every spoonful boasts hearty beans, robust spices, and a mix of bright vegetables. Think of it as a warm hug in a bowl.
What Makes This Recipe Different from Other Chunky Beef Chili Recipes?
While many may opt for ground meat or a thinner consistency, my version prioritizes tenderness and texture. Using a chuck roast instead of ground beef allows for that incredible, rich taste and tenderness that is unmatched. Plus, the combination of concentrated tomato purée and marinara sauce brings depth and richness that other recipes might lack.
The unique blend of spices, coupled with optional enhancements like brown sugar and corn, elevates the traditional chili experience to something truly memorable. Every bite carries a story, making it a dish worth sharing.
How Does It Taste?
Prepare yourself for a flavor explosion! Rich beef flavor combines with a slight sweetness from the brown sugar (if you choose to include it). The spices blend beautifully, creating a warm kick that excites your palate. Each spoonful offers a hearty texture, with tender meat complemented by the crunch of any toppings you decide to add. In short: pure bliss!
Ingredients You’ll Need to Make This Dish
Here’s a simple breakdown of the ingredients that will make your chili legendary:
- 1 (32-ounce) container rich beef stock
- 2 (6-ounce) cans concentrated tomato purée
- 2 (8-ounce) cans marinara sauce
- 4 lbs boneless chuck roast, diced into ½-inch cubes
- 1 teaspoon sea salt
- ½ teaspoon freshly cracked black pepper
- 2 teaspoons garlic powder
- 1 teaspoon ground cumin
- ½ teaspoon ground cayenne pepper
- 1 teaspoon smoked paprika
- 1 teaspoon dried oregano
- 1 teaspoon dehydrated onion flakes
- 2-4 tablespoons chili seasoning blend
- Optional Enhancements:
- 1 tablespoon brown sugar
- 1 cup corn kernels
Toppings
- Crushed tortilla chips
- Sour cream
- Shredded cheese (such as cheddar or Monterey Jack)
- Diced green onions

Step by Step Instructions
Step 1: Prepare the Meat
Start by dicing the boneless chuck roast into ½-inch cubes. This cut of meat is ideal because it becomes wonderfully tender during cooking. Season the beef cubes generously with salt and pepper, allowing them to sit for a few minutes while you gather other ingredients.
Step 2: Brown the Beef
In a large pot, heat some oil over medium-high heat. Once hot, add the beef cubes, browning them on all sides. This step adds a layer of flavor — don’t skip it! You’ll want to create a nice crust. Once browned, remove the beef and set aside.
Step 3: Sauté the Aromatics
In the same pot, add a bit more oil if needed. Next, throw in the dehydrated onion flakes. Sauté them for about a minute until they become fragrant, and toss in the garlic powder, cumin, and smoked paprika. Let the spices work their magic for another minute while stirring.
Step 4: Combine Ingredients
Now it’s time to go wild! Return the browned beef to the pot. Add the beef stock, tomato purée, marinara sauce, oregano, cayenne pepper, and chili seasoning blend. Stir everything together, ensuring those spices and flavors integrate well.
Step 5: Simmer
Bring the concoction to a boil. Then reduce the heat to low, cover, and allow the chili to simmer for at least an hour. A longer cooking time enhances the beef’s tenderness and deepens the flavors, so keep that in mind.
Step 6: Optional Enhancements
After simmering, taste your chili. It’s time to customize! If you like it sweeter, consider stirring in the brown sugar and corn. Adjust salt or heat levels to your preference. This is where the magic happens!
Step 7: Serve and Garnish
Once you’re satisfied, it’s serving time! Ladle your chunky beef chili into bowls. Offer a selection of toppings. Let your guests personalize their bowls with crushed tortilla chips, cheese, sour cream, and diced green onions.
Tips & Tricks on Making Chunky Beef Chili
- Select Quality Beef: Look for well-marbled chuck roast to ensure tenderness.
- Sear Properly: Don’t overcrowd the pot while browning. Do it in batches if necessary for that delightful crust.
- Simmer Longer: Allow it to cook low and slow. This deepens flavors and makes for juicy beef.
- Taste as You Go: Adjust spices and seasoning based on your preference. Everyone’s taste is a bit different.
- Let It Rest: If possible, let your chili sit overnight in the fridge. Many argue that chili often tastes even better the next day!
Nutrition Information
chunky beef chili recipe nutrition facts
How Do I Store This Dish?
Storing chili is simple. Let it cool to room temperature after cooking. Then, transfer it into an airtight container. It will keep in the refrigerator for about 3-4 days.
If you want to keep it longer, consider freezing it. Divide it into portions, placing it in freezer-safe bags or containers. It can last up to 3 months in the freezer. When you’re ready, just thaw overnight in the fridge and reheat on the stove or microwave.
What Other Substitutes Can You Use in Chunky Beef Chili?
- Use Ground Beef: If you prefer ground beef, it works too—just reduce the cooking time to avoid drying it out.
- Turkey or Chicken: Swap for leaner meats if you’re looking for a lighter option. Ground turkey or cubed chicken tastes great in chili.
- Vegetables: Add more veggies if you desire! Diced bell peppers, carrots, or even zucchini can blend well with the flavors.
- Lentils or Beans: To create a vegetarian-friendly dish, substitute the beef with lentils or your favorite beans for a meatless option. Black beans or kidney beans add texture and protein.
- Spicy Sausage: For a kick, consider using spicy sausage instead of beef. It’ll add a whole new layer of flavor and heat.

Conclusion
Now that you have my go-to chunky beef chili recipe, you’re set for chili fame! This dish is not just about satisfying hunger; it’s about bringing people together. With a few adjustments, you can make it your own. Don’t hesitate to experiment and share your version with friends and family.
So, fire up that stove, gather your ingredients, and prepare for a flavor-packed journey. Each bowl is more than just chili; it’s a memory waiting to happen. Happy cooking!
You’ll also like the following recipes!

Chunky Beef Chili Recipe – Hearty Food Ideas
Description
Before diving into the rich, savory goodness of chunky beef chili, it's worth considering the best accompaniments. This dish shines next to classic cornbread or crispy tortilla chips. Imagine dipping those chips into the hearty chili! Alternatively, a fresh, citrusy salad can cut through the richness and elevate your dining experience.
You might also enjoy a dollop of sour cream or a sprinkle of shredded cheese on top of each bowl. For drinks, a cold beer or a zesty lemonade complements the warmth of the chili. These pairings not only enhance the meal but also make for a feast that friends and family will remember.
Ingredients
Optional Enhancements:
Instructions
Step 1: Prepare the Meat
-
Start by dicing the boneless chuck roast into ½-inch cubes. This cut of meat is ideal because it becomes wonderfully tender during cooking. Season the beef cubes generously with salt and pepper, allowing them to sit for a few minutes while you gather other ingredients.
Step 2: Brown the Beef
-
In a large pot, heat some oil over medium-high heat. Once hot, add the beef cubes, browning them on all sides. This step adds a layer of flavor — don’t skip it! You'll want to create a nice crust. Once browned, remove the beef and set aside.
Step 3: Sauté the Aromatics
-
In the same pot, add a bit more oil if needed. Next, throw in the dehydrated onion flakes. Sauté them for about a minute until they become fragrant, and toss in the garlic powder, cumin, and smoked paprika. Let the spices work their magic for another minute while stirring.
Step 4: Combine Ingredients
-
Now it’s time to go wild! Return the browned beef to the pot. Add the beef stock, tomato purée, marinara sauce, oregano, cayenne pepper, and chili seasoning blend. Stir everything together, ensuring those spices and flavors integrate well.
Step 5: Simmer
-
Bring the concoction to a boil. Then reduce the heat to low, cover, and allow the chili to simmer for at least an hour. A longer cooking time enhances the beef’s tenderness and deepens the flavors, so keep that in mind.
Step 6: Optional Enhancements
-
After simmering, taste your chili. It’s time to customize! If you like it sweeter, consider stirring in the brown sugar and corn. Adjust salt or heat levels to your preference. This is where the magic happens!
Step 7: Serve and Garnish
-
Once you're satisfied, it’s serving time! Ladle your chunky beef chili into bowls. Offer a selection of toppings. Let your guests personalize their bowls with crushed tortilla chips, cheese, sour cream, and diced green onions.
Nutrition Facts
Servings 9
- Amount Per Serving
- Calories 338kcal
- % Daily Value *
- Total Fat 13.8g22%
- Saturated Fat 5.4g27%
- Trans Fat 0.5g
- Cholesterol 118mg40%
- Sodium 1026mg43%
- Total Carbohydrate 15g5%
- Dietary Fiber 3g12%
- Sugars 5g
- Protein 40g80%
* Percent Daily Values are based on a 2,000 calorie diet. Your daily value may be higher or lower depending on your calorie needs.
Note
- Select Quality Beef: Look for well-marbled chuck roast to ensure tenderness.
- Sear Properly: Don’t overcrowd the pot while browning. Do it in batches if necessary for that delightful crust.
- Simmer Longer: Allow it to cook low and slow. This deepens flavors and makes for juicy beef.
- Taste as You Go: Adjust spices and seasoning based on your preference. Everyone’s taste is a bit different.
- Let It Rest: If possible, let your chili sit overnight in the fridge. Many argue that chili often tastes even better the next day!


