As a food enthusiast with years of kitchen adventures, I can confidently say that there’s one side dish that has won the hearts (and stomachs) at every gathering I’ve hosted: Crispy Cheesy Potato Stacks.
Whether it’s a summer BBQ or a cozy winter dinner, these delicious stacks complement almost any main dish. Picture this: a perfectly grilled steak, seasoned to perfection, paired with these golden potato stacks, and a crisp salad on the side. Now, that’s a plate of happiness!
But what exactly are crispy cheesy potato stacks? Let’s dive into the details.

What Are Crispy Cheesy Potato Stacks?
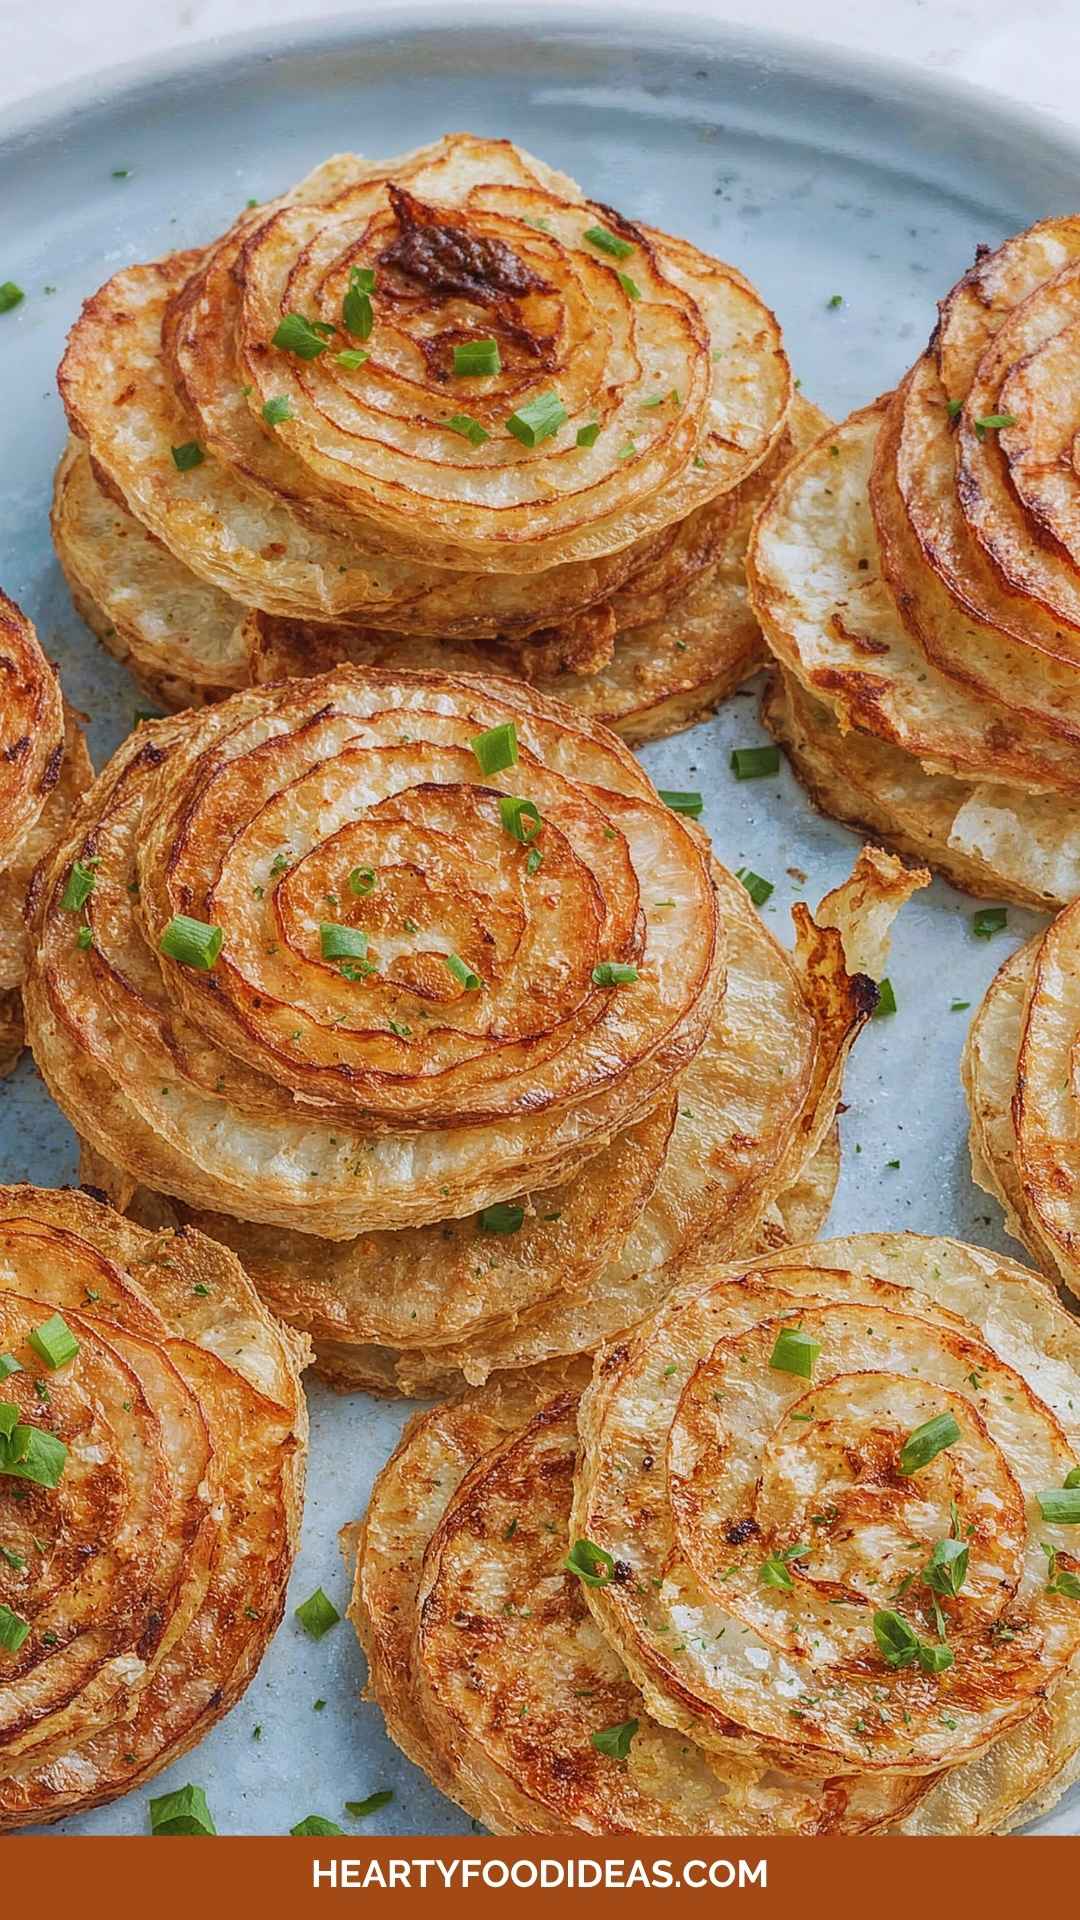
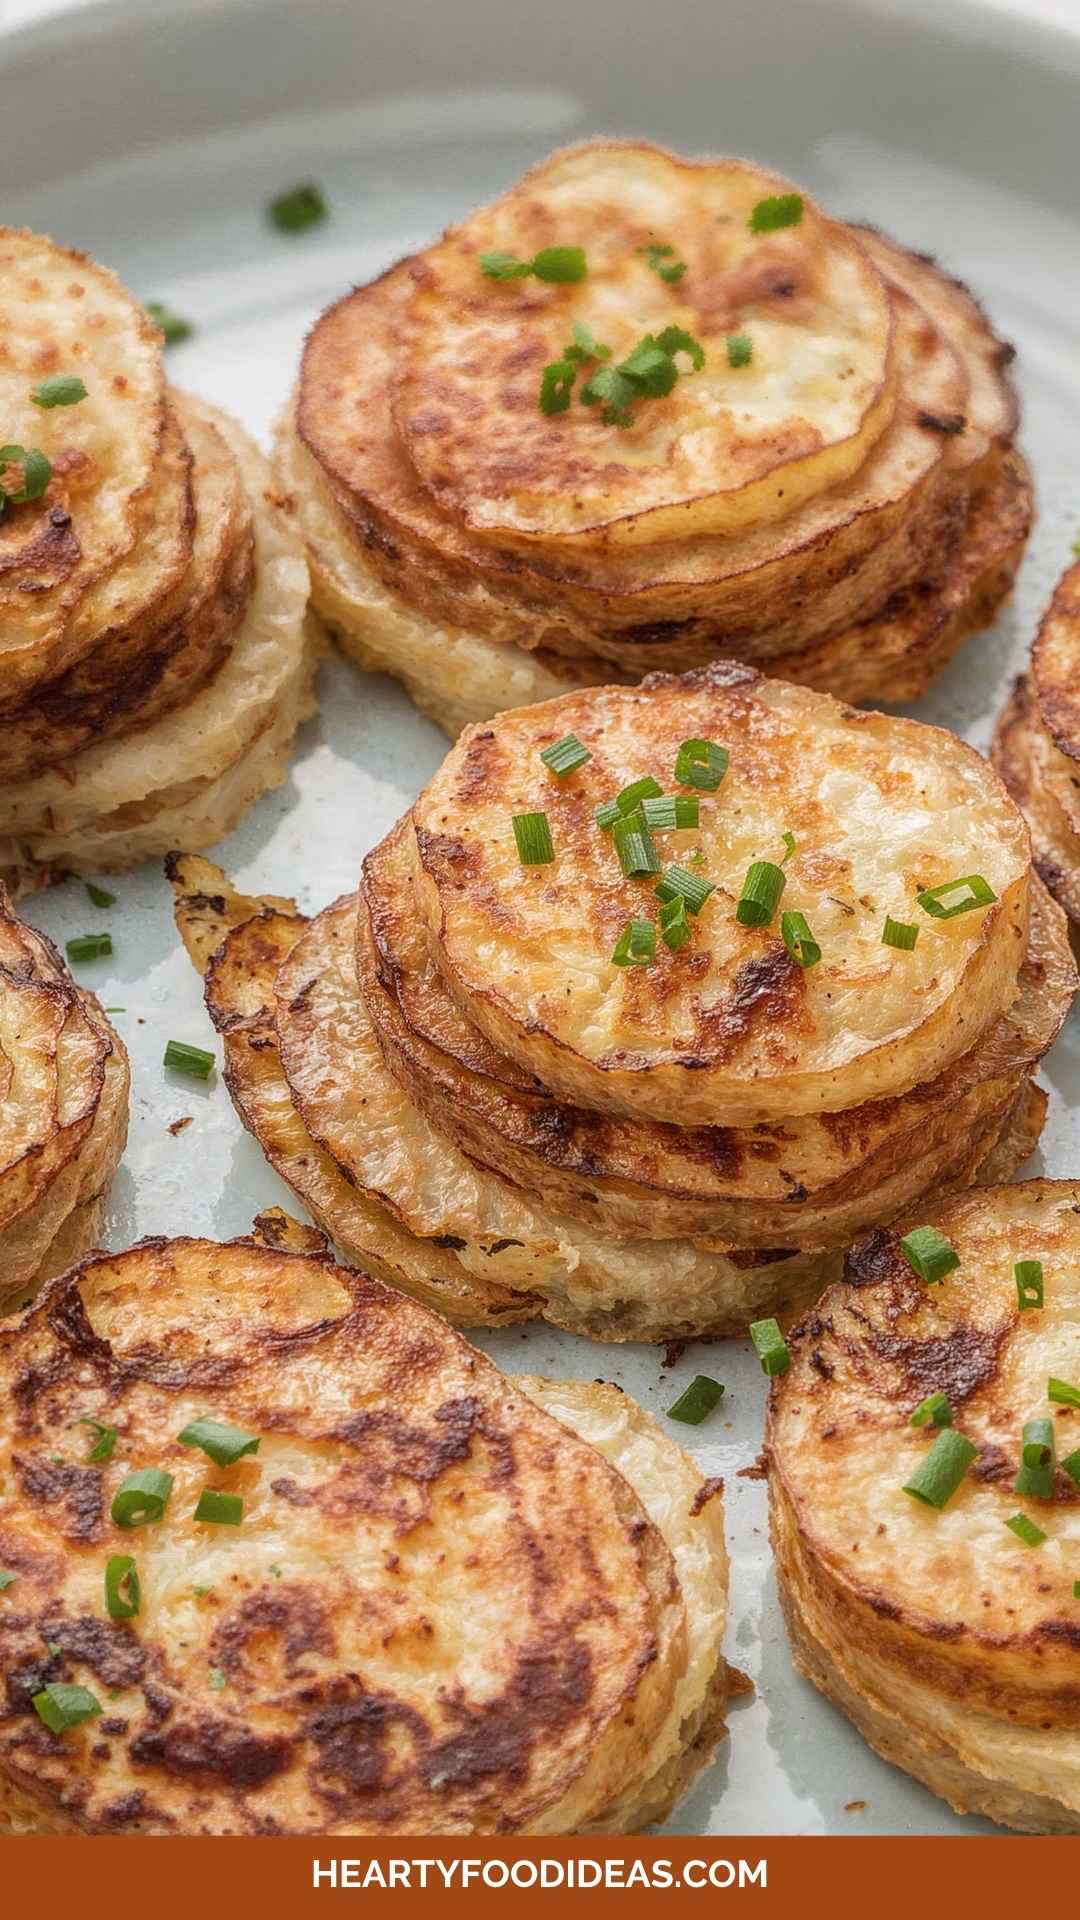
Crispy Cheesy Potato Stacks deliver exactly what they promise—crisp layers of thinly sliced potatoes, baked to perfection and infused with gooey cheese.
They are golden brown, flavorful, and provide that satisfying crunch with each bite. You get the creamy texture from the cheese while the potatoes deliver that rustic appeal. It’s a culinary match made in heaven.
This dish can easily transition between a casual lunch with friends or a fancy dinner party. Trust me; they are a showstopper!
The Ingredients
Creating these stacks is not only easy on the taste buds but also light on the pocket. Here’s what you’ll need to whip up these delightful treats:
1 ½ pounds russet or Yukon gold potatoes: Choose uniform-sized potatoes for even cooking.
2 cloves garlic: Fresh garlic adds a savory punch.
3 tablespoons olive oil: This helps with the crispiness and adds flavor.
2 ounces cheese: Gruyère, cheddar, Comté, or Parmesan—take your pick!
½ teaspoon fresh ground black pepper: A must for seasoning.
1 teaspoon kosher salt: Enhances all flavors.
2 tablespoons finely chopped fresh chives (optional): A pop of color and flavor.
¼ teaspoon cayenne pepper: For a gentle kick (optional).
Now that we have the essentials, let’s jump into how to make these stacks, shall we?
How to Make Crispy Cheesy Potato Stacks?
In short, making crispy cheesy potato stacks is about layering and baking. The potatoes are sliced, seasoned, stacked with cheese, and then baked to crispy perfection. How easy does that sound?
Step 1: Preheat the Oven
Start by preheating your oven to 400°F (200°C). This ensures that your potato stacks get that crispy exterior without any guesswork.
Step 2: Prepare the Baking Dish
Grease a muffin tin with olive oil to ensure that the stacks don’t stick. You want the crispy edges, and a well-greased tin does just that.
Step 3: Slice the Potatoes
Using a mandoline (or a good knife if you have steady hands), slice the potatoes into thin rounds—aim for about 1/8 inch thick. Uniform slices guarantee even cooking, so take your time here.
Step 4: Season the Potatoes
In a large bowl, mix your sliced potatoes with salt, pepper, garlic (minced), cayenne pepper, and olive oil. Coat everything evenly; you want each slice to have a lovely layer of flavor.
Step 5: Assemble the Stacks
Now comes the fun part! Layer the potato slices in the muffin tins. Start with one slice, sprinkle with cheese, and continue the layers until you reach the top. Aim for at least four to five layers in each tin. If you’re using chives, sprinkle them in the layers as well.
Step 6: Bake Them
Place the muffin tin in the preheated oven and bake for about 30-35 minutes. Keep an eye on them in the last few minutes. You want them to be golden brown and crispy.
Step 7: Let Them Cool
Once out of the oven, allow the stacks to cool for a few minutes. They’ll firm up as they cool, making them easier to remove.
Step 8: Serve and Enjoy!
Gently pop the stacks out of the muffin tin. Serve warm as a glorious side dish to your favorite meats or even a crisp salad.
Notes
Here are a few tips to ensure your crispy cheesy potato stacks turn out perfect:
Use starchy potatoes: Russets are my favorite for their fluffy texture, but Yukon golds also work well.
Rotate the tin halfway: This ensures even cooking and browning.
Experiment with cheese: Different cheeses can yield unique tastes. Try a mix if you’re feeling adventurous!
Don’t skip the resting time: Letting the stacks cool helps them hold their shape better.
Add seasonings: Feel free to experiment with other spices like smoked paprika or Italian herbs.
Storage Tips
If you have leftovers (which is unlikely, but let’s stay optimistic), store the cooled stacks in an airtight container in the fridge for up to three days. Reheat in the oven for the crispiest results.
Nutrition Information
For each serving (approximately three stacks), you can expect the following nutritional values (approximation):
Calories: 250
Protein: 6g
Carbohydrates: 36g
Fat: 10g
Fiber: 3g
Adjusting the cheese type or oil quantity can modify these values, making it versatile for different diets!
Serving Suggestions
Looking to add some flair to your crispy cheesy potato stacks? Here are five possibilities:
1. Dollop of Sour Cream: Add a creamy layer on top for extra decadence. The tang from sour cream complements the potatoes and cheese perfectly.
2. Fresh Herbs: Chopped parsley or basil sprinkled atop adds a fresh touch and brightens the flavors.
3. Salsa Verde: For a zing, drizzle some salsa verde over the top. It adds a vibrant color and taste.
4. Grilled Chicken or Fish: These stacks pair beautifully with your favorite proteins. The crunch contrasts deliciously with tender meats.
5. A Side Salad: Serve with a refreshing salad dressed in lemon vinaigrette. The lightness of the salad balances the richness of the stacks.
What Other Substitutes Can I Use in Crispy Cheesy Potato Stacks?
Sometimes you might find yourself short on some ingredients. No worries! Here are five substitutes:
Sweet Potatoes: Want a twist? Substitute sweet potatoes for a slightly sweeter flavor. Just adjust the baking time, as they cook a bit faster.
Cauliflower: For a low-carb version, use finely sliced cauliflower. It won’t be quite the same, but it’ll still be delicious.
Onion: Adding thinly sliced onions provides some sweetness. Layer them in between potato slices for extra flavor.
Different Cheeses: If you’ve got mozzarella or feta, feel free to use those in place of the main cheese. Just be mindful of moisture content.
Olive Oil Variations: Use garlic-infused oil or other flavored oils for additional taste dimensions.
Conclusion
Crispy cheesy potato stacks are a delightful addition to any meal. With their crunchy edges and cheesy goodness, they’re sure to impress your family and friends. Whether you serve them at a casual gathering or a festive dinner, these stacks provide comfort and deliciousness.
The best part? They are simple to prepare and offer room for creativity. So the next time you’re looking for a side dish, remember how easy it is to turn ordinary ingredients into something extraordinary. Happy cooking!
You’ll also like the following recipes!
- Cider Punch
- Tomato Peach And Burrata Salad Recipe
- One Skillet Creamy Sun Dried Tomato Chicken And Orzo Recipe

Crispy Cheesy Potato Stacks – Hearty Food Ideas
Description
As a food enthusiast with years of kitchen adventures, I can confidently say that there’s one side dish that has won the hearts (and stomachs) at every gathering I’ve hosted: Crispy Cheesy Potato Stacks.
Ingredients
Instructions
Step 1: Preheat the Oven
-
Start by preheating your oven to 400°F (200°C). This ensures that your potato stacks get that crispy exterior without any guesswork.
Step 2: Prepare the Baking Dish
-
Grease a muffin tin with olive oil to ensure that the stacks don’t stick. You want the crispy edges, and a well-greased tin does just that.
Step 3: Slice the Potatoes
-
Using a mandoline (or a good knife if you have steady hands), slice the potatoes into thin rounds—aim for about 1/8 inch thick. Uniform slices guarantee even cooking, so take your time here.
Step 4: Season the Potatoes
-
In a large bowl, mix your sliced potatoes with salt, pepper, garlic (minced), cayenne pepper, and olive oil. Coat everything evenly; you want each slice to have a lovely layer of flavor.
Step 5: Assemble the Stacks
-
Now comes the fun part! Layer the potato slices in the muffin tins. Start with one slice, sprinkle with cheese, and continue the layers until you reach the top. Aim for at least four to five layers in each tin. If you're using chives, sprinkle them in the layers as well.
Step 6: Bake Them
-
Place the muffin tin in the preheated oven and bake for about 30-35 minutes. Keep an eye on them in the last few minutes. You want them to be golden brown and crispy.
Step 7: Let Them Cool
-
Once out of the oven, allow the stacks to cool for a few minutes. They’ll firm up as they cool, making them easier to remove.
Step 8: Serve and Enjoy!
-
Gently pop the stacks out of the muffin tin. Serve warm as a glorious side dish to your favorite meats or even a crisp salad.
Nutrition Facts
Servings 6
- Amount Per Serving
- Calories 250kcal
- % Daily Value *
- Total Fat 10g16%
- Total Carbohydrate 36g12%
- Dietary Fiber 3g12%
- Protein 6g12%
* Percent Daily Values are based on a 2,000 calorie diet. Your daily value may be higher or lower depending on your calorie needs.
Note
- Use starchy potatoes: Russets are my favorite for their fluffy texture, but Yukon golds also work well.
- Rotate the tin halfway: This ensures even cooking and browning.
- Experiment with cheese: Different cheeses can yield unique tastes. Try a mix if you’re feeling adventurous!
- Don’t skip the resting time: Letting the stacks cool helps them hold their shape better.
- Add seasonings: Feel free to experiment with other spices like smoked paprika or Italian herbs.


