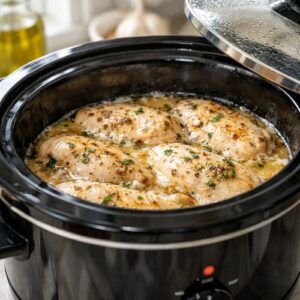
Chicken Breast In A Crockpot Recipe
You've probably tried the oven method, the stovetop version, and maybe even a slow cooker attempt that left you with rubbery chicken. Here's why this approach is different. I learned in my mother's kitchen that the best meals aren't about complicated techniques—they're about understanding how time and temperature work together. That's exactly what makes this crockpot method so special. When you pair low, gentle heat with the right seasonings and broth, something magical happens. Your chicken becomes tender enough to shred with a fork, stays moist throughout, and fills your home with an aroma that says "someone who loves me is cooking dinner." This is the recipe I've perfected over years of working with families who need nutritious meals that don't demand hours of hands-on time.
Servings 4
Calories 198kcal
Ingredients
- 1 cup diced vegetables like carrots or celery optional but adds fiber and nutrients while absorbing flavor
- ¼ teaspoon garlic powder garlic powder prevents the harshness that fresh garlic can develop during long cooking
- ½ cup low-sodium chicken broth check your label to ensure it's truly low-sodium, not regular broth which can add 800+ mg sodium per serving
- 4 boneless, skinless chicken breasts about 6-8 ounces each, they cook most evenly at this size
- ½ teaspoon onion powder skip the fresh onion here; powdered distributes the flavor more evenly during the long cooking time
- 1 teaspoon kosher salt kosher salt has larger crystals than table salt, so measure by weight if you're very sodium-conscious
- ½ teaspoon ground paprika Hungarian paprika has more depth than Spanish paprika, though either works
- ½ teaspoon dried thyme (fresh thyme can substitute
- ¼ teaspoon ground black pepper freshly ground tastes noticeably better than pre-ground
- 2 tablespoon olive oil extra virgin gives better flavor than light olive oil
Instructions
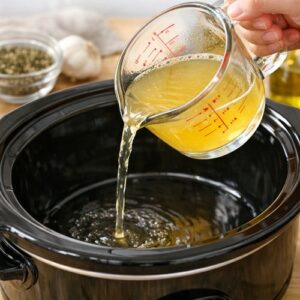
Step 1: Add Your Broth to the Crockpot Base
- Start by pouring your ½ cup of low-sodium chicken broth directly into the empty crockpot. This step is critically different from recipes that skip the broth entirely. That broth does three things: it creates steam that keeps your chicken moist, it prevents sticking on the bottom of the pot, and it captures all those delicious seasonings so they become a light pan sauce. Don't skip this. Don't assume it's optional because you're adding oil.
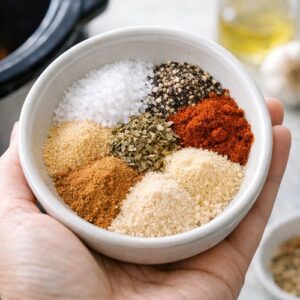
Step 2: Create Your Seasoning Blend in a Small Bowl
- While your crockpot is sitting there, grab a small mixing bowl—nothing fancy, just something you can hold in one hand. This is where the real work happens. Combine your 1 teaspoon kosher salt, ½ teaspoon dried thyme, ½ teaspoon onion powder, ½ teaspoon paprika, ¼ teaspoon black pepper, and ¼ teaspoon garlic powder. Mix it thoroughly with a small spoon or your fingers so there are no clumps of any single spice. This matters more than you'd think. When you mix them in the bowl first, you ensure even distribution. If you sprinkle them individually on the chicken, you'll end up with one bite that's all thyme and another that's just bland.
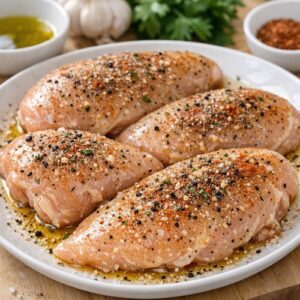
Step 3: Coat Your Chicken with Oil and Seasonings
- Pat your chicken breasts dry with a paper towel—this is important for even seasoning distribution. Wet surfaces don't hold the seasoning blend as well. Now take your 2 tablespoons of olive oil and drizzle it over all four breasts. Using your clean hands, rub that oil all over each breast, getting the top, bottom, and sides. This is not optional and it's not just about flavor. The oil helps the seasonings stick, yes, but it also contributes to keeping the surface from drying out during those hours in the crockpot. Once they're glistening with oil, sprinkle your seasoning blend evenly over all four breasts. Rub it in gently so it adheres to the oil. You want every surface seasoned, not just the top.
Step 4: Arrange Chicken in the Crockpot
- Carefully place all four seasoned breasts into your broth-filled crockpot. They can overlap slightly, but ideally, try to arrange them in a single layer if your pot is large enough. They don't need to be submerged completely in the broth—the steam will do the cooking work. Do not stack them flat on top of each other as that creates uneven cooking with the bottom breast overcooked and the top undercooked.
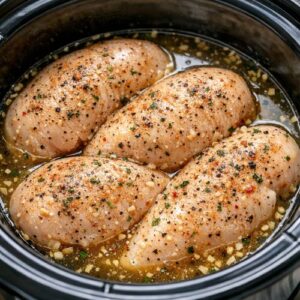
Step 5: Cook on Your Preferred Setting
- Here's where slow cooking shows its advantage. You have options. If you're cooking in the morning before work, set your crockpot on low for 4-6 hours. If you need dinner faster, use high for 3-4 hours. Both produce excellent results. Low setting is gentler and preserves more nutrients, while high is faster if you're working with a shorter timeline. The chicken is done when the thickest part reaches 165°F internally on an instant-read thermometer. Most crockpots will be ready around 3.5 hours on high or 5.5 hours on low with standard breast sizes. Do not lift the lid to peek constantly. I know the temptation is real, but each time you lift the lid, you release steam and add 15-20 minutes to your cooking time. Trust the process. Set a timer and walk away.