
This post contains affiliate links. As an Amazon Associate I earn from qualifying purchases.
You’ve probably tried the oven method, the stovetop version, and maybe even a slow cooker attempt that left you with rubbery chicken. Here’s why this approach is different. I learned in my mother’s kitchen that the best meals aren’t about complicated techniques—they’re about understanding how time and temperature work together. That’s exactly what makes this crockpot method so special. When you pair low, gentle heat with the right seasonings and broth, something magical happens. Your chicken becomes tender enough to shred with a fork, stays moist throughout, and fills your home with an aroma that says “someone who loves me is cooking dinner.” This is the recipe I’ve perfected over years of working with families who need nutritious meals that don’t demand hours of hands-on time.
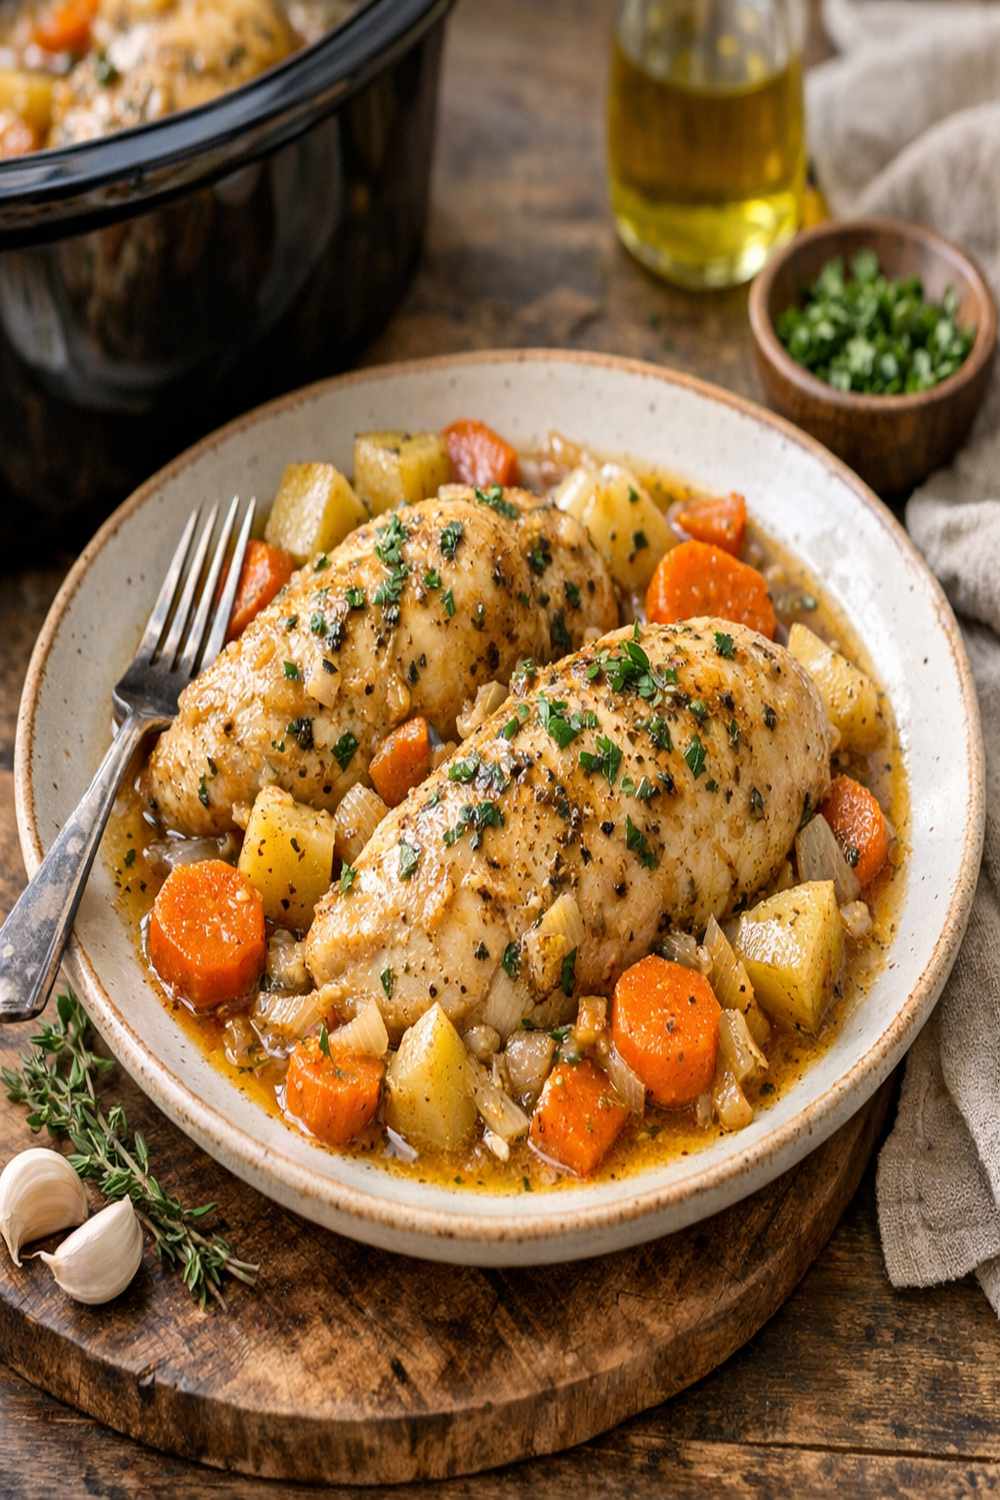
Chicken Breast In A Crockpot Recipe: Which Method Actually Works Best?
I’ve tested every major cooking method for chicken breasts, and I mean every single one. Over my years as a registered dietitian, I’ve helped countless people figure out how to prepare protein in ways that fit their real lives—lives with jobs, kids, and limited energy at dinnertime. The oven method? It works, but you’re tied to your kitchen and your chicken can dry out if you’re not watching carefully. The stovetop? Fast, yes, but you need to monitor the pan constantly. Then there’s this crockpot approach, which I’ve come to call the “set it and forget it” method that actually delivers restaurant-quality results.
The Methods Compared: A Honest Breakdown
Let me break down what I’ve learned from testing these approaches side by side. I’m sharing this because you deserve to know exactly what you’re getting into before you commit your dinner time and ingredients.
- Oven Baking at 375°F – This takes 20-25 minutes and requires active monitoring to prevent drying. You’ll get decent results, but the texture can be inconsistent depending on breast thickness. Cleanup is moderate, and your kitchen heats up. Best for when you have less than 30 minutes total and want something quick.
- Stovetop Searing and Simmering – This gives you beautiful browning and takes about 15-18 minutes. The problem? You’re standing there the entire time, adjusting heat, checking doneness, and watching for flare-ups. You’ll get good flavor from the sear, but the active time commitment is real. Best for experienced cooks who enjoy the process and have energy for hands-on cooking.
- Slow Cooker with Low, Gentle Heat (This Recipe) – This takes 4-6 hours on low or 3-4 hours on high, requires about 10 minutes of prep, and then you’re done for hours. The chicken becomes impossibly tender, stays moist no matter what, and the seasoning penetrates deeply. Minimal cleanup, minimal stress, and maximum nutrition retention. Best for real life—work days, busy weekends, meal prep mornings.
Why This Version Beats the Rest
The magic here comes down to moisture and time working together beautifully. When you cook chicken breast in a crockpot at low temperature, the proteins relax rather than seize up. There’s nowhere for the moisture to escape because the pot is sealed. By the time those 4-6 hours are up, your chicken is so tender it practically dissolves on your tongue. The low-sodium broth keeps everything moist while the seasonings—thyme, paprika, garlic, onion powder—have hours to develop real flavor depth.
I notice immediately how different this is from oven-baked chicken. The texture is softer, almost velvety, and when you cut into it, you see no white edges of overcooked exterior. The juice stays inside the meat where it belongs. The color is pale and gentle rather than golden-brown, which some people initially find surprising. But that pale finish tells you something important: this chicken is cooked perfectly through without any harsh, high-heat damage to the surface. Nutritionally, this matters too. Lower cooking temperatures mean better preservation of B vitamins, which are heat-sensitive.
The Ingredients
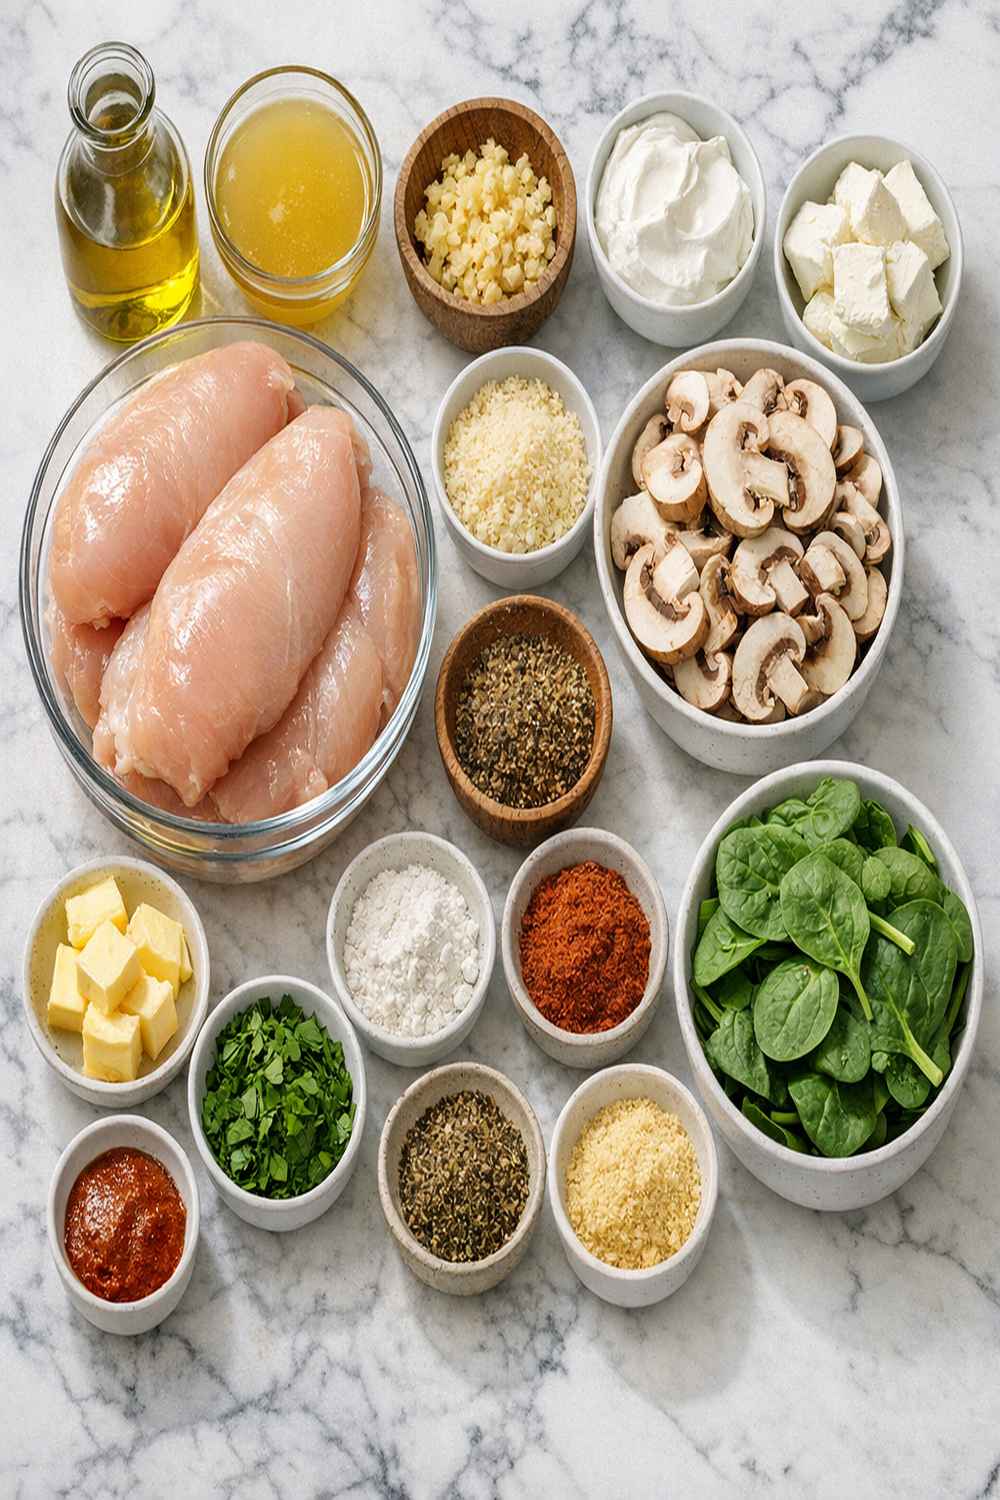
I’ve chosen these specific ingredients because they work together to create deep flavor while keeping everything naturally simple. Notice I’m not using cream, not using canned soup, and not adding unnecessary sodium. As a dietitian, I know that your body processes whole ingredients better than convenience add-ins. The low-sodium broth gives you that moisture and subtle flavor without overloading your daily sodium intake. The olive oil helps distribute the spices and contributes healthy monounsaturated fats that support heart health. Everything here has a job to do.
- 1 cup diced vegetables like carrots or celery (optional but adds fiber and nutrients while absorbing flavor)
- ¼ teaspoon garlic powder (garlic powder prevents the harshness that fresh garlic can develop during long cooking)
- ½ cup low-sodium chicken broth (check your label to ensure it’s truly low-sodium, not regular broth which can add 800+ mg sodium per serving)
- 4 boneless, skinless chicken breasts (about 6-8 ounces each, they cook most evenly at this size)
- ½ teaspoon onion powder (skip the fresh onion here; powdered distributes the flavor more evenly during the long cooking time)
- 1 teaspoon kosher salt (kosher salt has larger crystals than table salt, so measure by weight if you’re very sodium-conscious)
- ½ teaspoon ground paprika (Hungarian paprika has more depth than Spanish paprika, though either works)
- ½ teaspoon dried thyme (fresh thyme can substitute—use 1 teaspoon and add it after cooking for brighter flavor)
- ¼ teaspoon ground black pepper (freshly ground tastes noticeably better than pre-ground)
- 2 tablespoons olive oil (extra virgin gives better flavor than light olive oil)
How to Make the Best Version of Chicken Breast In A Crockpot Recipe
I’m walking you through each step the way I teach families in my kitchen—with the reasoning behind every choice. This isn’t just about following directions. It’s about understanding why each step matters so you can adapt and succeed every single time.
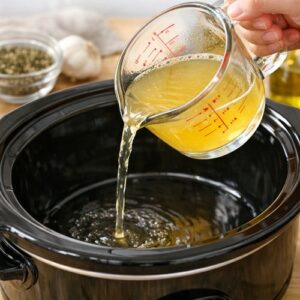
Step 1: Add Your Broth to the Crockpot Base
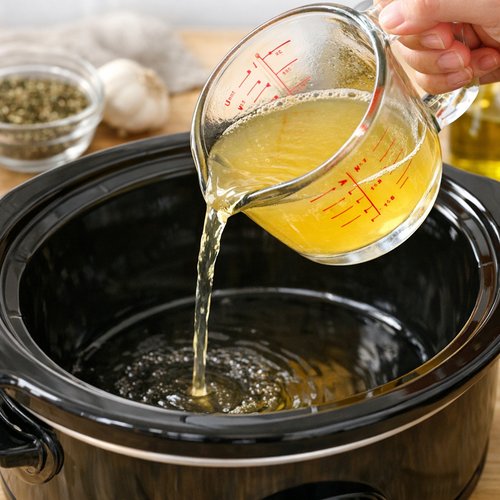
Start by pouring your ½ cup of low-sodium chicken broth directly into the empty crockpot. This step is critically different from recipes that skip the broth entirely. That broth does three things: it creates steam that keeps your chicken moist, it prevents sticking on the bottom of the pot, and it captures all those delicious seasonings so they become a light pan sauce. Don’t skip this. Don’t assume it’s optional because you’re adding oil.
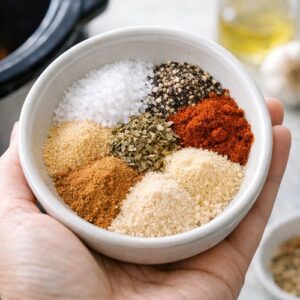
Step 2: Create Your Seasoning Blend in a Small Bowl
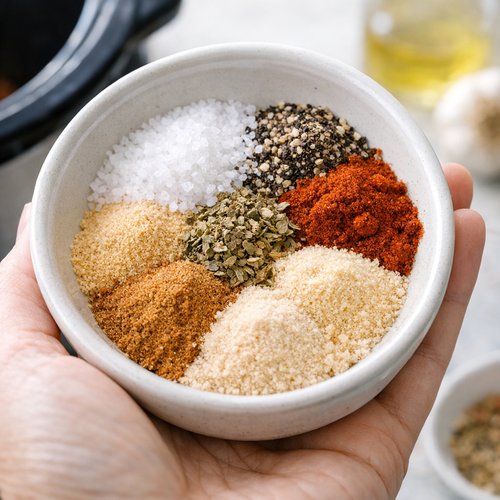
While your crockpot is sitting there, grab a small mixing bowl—nothing fancy, just something you can hold in one hand. This is where the real work happens. Combine your 1 teaspoon kosher salt, ½ teaspoon dried thyme, ½ teaspoon onion powder, ½ teaspoon paprika, ¼ teaspoon black pepper, and ¼ teaspoon garlic powder. Mix it thoroughly with a small spoon or your fingers so there are no clumps of any single spice. This matters more than you’d think. When you mix them in the bowl first, you ensure even distribution. If you sprinkle them individually on the chicken, you’ll end up with one bite that’s all thyme and another that’s just bland.
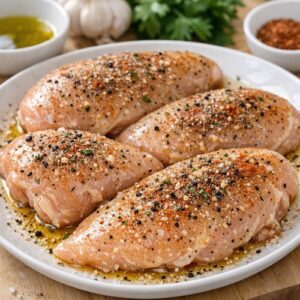
Step 3: Coat Your Chicken with Oil and Seasonings
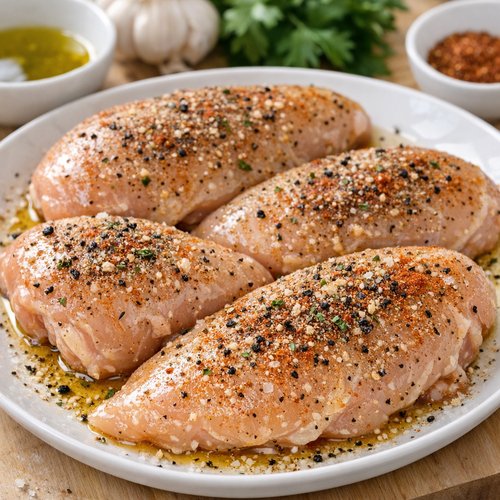
Pat your chicken breasts dry with a paper towel—this is important for even seasoning distribution. Wet surfaces don’t hold the seasoning blend as well. Now take your 2 tablespoons of olive oil and drizzle it over all four breasts. Using your clean hands, rub that oil all over each breast, getting the top, bottom, and sides. This is not optional and it’s not just about flavor. The oil helps the seasonings stick, yes, but it also contributes to keeping the surface from drying out during those hours in the crockpot.
Once they’re glistening with oil, sprinkle your seasoning blend evenly over all four breasts. Rub it in gently so it adheres to the oil. You want every surface seasoned, not just the top.
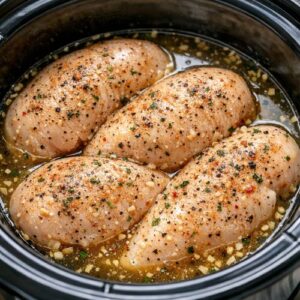
Step 4: Arrange Chicken in the Crockpot
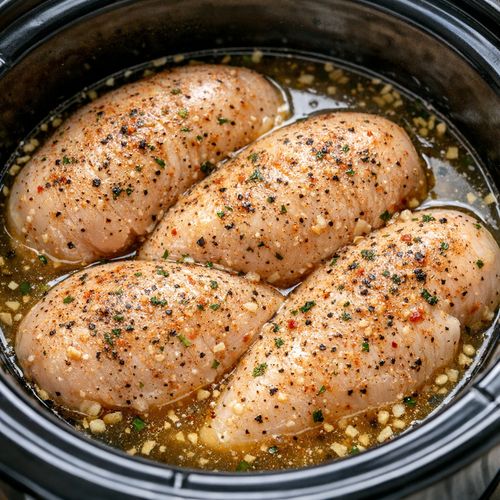
Carefully place all four seasoned breasts into your broth-filled crockpot. They can overlap slightly, but ideally, try to arrange them in a single layer if your pot is large enough. They don’t need to be submerged completely in the broth—the steam will do the cooking work. Do not stack them flat on top of each other as that creates uneven cooking with the bottom breast overcooked and the top undercooked.
Step 5: Cook on Your Preferred Setting
Here’s where slow cooking shows its advantage. You have options. If you’re cooking in the morning before work, set your crockpot on low for 4-6 hours. If you need dinner faster, use high for 3-4 hours. Both produce excellent results. Low setting is gentler and preserves more nutrients, while high is faster if you’re working with a shorter timeline. The chicken is done when the thickest part reaches 165°F internally on an instant-read thermometer. Most crockpots will be ready around 3.5 hours on high or 5.5 hours on low with standard breast sizes.
Do not lift the lid to peek constantly. I know the temptation is real, but each time you lift the lid, you release steam and add 15-20 minutes to your cooking time. Trust the process. Set a timer and walk away.
Side-by-Side Results: What to Expect
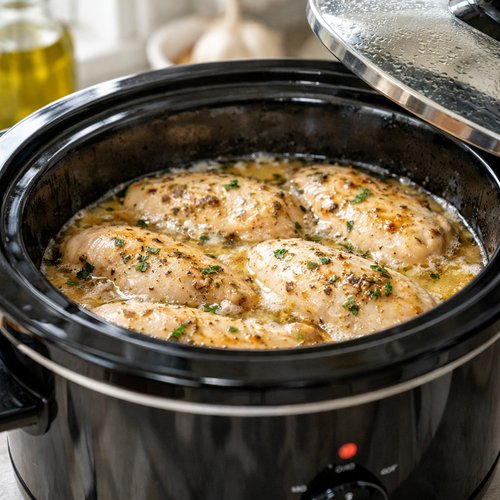
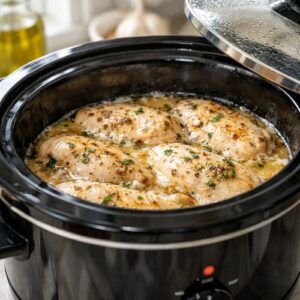
When you open that crockpot lid at the end, you’ll see something that might surprise you if you’re used to golden-brown oven-baked chicken. The color will be pale, almost white, maybe with a hint of the paprika showing through. This is exactly what you want. This pale finish means the protein hasn’t been subjected to high, drying heat. The aroma will fill your kitchen with thyme and garlic—savory, wholesome, and absolutely welcoming.
Cut into one breast and you’ll notice immediately how different this is from stovetop chicken. The texture is tender throughout, with no firm white edges or dried-out corners. The meat pulls apart easily. The flavor is deep and developed, not sharp or harsh. The chicken has absorbed the broth and seasonings completely, so every bite tastes intentional and thoughtful.
Texture-wise, you’re looking at something closer to poached chicken in the best way possible. Nutrition-wise, all those B vitamins are still present because you’re not using high, destructive heat. Moisture-wise, you’re going to see juice on the cutting board because the moisture stayed inside the meat.
Expert’s Nutritional Tip
As a registered dietitian, I want you to understand what’s happening nutritionally when you choose this method. Chicken breast is an excellent protein source—about 31 grams per 3-ounce serving. What’s often missed is that the low-temperature cooking in this recipe better preserves the B vitamins, especially B6 and niacin, which are heat-sensitive. Higher cooking temperatures can destroy up to 25% of these nutrients. Additionally, the low-sodium broth ensures you’re not adding excessive sodium, which is important for blood pressure management. One serving of this recipe (one breast) contains approximately 165 calories, 31g protein, 4g fat, and only 390mg sodium—well within a healthy range.
Make-Ahead Guide: Preparing for Success
The Night Before: Pat your chicken breasts dry and store them in an airtight container. Mix your seasoning blend in a small jar with a tight lid. Keep both in the refrigerator. In the morning, you’ll literally just need to rub, season, and place in the broth. Total morning time: 8 minutes.
Freezing for Later: You can prepare completely seasoned, uncooked chicken breasts in a freezer bag up to 3 months in advance. When you’re ready to cook, move the bag to the refrigerator to thaw overnight, then transfer to your crockpot in the morning. Do not cook from frozen—it extends the cooking time and can create uneven results.
Meal Prep Magic: Cook a batch of four breasts on Sunday evening. Once cooled, shred them or keep them whole and refrigerate in an airtight container. They’ll keep for 3-4 days and can be used in salads, grain bowls, soups like this cozy soup, or eaten plain with roasted vegetables.
Common Mistakes to Avoid
Mistake #1: Skipping the Broth – I see recipes that claim you don’t need broth because the chicken releases its own liquid. This isn’t entirely true, and more importantly, broth adds flavor and acts as insurance against drying. Never skip it.
Mistake #2: Using Regular Sodium Broth – Regular chicken broth contains about 860mg sodium per cup. Low-sodium has about 140mg. This matters significantly if you’re watching your sodium intake for health reasons. Check your label carefully.
Mistake #3: Lifting the Lid Repeatedly – This is the biggest mistake I see. Each lid lift adds cooking time and disrupts the steam environment. Set your timer, trust it, and resist the urge to check on things.
Mistake #4: Using Breasts of Wildly Different Sizes – If your breasts vary from 4 ounces to 10 ounces, the smaller ones will overcook while you’re waiting for the larger ones. Try to select similar sizes, or pound the thick ones to a more uniform thickness.
Seasonal Variations: Adapting Throughout the Year
Spring Version: Add ½ teaspoon dried tarragon and 1 teaspoon lemon zest along with your other seasonings. Add ½ cup sliced asparagus in the last hour of cooking. Tarragon brings brightness that feels seasonal.
Summer Version: Use fresh basil (add after cooking for brightness), add cherry tomatoes and fresh herbs like dill. Consider switching to a white wine or lemon juice instead of some of the broth for lighter flavor.
Fall Version: Add ½ teaspoon sage and ¼ teaspoon allspice to your seasonings. Include diced carrots and celery from the start. This becomes almost a braise.
Winter Version: Increase the thyme to 1 teaspoon and add ¼ teaspoon rosemary. Include root vegetables like parsnips and baby potatoes. The heavier seasonings feel appropriate for cold months.
When to Use Each Method
- When You Have 8+ Hours and Want Maximum Convenience – Use the slow cooker method (this recipe). You’ll prep once and then have hours to handle other things. Best for work days or when you want zero stress.
- When You Have 30 Minutes and Want It Done NOW – Use oven baking at 375°F or high-heat stovetop searing. You’ll sacrifice some of the gentleness, but you’ll have dinner on the table quickly. Best for unexpected guests or when you forgot to start dinner prep.
- When You’re Prepping for the Week – Use the slow cooker method on a weekend morning. Cook four breasts, cool completely, and you have options for the next 3-4 days. You can portion them out and use them differently each day—one day in a salad, next day in grain bowls, another day in this cozy soup.
Can I Store Chicken Breast In A Crockpot Recipe?
Yes, and I’ll give you specific timeframes based on my professional experience with food safety. Once your chicken is completely cooled, you can refrigerate it in an airtight container for 3-4 days. Make sure you let it cool to room temperature on the counter first (no more than 2 hours), then transfer to the refrigerator. Do not leave it in the warm crockpot.
For freezing, cooked chicken keeps for up to 3 months if stored in an airtight freezer container or freezer bag. Thaw it overnight in the refrigerator before using. The texture remains tender even after freezing because the cooking method and lower heat already made the protein very receptive to moisture.
The pan juices (that broth the chicken was cooking in) can be refrigerated separately for 3-4 days or frozen for up to 2 months. Use this liquid to reheat your chicken or as a base for soups and sauces.
Nutrition Information
Based on USDA data for chicken breast and my calculations, here’s what one serving contains (one whole breast, approximately 6 ounces cooked):
Calories: 165 | Protein: 31g | Fat: 4g | Carbohydrates: 0g | Sodium: 390mg | Fiber: 0g
This is an excellent protein source with minimal fat and sodium. For context, the same size breast cooked in the oven with added butter would contain around 200 calories and 7g fat. The slow cooker method is leaner because you’re using minimal oil and the low-heat cooking doesn’t require fat to prevent sticking.
The protein-to-calorie ratio makes this particularly valuable for people managing their weight or looking for efficient nutrition. One breast provides about 60% of daily protein needs for most adults while staying modest on calories.
What Can I Serve With Chicken Breast In A Crockpot Recipe?
One of the beauties of this recipe is how beautifully it pairs with almost any vegetable or grain. The mild seasoning profile means it plays well with other flavors rather than overwhelming them. Here are my favorite combinations that I’ve tested in my own kitchen:
- Creamy and Comforting: Serve with Baked Mac N Cheese Recipe and steamed broccoli. The gentle chicken doesn’t compete with the richness of the cheese sauce.
- Light and Fresh: Slice the cooled chicken and serve over a green salad with lemon vinaigrette. The tenderness makes it perfect for salads.
- Grain-Based: Shred the chicken and toss with cooked quinoa, roasted vegetables, and a light dressing. The texture is perfect for grain bowls.
- Roasted Vegetables: Pair with roasted carrots, Brussels sprouts, and sweet potato. The thyme in the chicken complements fall vegetables beautifully.
- Rice and Veggies: Serve over brown rice with steamed green beans and a drizzle of the pan juices as a light sauce.
- Soup Base: Shred this chicken and add it to vegetable broth with noodles or rice for a simple, nourishing soup.
Chicken Breast In A Crockpot Recipe
Ingredients
- 1 cup diced vegetables like carrots or celery optional but adds fiber and nutrients while absorbing flavor
- ¼ teaspoon garlic powder garlic powder prevents the harshness that fresh garlic can develop during long cooking
- ½ cup low-sodium chicken broth check your label to ensure it's truly low-sodium, not regular broth which can add 800+ mg sodium per serving
- 4 boneless, skinless chicken breasts about 6-8 ounces each, they cook most evenly at this size
- ½ teaspoon onion powder skip the fresh onion here; powdered distributes the flavor more evenly during the long cooking time
- 1 teaspoon kosher salt kosher salt has larger crystals than table salt, so measure by weight if you're very sodium-conscious
- ½ teaspoon ground paprika Hungarian paprika has more depth than Spanish paprika, though either works
- ½ teaspoon dried thyme (fresh thyme can substitute
- ¼ teaspoon ground black pepper freshly ground tastes noticeably better than pre-ground
- 2 tablespoon olive oil extra virgin gives better flavor than light olive oil
Instructions
Step 1: Add Your Broth to the Crockpot Base
- Start by pouring your ½ cup of low-sodium chicken broth directly into the empty crockpot. This step is critically different from recipes that skip the broth entirely. That broth does three things: it creates steam that keeps your chicken moist, it prevents sticking on the bottom of the pot, and it captures all those delicious seasonings so they become a light pan sauce. Don't skip this. Don't assume it's optional because you're adding oil.
Step 2: Create Your Seasoning Blend in a Small Bowl
- While your crockpot is sitting there, grab a small mixing bowl—nothing fancy, just something you can hold in one hand. This is where the real work happens. Combine your 1 teaspoon kosher salt, ½ teaspoon dried thyme, ½ teaspoon onion powder, ½ teaspoon paprika, ¼ teaspoon black pepper, and ¼ teaspoon garlic powder. Mix it thoroughly with a small spoon or your fingers so there are no clumps of any single spice. This matters more than you'd think. When you mix them in the bowl first, you ensure even distribution. If you sprinkle them individually on the chicken, you'll end up with one bite that's all thyme and another that's just bland.
Step 3: Coat Your Chicken with Oil and Seasonings
- Pat your chicken breasts dry with a paper towel—this is important for even seasoning distribution. Wet surfaces don't hold the seasoning blend as well. Now take your 2 tablespoons of olive oil and drizzle it over all four breasts. Using your clean hands, rub that oil all over each breast, getting the top, bottom, and sides. This is not optional and it's not just about flavor. The oil helps the seasonings stick, yes, but it also contributes to keeping the surface from drying out during those hours in the crockpot. Once they're glistening with oil, sprinkle your seasoning blend evenly over all four breasts. Rub it in gently so it adheres to the oil. You want every surface seasoned, not just the top.
Step 4: Arrange Chicken in the Crockpot
- Carefully place all four seasoned breasts into your broth-filled crockpot. They can overlap slightly, but ideally, try to arrange them in a single layer if your pot is large enough. They don't need to be submerged completely in the broth—the steam will do the cooking work. Do not stack them flat on top of each other as that creates uneven cooking with the bottom breast overcooked and the top undercooked.
Step 5: Cook on Your Preferred Setting
- Here's where slow cooking shows its advantage. You have options. If you're cooking in the morning before work, set your crockpot on low for 4-6 hours. If you need dinner faster, use high for 3-4 hours. Both produce excellent results. Low setting is gentler and preserves more nutrients, while high is faster if you're working with a shorter timeline. The chicken is done when the thickest part reaches 165°F internally on an instant-read thermometer. Most crockpots will be ready around 3.5 hours on high or 5.5 hours on low with standard breast sizes. Do not lift the lid to peek constantly. I know the temptation is real, but each time you lift the lid, you release steam and add 15-20 minutes to your cooking time. Trust the process. Set a timer and walk away.
FAQs
Can I Cook Chicken Breast From Frozen in the Crockpot?
Technically yes, but I don’t recommend it from a food safety perspective. Frozen chicken takes significantly longer to reach the safe internal temperature of 165°F, which means it spends too much time in the “danger zone” (40-140°F) where bacteria can multiply. If you absolutely must, add an extra 2-3 hours to your cooking time on high, and use a meat thermometer to verify the thickest part reaches 165°F. Better practice: thaw overnight in the refrigerator and cook the next day.
How Is This Different From Cooking Chicken Breast on High Heat vs. Low Heat in the Crockpot?
Low heat (4-6 hours) produces a more tender, moist result because the proteins relax gradually. High heat (3-4 hours) cooks faster but can sometimes create a slightly drier texture if your breasts are on the thinner side. If you choose high, check for doneness at 3 hours rather than waiting the full 4. The seasoning flavor develops slightly more deeply on low because there’s more time for the spices to infuse the meat.
What Size Crockpot Do I Need for This Recipe?
A 4-6 quart crockpot is ideal for four breasts. This gives them room to cook somewhat evenly without overcrowding. If you have a smaller 3-quart pot, reduce to 2-3 breasts and reduce all other ingredients by half. If you have a larger 7+ quart pot, the recipe still works but the cooking time might be slightly shorter because there’s more surface area for heat circulation.
Can I Double This Recipe and Freeze Half?
Absolutely. Prepare eight chicken breasts using double the broth and seasonings. Cook for the same time—the crockpot’s size allows for this. Once cooled completely, portion into individual containers with some of the pan juices and freeze for up to 3 months. This is exactly how I prepare for busy weeks. Thaw overnight and reheat gently in a 300°F oven with a little extra broth to restore moisture.
How Do I Reheat Leftover Chicken Without Drying It Out?
This is where low and slow pays dividends. To reheat, place cold chicken in a baking dish with 2-3 tablespoons of the pan juices or chicken broth, cover tightly with foil, and warm in a 300°F oven for about 15 minutes. Do not use the microwave if you can help it—microwaves can accelerate moisture loss. Alternatively, reheat gently in a covered skillet over low heat with a little broth. The key is never exposing it to high heat again.
More Recipes You’ll Love
- my oven-baked chicken – A naturally sweet preparation that offers a different flavor profile for when you want something glazed and caramelized
- my oven-baked chicken – Italian flavors with fresh tomato and basil, perfect for when you want something lighter and brighter
- Air Fryer Boneless Chicken Thigh Recipe – A faster method using chicken thighs if you ever want to trade tenderness for cooking speed
I want you to know that this recipe represents years of testing, tasting, and adjusting. It represents my belief that the best nutrition is food that actually gets cooked and eaten, not the perfect recipe that sits bookmarked and never attempted. This slow cooker method wins because it meets you where you are—busy, tired, and wanting something that’s both wholesome and stress-free. There’s no complicated technique to master, no precise timing that demands your constant attention, just chicken that becomes more tender and flavorful the longer it cooks. That’s how my mother taught me to cook, and that’s what I’ve carried into my work as a dietitian. Food is love, and love doesn’t demand perfection. It demands presence and intention. You’ve got both when you make this. Happy Cooking!