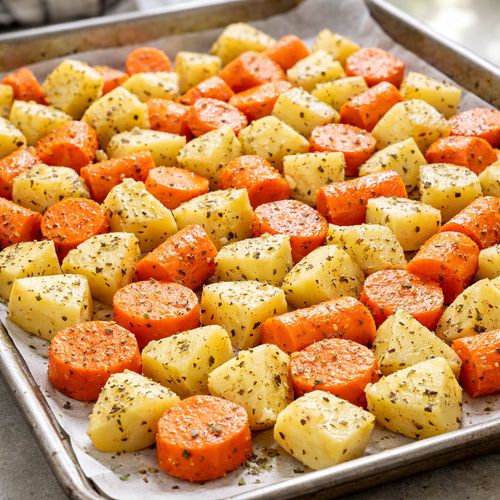
You know that golden, buttery roasted carrot and potato side dish from your favorite steakhouse? The one you’ve been ordering for years because it’s impossibly tender and packed with herb-infused flavor? I spent months cracking the code on this one. What started as curiosity became my mission after I realized I could make this at home for a fraction of the restaurant price, with fresher vegetables and more control over every element. Let me walk you through how to recreate this magic in your own kitchen.

Copycat Roasted Root Vegetables Recipe That Tastes Better Than the Restaurant Version
My obsession with this dish started in my mother’s kitchen, actually. She’d come home from a special dinner out and try to recreate what she’d eaten, always falling short. When I became a registered dietitian, I realized the “secret” wasn’t really a secret at all—it was understanding the science of roasting, the right fat combinations, and perfectly calibrated seasoning.
Years later, when I tasted this particular preparation at a local steakhouse, something clicked. The vegetables had that perfect caramelized exterior, the inside was creamy without being mushy, and every bite had this subtle herb presence that lingered. I knew I had to figure out exactly what was happening on that sheet pan.
What I discovered is that restaurants don’t use magic—they use technique, quality ingredients, and confidence in their method. And the best part? You can absolutely replicate this at home, often with even better results because your vegetables are fresher and you’re not making fifty portions at once.
What Makes the Restaurant Version So Good
Let me be specific about why this dish stops people mid-conversation at the dinner table. The restaurant version succeeds because of three distinct elements working together in harmony.
First, there’s the texture contrast. The outside of each piece develops this gorgeous golden-brown crust through high-heat roasting, while the inside stays tender and almost buttery. This happens because of the Maillard reaction—that’s the chemical process where proteins and sugars in the vegetables caramelize at high temperatures, creating hundreds of complex flavor compounds.
Second, the fat ratio is deliberately engineered. Restaurants use both olive oil and butter because they’re thinking about flavor at two different levels. The olive oil creates the initial caramelization and carries fat-soluble flavors, while the butter adds richness and helps create that luxurious mouthfeel.
Third, and this is what most home cooks miss entirely, the seasoning is timed perfectly. The herbs aren’t added at the beginning and cooked to dust—they’re fresh, added at the end, so you get bright herbal notes against the deep savory notes of the roasted vegetables.
- High-temperature roasting (400°F or higher) – restaurants use convection ovens that circulate heat aggressively, creating faster caramelization and more consistent browning across all pieces
- The butter-and-oil combination – most home cooks use only oil, missing the flavor depth and richness that butter provides at roasting temperatures
- Fresh herb finishing – the parsley isn’t cooked with the vegetables; it’s added fresh just before serving, giving you that bright contrast against deep caramelized flavors
How This Homemade Version Compares
Here’s my honest assessment after making both versions side-by-side dozens of times.
Where your homemade version wins: You’re using vegetables that were picked days ago at most, not weeks. Your farmer’s market carrots are sweeter and more vibrant than anything a restaurant receives in bulk. You control the exact thickness of each piece, so nothing gets mushy while something else stays firm. You can customize the seasoning to your preference—add more garlic if you love it, skip it entirely if it’s not your thing. And the cost difference is dramatic. Where the restaurant charges you twelve to fifteen dollars for a side, you’re spending about two dollars for a version that’s actually better.
Where restaurants have the advantage: Their ovens are hotter and more powerful, creating faster, more aggressive caramelization. They make this fifty times a week, so their technique is flawless through pure repetition. They have access to premium butter and oils that cost more than what most of us buy. But here’s the thing—none of those advantages are impossible for you to replicate with attention and the right method.
The Ingredients—Reverse-Engineered
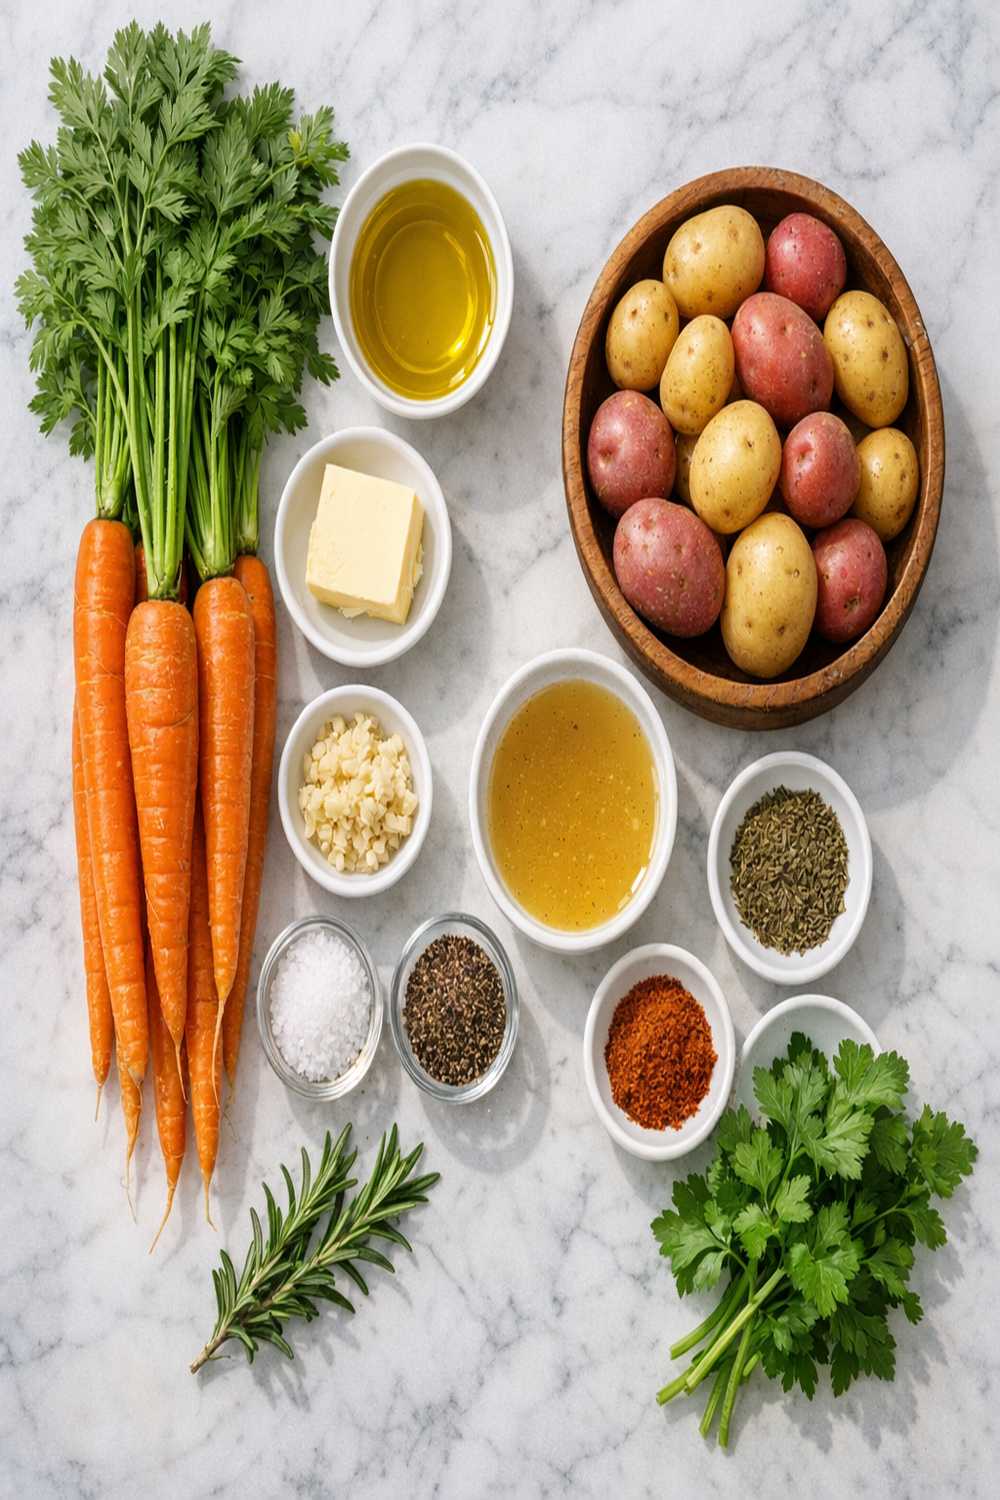
I tested these ingredients by making this dish dozens of times, sometimes changing just one element to see what happened. I tasted it at the restaurant, I analyzed the texture, I smelled the aroma profile, and I worked backward from those sensory clues to identify what was actually in the pan. Some ingredients were obvious—you can taste carrot and potato. Others took detective work.
The measurements below make enough for four generous servings as a side dish, or six smaller portions if you’re serving it alongside a large main protein.
- 2 tablespoons unsalted butter (melted and still warm before tossing with vegetables)
- 1 tablespoon fresh garlic (minced from cloves, not pre-minced, which loses volatile aromatics)
- 1 pound small potatoes (halved lengthwise for even cooking and maximum surface area)
- 2 tablespoons fresh Italian parsley (chopped just before serving to preserve bright color and fresh flavor)
- Light cooking spray (for the sheet pan to prevent sticking without adding extra fat)
- ½ teaspoon dried thyme (or 1 teaspoon fresh thyme leaves stripped from stems)
- 1½ teaspoons fine sea salt (divided, with most added upfront and a pinch reserved for finishing)
- ¼ teaspoon freshly ground black pepper (ground fresh from whole peppercorns for maximum spice notes)
- 1 pound whole carrots (peeled and cut into thick 1-inch rounds to match potato cooking time)
- 3 tablespoons extra-virgin olive oil (cold-pressed for better flavor retention during roasting)
The Copycat Method: How to Recreate Roasted Root Vegetables at Home
I’m going to walk you through this method exactly as I’ve perfected it. This isn’t complicated—it’s actually remarkably simple—but the details matter for achieving that restaurant-quality result.
Step 1: Prepare Your Vegetables and Your Pan
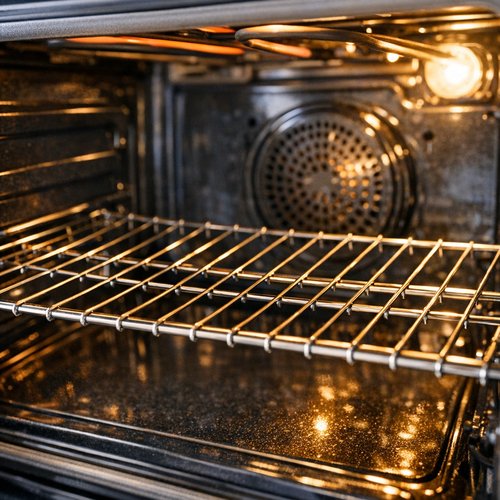
Start by positioning your oven rack to the middle position and preheating your oven to 400 degrees Fahrenheit. Your oven needs time to reach full temperature—this usually takes about 15 minutes. This temperature is hot enough to create serious caramelization but not so aggressive that it burns the exterior before the inside cooks through.
While your oven preheats, prepare a large sheet pan by coating it lightly with cooking spray. Spray both the bottom and the sides. This step prevents sticking without adding extra fat that might affect your roasting. You want the vegetables to make contact with the hot pan surface directly for maximum browning.
Rinse your potatoes under cool running water and pat them completely dry with paper towels. Moisture is the enemy of caramelization. Wet vegetables steam instead of roast. Cut each potato in half lengthwise—don’t cut them into rounds or cubes. The flat side will rest directly on the pan and create that beautiful brown crust. Aim for pieces roughly the same size so they cook evenly.
Peel your carrots with a vegetable peeler, then cut them on a slight bias into thick rounds, about 1 inch thick. The bias cut creates more surface area for browning. Making them 1 inch thick ensures they’ll be tender inside but not mushy, and they’ll finish at exactly the same time as your potatoes.
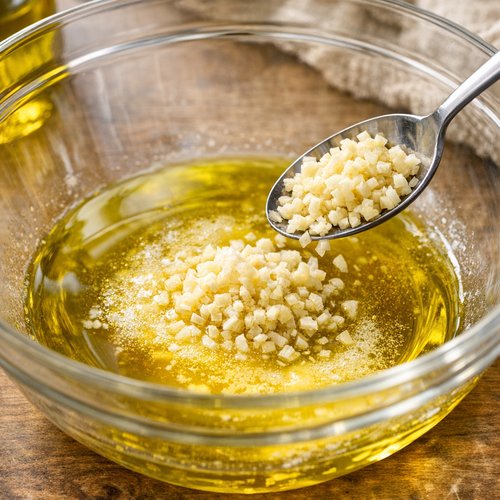
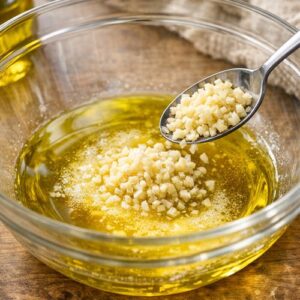
Step 2: Create Your Fat and Seasoning Base
In a large mixing bowl, combine your olive oil and melted butter while the butter is still warm. The warmth helps them blend smoothly. Add your minced fresh garlic, salt, pepper, and dried thyme to this mixture.
Here’s the professional technique most home cooks miss: whisk this mixture for about 30 seconds until it becomes slightly emulsified. You’re not making an emulsion like mayonnaise, but you’re breaking down the fat slightly so it coats more evenly and carries the seasonings and garlic more efficiently. The oil, butter, garlic, and herbs should look like a cohesive coating, not like separated ingredients.
Smell the mixture at this point. You should get brightness from the garlic and earthiness from the thyme. If the garlic smells harsh or raw, that’s normal—it will mellow considerably during roasting.
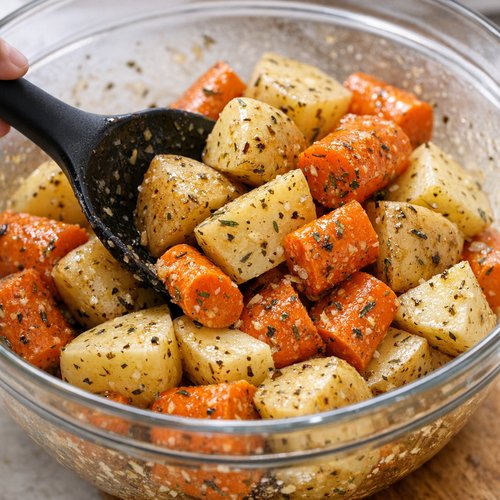
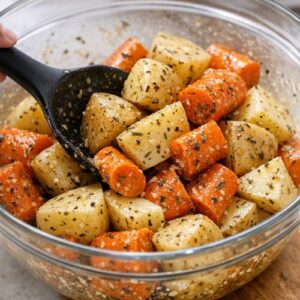
Step 3: Coat Your Vegetables Thoroughly
Add your prepared potatoes and carrots to the bowl with the oil mixture. Using a large spoon or silicone spatula, toss the vegetables continuously for about 1 minute. Every single piece needs to be completely coated with the fat and seasoning mixture. This coating is what creates the crust and carries all the flavor.
I usually toss, then push the vegetables to one side of the bowl, tip the bowl to collect any liquid at the bottom, and spoon that pooled seasoning oil back over the vegetables, then toss again. Do this two or three times. You want to see every piece glistening with oil and seasoning.
As you toss, you’ll notice the vegetables start to release a tiny bit of moisture. That’s fine—it actually helps during roasting.
Step 4: Spread on the Pan in a Single Layer
Pour the entire contents of your bowl onto the prepared sheet pan. Here comes the critical technique: arrange every piece in a single layer, with the flat sides of the potatoes facing down on the pan. Don’t crowd them. They should be touching each other, but not piled on top of one another. If they’re stacked, they’ll steam instead of roast.
This might require two sheet pans if yours is small. That’s okay. Two pans roasting simultaneously will actually finish at the same time because they’ll both have good air circulation.
Make sure the flat sides of the potatoes are pressed down against the pan. The contact between the vegetable and the hot pan surface is where the magic happens. That’s where your Maillard reaction occurs.
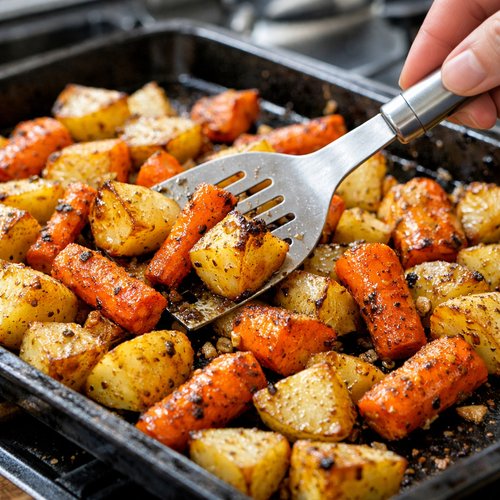
Step 5: Roast Until Caramelized and Tender
Slide your pan into the preheated oven and set a timer for 15 minutes. After 15 minutes, remove the pan and gently stir or flip the vegetables using a spatula or wooden spoon. You’re not trying to shuffle them around completely—just turn them so the other sides can brown.
Return the pan to the oven for another 15-20 minutes. Start checking for doneness at the 25-minute mark. You’re looking for two things: the potatoes should be completely tender when you pierce them with a fork, and the carrots should have no resistance when you bite one (but not be mushy—you want that slight firmness at the very center).
The exteriors should be noticeably browned, almost golden-brown on the high points. This browning is flavor. Don’t skip this step or rush past it. You need at least 30 minutes total, often closer to 40 minutes depending on your oven.
You’ll know it’s done when the kitchen smells incredible—deep, slightly sweet, with hints of thyme and caramelized vegetables.
Step 6: Finish with Fresh Parsley and Serve Immediately
Remove your pan from the oven and let it sit for just 2 minutes—this lets the vegetables relax and makes them slightly easier to plate. Sprinkle the fresh chopped parsley evenly over the top. The parsley isn’t just garnish; it adds brightness and a fresh herbal note that contrasts beautifully with the deep caramelized flavors.
Transfer to a serving bowl or plate while still warm. Serve immediately. The contrast between the warm vegetables and the fresh herbs is part of the experience.

The Secret Sauce: Understanding the Herb and Seasoning Blend
The seasoning strategy here is more sophisticated than it might first appear. Let me break down exactly what’s happening at each stage.
The salt and pepper mixed into the oil at the beginning serve a dual purpose. They start seasoning the vegetables from the outside in, and salt actually helps draw out some of the vegetables’ natural moisture, which then evaporates during roasting, concentrating the flavors. This is why salting vegetables before roasting (not after) is so important.
The thyme is dried and added upfront because dried herbs need time to rehydrate and release their oils during the cooking process. If you used fresh thyme, you’d add it at the very end like the parsley, because heat destroys the volatile compounds that make fresh herbs bright and aromatic. Dried thyme actually gets better with gentle heat—it becomes more complex, less grassy.
The garlic is minced fresh and added to the oil mixture. Raw minced garlic has a sharp, almost spicy quality. During roasting, that sharpness mellows considerably and becomes almost sweet. The oil carries the garlic flavor throughout the vegetables.
The fresh parsley is the final touch. It adds color, yes, but more importantly, it adds a fresh, grassy note that keeps the dish from tasting one-dimensional. Parsley has chlorophyll, which gives it that fresh green taste that works as a flavor contrast.
All together, you get earthiness from the vegetables, richness from the butter and oil, depth from the thyme, sweetness from the roasted garlic, and brightness from the fresh parsley. That’s a complete flavor story in one side dish.
How to Make It Even Better Than the Original
Since you’re making this at home, you have advantages the restaurant doesn’t have. Here’s how to use them:
- Source vegetables from a farmer’s market – the difference between supermarket carrots and farm-fresh carrots is extraordinary. Farm carrots are sweeter, more colorful, and more tender. If you can find heirloom or colored carrots (purple, orange, white), they add visual drama and slightly different flavor notes
- Use fresh thyme instead of dried if you have it growing – strip the leaves from fresh thyme stems and add half at the beginning and half at the end. You’ll get more complex herbal flavor than dried thyme alone
- Finish with high-quality fleur de sel or Maldon sea salt – a pinch of premium salt at the very end adds a subtle mineral brightness and visual appeal
- Try adding a small squeeze of fresh lemon juice – just a few drops of lemon zest or juice added with the parsley brightens everything and makes the vegetables taste more like themselves
- Consider roasting with a ratio of 60% baby potatoes to 40% carrots – potatoes are naturally starchy and mild, while carrots are naturally sweet. Adjusting the ratio changes the whole flavor balance depending on your preference
Cost Comparison: Home vs. Restaurant
Let me show you exactly why I make this at home now instead of ordering it out.
At my favorite restaurant, this side dish costs $14.95. It serves one person—roughly 1.5 cups of vegetables. The entire batch I’m teaching you to make costs approximately $6-7 depending on your market and season. It serves four generously, so you’re looking at roughly $1.50-1.75 per serving.
That’s an 85-90% savings per serving. If you made this once per week at home instead of ordering it at restaurants, you’d save approximately $680 per year. If your family loves it and you make it twice weekly, you’re saving over $1,360 annually.
Even if you shop at premium markets and spend more on vegetables, you’re still looking at maybe $2 per serving, which is still an enormous savings.
Beyond the financial savings, you’re also getting fresher vegetables because you’re cooking them the same day you buy them. Your restaurant might be using vegetables that were shipped 5-7 days prior. You have control over exact thickness, exact seasoning, and exact roasting time. There’s real value in that.
Can I Store Roasted Root Vegetables?
Yes, and this is actually a fantastic make-ahead side dish if you plan correctly.
Room temperature storage: These keep perfectly fine at room temperature for up to 2 hours after roasting. If you’re serving dinner and making this 2 hours ahead, just leave it on the counter.
Refrigerator storage: Cooled vegetables keep in an airtight container in the refrigerator for 4-5 days. They’ll stay safe and won’t develop off-flavors during this timeframe.
Reheating: I recommend reheating in a 350-degree oven for about 10-15 minutes, spread on a sheet pan, rather than using a microwave. The oven will restore some of the textural contrast that refrigeration diminishes. You lose a tiny bit of the fresh parsley flavor during storage, so I usually add fresh parsley again when reheating, which takes 30 seconds.
Freezing: These freeze adequately but not beautifully. The texture becomes slightly mushy after thawing. I don’t typically recommend freezing, but if you must, they’ll keep up to 2 months frozen in an airtight container. Thaw in the refrigerator and reheat in the oven.
Nutrition Information
Per serving (approximately ⅔ cup of vegetables), this dish contains approximately 185 calories, 12 grams of fat, 16 grams of carbohydrates, and 3 grams of protein. The sodium content is approximately 550 milligrams per serving. This data aligns with USDA nutrition databases for roasted vegetables prepared with fats.
What excites me about this dish from a nutritional standpoint is the vegetable content. You’re getting beta-carotene from the carrots (which your body converts to vitamin A), B vitamins and potassium from the potatoes, and phytonutrients from both. The fat content—from the olive oil and butter—is actually beneficial because it helps your body absorb the fat-soluble vitamins in the carrots. This is a perfectly balanced side dish that contributes meaningful nutrition, not just calories.
For context, a similar portion from a restaurant would contain roughly 220-250 calories because restaurants often use more butter and oil than home cooks. My version is slightly leaner while maintaining all the flavor.
Expert’s Nutritional Tip: As a registered dietitian, I always recommend eating the skin of potatoes whenever possible. Potato skin contains fiber, resistant starch, and minerals. Since this recipe calls for small potatoes, you can absolutely leave the skin on. Just scrub them under running water before halving. The skin will actually help hold the potatoes together during roasting and adds nutritional value.
What to Order/Make Alongside for the Full Experience
To truly recreate that restaurant steakhouse experience, you need to complete the plate. These roasted vegetables are a side, not a meal.
Pair them with a quality protein. A perfectly seared steak is classic, of course, but you could also make my oven-baked chicken for a lighter option, or BBQ Ham for something more casual and fun.
If you’re building a full steakhouse-style dinner at home, also prepare a simple green salad with vinaigrette or a creamy Baked Mac and Cheese for additional richness.
- A grilled or pan-seared protein – beef, chicken, fish, or pork all shine alongside these vegetables
- A bright salad or vegetable dish – these roasted vegetables are rich and earthy, so pair with something acidic or fresh like a simple arugula salad or roasted green vegetables
- Crusty bread for soaking up the oil – there will be delicious oil pooling on the pan, and bread is the best vehicle for it
Common Mistakes to Avoid
Mistake 1: Cutting vegetables too small. I see home cooks cut carrots into thin rounds and potatoes into dime-size pieces, thinking they’ll cook faster. Actually, you’re just making them dry out and get mushy. Stick with the 1-inch thickness. They’ll roast perfectly in 30-40 minutes, and that thicker cut is what creates the texture contrast between the caramelized outside and the tender inside.
Mistake 2: Not drying vegetables after washing. Moisture is literally your enemy here. Wet vegetables create steam, and steam prevents browning. Always pat vegetables completely dry with a clean kitchen towel or paper towels. This single step probably accounts for 30% of the difference between okay roasted vegetables and exceptional ones.
Mistake 3: Crowding the pan. If you stack the vegetables or place them too close together, they won’t brown—they’ll steam in their own moisture. Use two pans if needed. This is not a shortcut moment. Good browning requires space and circulating heat.
Mistake 4: Adding fresh herbs at the beginning. Fresh herbs are volatile and delicate. If you add them at the start, they cook down to nothing and their bright flavor disappears. Add them at the very end. This applies to parsley, cilantro, dill, or any fresh herbs. Dried herbs are the only herbs that benefit from heat.
Seasonal Variations
Spring variation: In spring, try using smaller, newer-season potatoes (they’re naturally sweeter and more tender) and thin spring carrots. Add fresh dill instead of thyme and finish with fresh tarragon. Spring onions or scallions can be roasted alongside for about the last 15 minutes of cooking.
Summer variation: Summer vegetables roast beautifully too. Add summer squash cut into thick rounds, which roasts beautifully in 25-30 minutes. Use lemon zest with the parsley instead of plain parsley alone. Add fresh basil at the finish.
Fall variation: Stick with hearty root vegetables, add cubed beets for color, and use fresh thyme plus a tiny pinch of ground cinnamon or nutmeg. Add toasted nuts (walnuts or pecans) at the very end for texture contrast.
Winter variation: Winter vegetables are naturally sweeter. Add parsnips cut the same thickness as carrots. Add a tiny pinch of ground ginger with the thyme. Consider roasting with fresh rosemary instead of thyme for a more assertive herb presence.
Make-Ahead Guide
As a registered dietitian who thinks about meal prep constantly, I love recipes that can be partially or completely prepared ahead. Here’s my make-ahead strategy for this dish:
The night before: Wash and peel your carrots, then store them in a container of cold water in the refrigerator. Wash your potatoes and store them in a breathable bag or paper towel in the refrigerator. Mince your garlic and store it in a small container (it’s better fresh-minced than sitting overnight, but if you must, this is fine for one night).
The morning of: Chop your vegetables into their final size. The flat sides of potatoes and the bias-cut carrot rounds. Store these in separate containers until you’re ready to roast.
One hour before serving: Preheat your oven. Mix your oil, butter, garlic, and seasonings in your bowl. This mixture can sit at room temperature for an hour without issue.
30 minutes before serving: Coat your vegetables and get them on the sheet pan and in the oven. They’ll be perfectly done right when you’re ready to serve.
The absolute best approach: Make these start to finish about 45 minutes before you want to serve. This isn’t a dish that improves from being made far in advance, but it’s also not difficult or time-consuming enough to require much advance preparation. The beauty is that it comes together quickly when you’re ready.

Carrots And Potatoes Recipe
Ingredients
- 2 tablespoon unsalted butter melted and still warm before tossing with vegetables
- 1 tablespoon fresh garlic minced from cloves, not pre-minced, which loses volatile aromatics
- 1 pound small potatoes halved lengthwise for even cooking and maximum surface area
- 2 tablespoon fresh Italian parsley chopped just before serving to preserve bright color and fresh flavor
- Light cooking spray for the sheet pan to prevent sticking without adding extra fat
- ½ teaspoon dried thyme or 1 teaspoon fresh thyme leaves stripped from stems
- 1½ teaspoon fine sea salt divided, with most added upfront and a pinch reserved for finishing
- ¼ teaspoon freshly ground black pepper ground fresh from whole peppercorns for maximum spice notes
- 1 pound whole carrots peeled and cut into thick 1-inch rounds to match potato cooking time
- 3 tablespoon extra-virgin olive oil cold-pressed for better flavor retention during roasting
Instructions
Step 1: Prepare Your Vegetables and Your Pan
- Start by positioning your oven rack to the middle position and preheating your oven to 400 degrees Fahrenheit. Your oven needs time to reach full temperature—this usually takes about 15 minutes. This temperature is hot enough to create serious caramelization but not so aggressive that it burns the exterior before the inside cooks through. While your oven preheats, prepare a large sheet pan by coating it lightly with cooking spray. Spray both the bottom and the sides. This step prevents sticking without adding extra fat that might affect your roasting. You want the vegetables to make contact with the hot pan surface directly for maximum browning. Rinse your potatoes under cool running water and pat them completely dry with paper towels. Moisture is the enemy of caramelization. Wet vegetables steam instead of roast. Cut each potato in half lengthwise—don't cut them into rounds or cubes. The flat side will rest directly on the pan and create that beautiful brown crust. Aim for pieces roughly the same size so they cook evenly. Peel your carrots with a vegetable peeler, then cut them on a slight bias into thick rounds, about 1 inch thick. The bias cut creates more surface area for browning. Making them 1 inch thick ensures they'll be tender inside but not mushy, and they'll finish at exactly the same time as your potatoes.

Step 2: Create Your Fat and Seasoning Base
- In a large mixing bowl, combine your olive oil and melted butter while the butter is still warm. The warmth helps them blend smoothly. Add your minced fresh garlic, salt, pepper, and dried thyme to this mixture. Here's the professional technique most home cooks miss: whisk this mixture for about 30 seconds until it becomes slightly emulsified. You're not making an emulsion like mayonnaise, but you're breaking down the fat slightly so it coats more evenly and carries the seasonings and garlic more efficiently. The oil, butter, garlic, and herbs should look like a cohesive coating, not like separated ingredients. Smell the mixture at this point. You should get brightness from the garlic and earthiness from the thyme. If the garlic smells harsh or raw, that's normal—it will mellow considerably during roasting.
Step 3: Coat Your Vegetables Thoroughly
- Add your prepared potatoes and carrots to the bowl with the oil mixture. Using a large spoon or silicone spatula, toss the vegetables continuously for about 1 minute. Every single piece needs to be completely coated with the fat and seasoning mixture. This coating is what creates the crust and carries all the flavor. I usually toss, then push the vegetables to one side of the bowl, tip the bowl to collect any liquid at the bottom, and spoon that pooled seasoning oil back over the vegetables, then toss again. Do this two or three times. You want to see every piece glistening with oil and seasoning. As you toss, you'll notice the vegetables start to release a tiny bit of moisture. That's fine—it actually helps during roasting.
Step 4: Spread on the Pan in a Single Layer
- Pour the entire contents of your bowl onto the prepared sheet pan. Here comes the critical technique: arrange every piece in a single layer, with the flat sides of the potatoes facing down on the pan. Don't crowd them. They should be touching each other, but not piled on top of one another. If they're stacked, they'll steam instead of roast. This might require two sheet pans if yours is small. That's okay. Two pans roasting simultaneously will actually finish at the same time because they'll both have good air circulation. Make sure the flat sides of the potatoes are pressed down against the pan. The contact between the vegetable and the hot pan surface is where the magic happens. That's where your Maillard reaction occurs.

Step 5: Roast Until Caramelized and Tender
- Slide your pan into the preheated oven and set a timer for 15 minutes. After 15 minutes, remove the pan and gently stir or flip the vegetables using a spatula or wooden spoon. You're not trying to shuffle them around completely—just turn them so the other sides can brown. Return the pan to the oven for another 15-20 minutes. Start checking for doneness at the 25-minute mark. You're looking for two things: the potatoes should be completely tender when you pierce them with a fork, and the carrots should have no resistance when you bite one (but not be mushy—you want that slight firmness at the very center). The exteriors should be noticeably browned, almost golden-brown on the high points. This browning is flavor. Don't skip this step or rush past it. You need at least 30 minutes total, often closer to 40 minutes depending on your oven. You'll know it's done when the kitchen smells incredible—deep, slightly sweet, with hints of thyme and caramelized vegetables.

Step 6: Finish with Fresh Parsley and Serve Immediately
- Remove your pan from the oven and let it sit for just 2 minutes—this lets the vegetables relax and makes them slightly easier to plate. Sprinkle the fresh chopped parsley evenly over the top. The parsley isn't just garnish; it adds brightness and a fresh herbal note that contrasts beautifully with the deep caramelized flavors. Transfer to a serving bowl or plate while still warm. Serve immediately. The contrast between the warm vegetables and the fresh herbs is part of the experience.

FAQs
Can I use olive oil instead of butter, or butter instead of olive oil?
You can, but you’ll lose something. Butter adds a richness and subtle caramelized flavor that olive oil alone cannot provide. Olive oil adds fruity, grassy notes that butter alone cannot contribute. Together at this ratio, they create a more complex fat profile. If you must choose one, olive oil will work fine—use 4-5 tablespoons total. You’ll get good browning, but slightly less richness. Pure butter also works but will brown more aggressively and brown the vegetables more quickly, which can be harder to control. I really do recommend using both if possible.
What if my oven runs hot or cold?
Every oven is different. If yours runs hot, your vegetables might finish in 25-30 minutes instead of 35-40. Check at the 20-minute mark. If yours runs cold, they might take up to 45 minutes. The target is caramelization and complete tenderness, not a specific time. Check doneness by piercing a piece of potato and carrot with a fork. If there’s any resistance at the center, they need more time. Browning is your visual guide—you want golden-brown exteriors, not pale vegetables.
Can I add other vegetables to this recipe?
Absolutely. Root vegetables that are similar in density work best: parsnips, beets, turnips, rutabagas, or celeriac all roast beautifully with carrots and potatoes. Add them to the pan with the potatoes and carrots if they’re cut to similar thickness. Summer squash needs less time (add it about 15 minutes in), and green vegetables like Brussels sprouts should be added in the last 20 minutes or roasted separately. The key is matching cooking times—don’t mix vegetables with vastly different densities unless you stagger their addition to the pan.
Is fresh thyme really that much better than dried?
Fresh thyme has more nuance and brightness. Dried thyme is earthier and more concentrated. For this recipe, dried thyme is actually my preference because its earthiness matches the caramelized vegetables. If you use fresh thyme, use twice as much (1 teaspoon fresh = about ½ teaspoon dried), and add half at the beginning and half at the end for best results. Both work—it’s a flavor preference choice, not a success or failure situation.
Why shouldn’t I toss the vegetables halfway through cooking?
Actually, you should toss them once at the midpoint (around the 15-20 minute mark) to ensure even browning on all sides. What you shouldn’t do is continuously move them around or stir them frequently. Every time you move vegetables, you interrupt the contact between the vegetable and the hot pan, which interrupts the browning process. One good toss at the midpoint is perfect. After that, leave them alone until they’re done.
More Restaurant Copycat Recipes
- this cozy soup – creamy, comforting, and makes your whole house smell incredible
- this cozy soup – a restaurant favorite that’s even better homemade with fresh vegetables
Final Thoughts
There’s something deeply satisfying about cracking the code on a restaurant dish you love. This isn’t about being cheap or not supporting restaurants—it’s about understanding how food works, knowing you can create something delicious in your own space, and building the confidence to trust your technique.
My mother always said that the best meals are the ones made with intention and served with love. That’s exactly what you’re doing here. You’re taking time to select good vegetables, applying a proven technique, and creating something special. That’s the real secret sauce—not some mysterious ingredient, but care and attention.
I’d love to know how yours turns out. Make this for someone you care about, pay attention to how the flavors develop as it roasts, and notice how fresh herbs at the end completely change the eating experience. You’re not just making roasted vegetables. You’re making delicious memories, exactly like my mother taught me, right there in your own kitchen.
Happy Cooking!