Getting kids to eat homemade treats feels impossible when store-bought options are so convenient—until you try making butter tarts together as a family. I’ve watched countless children who claim they don’t like “homemade desserts” become completely mesmerized by the buttery aroma and gooey filling of warm butter tarts. There’s something about creating these little golden pockets of sweetness that turns skeptical eaters into enthusiastic helpers. Today, I’m sharing my tested approach to butter tarts that wins over even the pickiest palates in your kitchen.
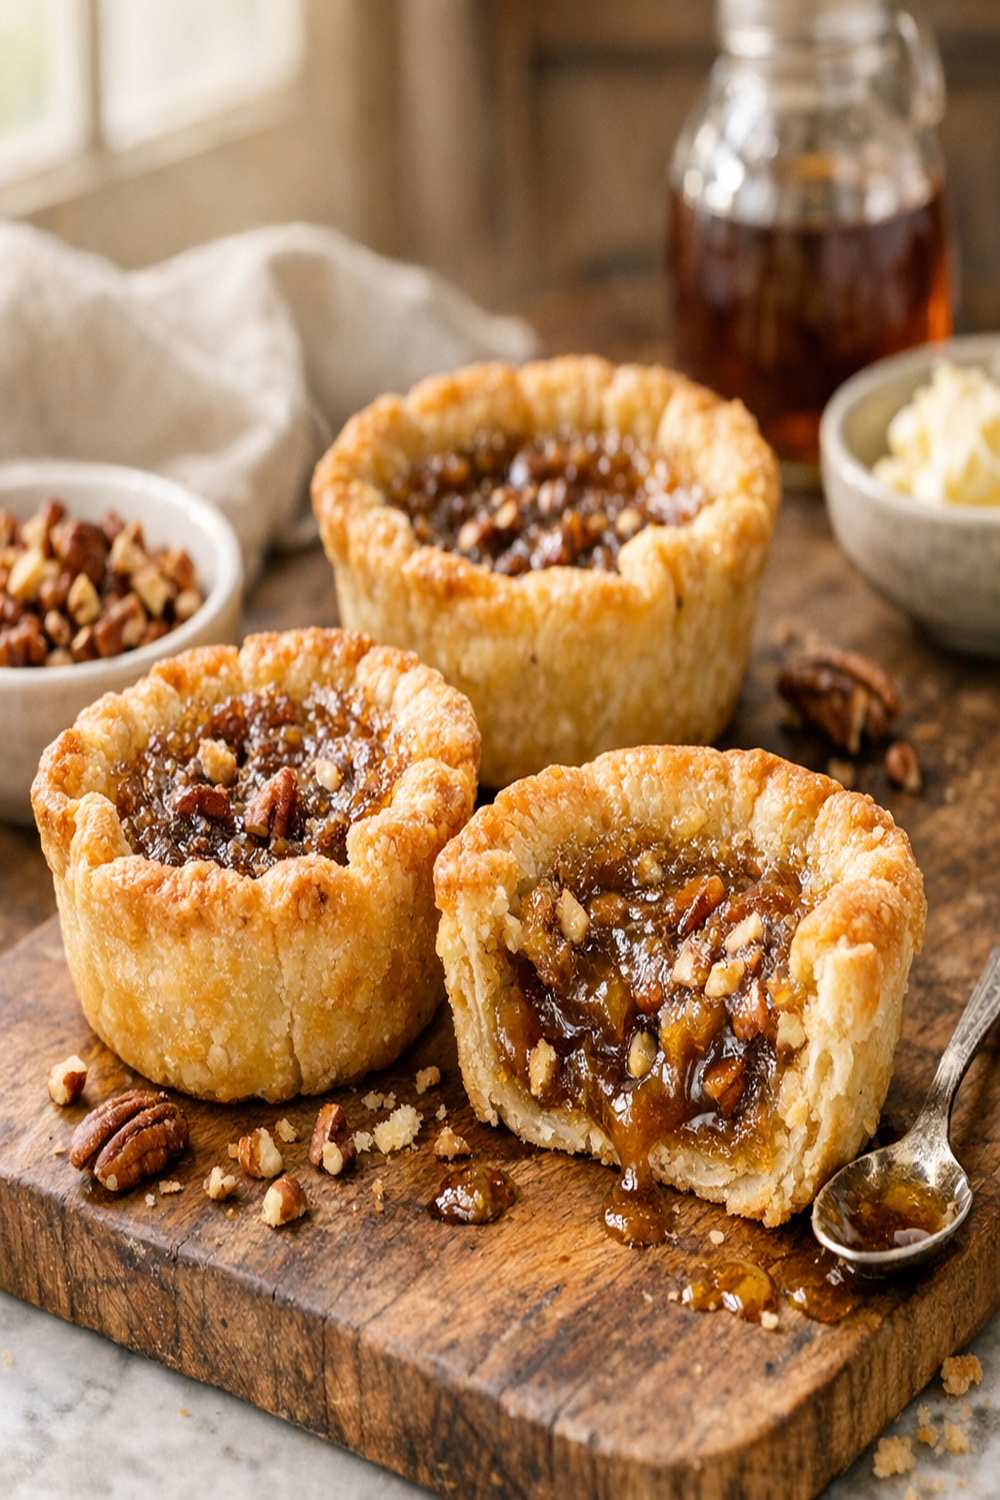
Butter Tart Recipe: The Whole Family Will Actually Eat (Picky Eaters Included)
I still remember my mother pulling a batch of butter tarts from the oven on Sunday afternoons. The kitchen would fill with this irresistible caramel smell, and my siblings would appear from nowhere, drawn like magnets to the cooling racks. My mother had this gift for making people feel loved through food, and those butter tarts were pure comfort in edible form. Now, as a registered dietitian and mother myself, I understand that she wasn’t just making desserts—she was creating moments where we all gathered around something warm, something made with care.
That same magic happens when you make butter tarts at home with your family. Unlike pre-packaged treats, homemade versions feel special because everyone has fingerprints on them—literally and emotionally. When your child helps press dough into muffin cups and watches the filling bubble up in the oven, they’re not just eating a dessert. They’re building a food memory that will stick with them long after the last crumb disappears.
Why Kids Love This Version
I’ve learned through years of working with families that children eat with their eyes and their hearts before their mouths. Butter tarts hit every psychological button that makes kids excited about food. The individual size means each child gets their own special tart—no sharing negotiations needed. The combination of flaky crust and gooey, sweet filling appeals to kids who might resist “fancy” desserts. And perhaps most importantly, the appearance of homemade perfection makes kids feel proud to eat something they helped create.
- Individual portions create excitement – Kids feel special getting their own tart, which makes them more willing to try something homemade
- The texture contrast keeps interest – Crispy pastry shells with soft, caramel-like filling satisfy both crunchy and chewy preferences that picky eaters often have
- Customizable fillings reduce resistance – When children choose their mix-ins (raisins, pecans, or chocolate chips), they’re more likely to eat what they created
- Hands-on involvement builds investment – Kids who help make something are exponentially more likely to eat it, even if they’ve previously rejected similar foods
How to Get Kids Involved in Making This
One of my favorite parts about working with families is showing them how cooking together actually solves picky eating challenges. When children participate in food preparation, they develop curiosity about flavors and textures instead of fear. Butter tarts are perfect for this because there are genuinely age-appropriate tasks at every stage.
- Ages 3-5: The Mix-In Masters – Let toddlers help pour raisins, pecans, or chocolate chips into a small bowl. They can help sprinkle these into the pastry cups with your guidance. This gives them ownership and makes them excited about what they see in their tart.
- Ages 6-9: The Filling Makers – School-age children can help measure ingredients (with your supervision) and stir the filling together. They can crack an egg with your help, combine the brown sugar with corn syrup, and use an electric mixer. This is where real learning happens—they’re following a sequence and seeing how ingredients transform.
- Ages 10+: The Pastry Builders – Older kids can learn dough-making from start to finish, from pulsing cold ingredients together to rolling out pastry and cutting circles. They can work with a food processor, handle the rolling pin, and press dough into muffin cups independently. This teaches fundamental cooking skills they’ll use forever.
The Ingredients – Hidden Nutrition, Visible Deliciousness
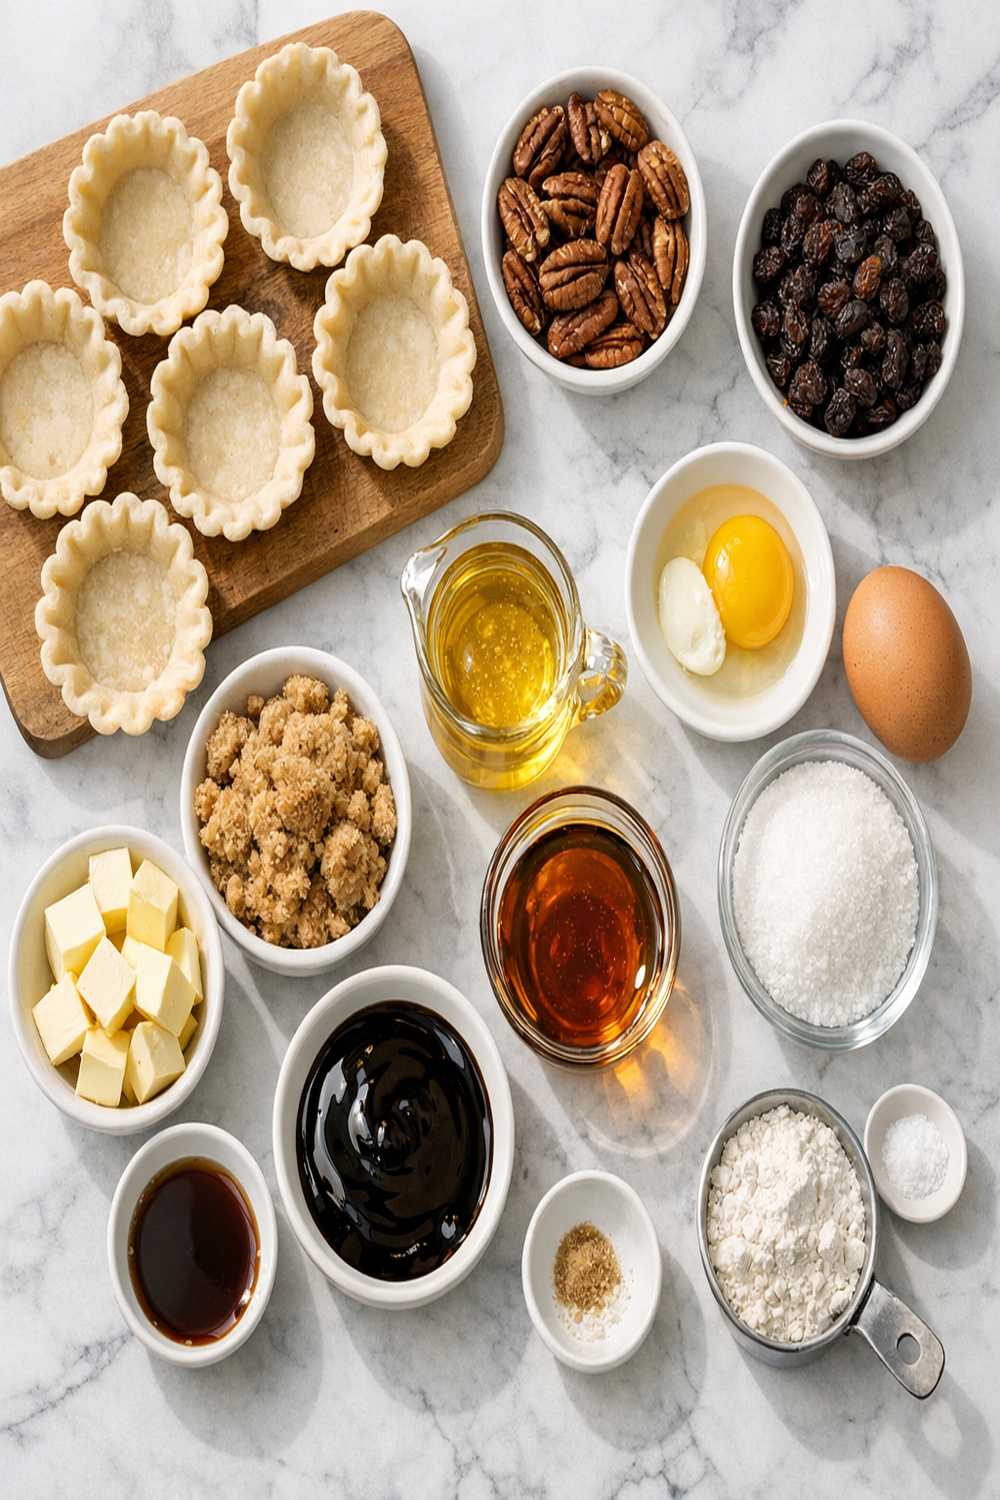
When I design recipes for families, I’m always thinking about nutrition alongside enjoyment. These butter tarts deliver more than just empty calories—the eggs provide protein and choline for brain development, the whole grain option in the pastry adds fiber, and certain variations include nuts packed with healthy fats. I’ve included ingredient notes that show you how to maximize nutrition without sacrificing the taste that makes kids actually want to eat these treats.
For the Pastry Shells
- ½ cup unsalted butter (very cold, cut into small cubes—adds flavor that shortening alone cannot provide)
- 1 tablespoon brown sugar (adds subtle sweetness and helps create golden color)
- 6 tablespoons ice water (approximately—add gradually until dough just comes together)
- 2¼ cups all-purpose flour (or use pastry flour for extra-tender crusts—it has lower protein content)
- ½ teaspoon salt (enhances all other flavors without tasting salty)
- ½ cup vegetable shortening (very cold, cut into small cubes—this creates flakiness)
For the Filling
- 1 large egg (room temperature for even mixing—take it out 15 minutes before cooking)
- ¼ teaspoon salt (balances sweetness and brings out depth)
- ½ cup corn syrup (creates that signature caramel-like consistency and shine)
- ½ cup lightly packed brown sugar (the packed measurement matters—use the spoon-and-level method)
- 1 teaspoon pure vanilla extract (not imitation—the flavor difference matters here)
- ¼ cup unsalted butter (melted and slightly cooled before adding to egg)
- ½ cup raisins (or substitute with ½ cup chopped pecans, walnuts, or chocolate chips based on family preference)
Recipe makes: 24 individual butter tarts (enough for a family of 4 with some left over for lunchboxes or gifting)
How to Make Butter Tart Recipe for the Whole Family
I’ve structured these instructions to feel more like a family project than a cooking task. Read through everything first so you know where kids can jump in, then gather everyone in the kitchen with the expectation that this is going to take a bit longer than if you made it alone—and that’s exactly the point. The time you invest together is part of what makes these tarts taste so good.
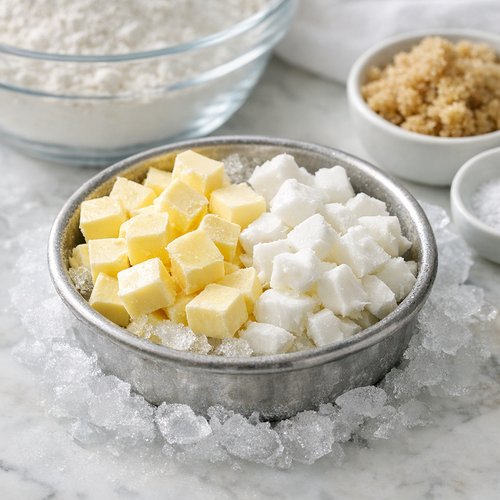
Step 1: Prepare the Pastry Dough
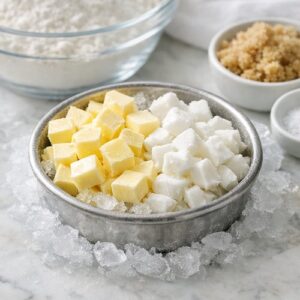
Start by gathering your cold butter and shortening in small cubes and placing them in the freezer while you measure your flour, salt, and brown sugar. Cold fat is essential for flaky pastry—this is the most important step, and I want you to understand why. When cold fat pieces melt in the oven, they create steam pockets that make the pastry light and crispy. If your fat is warm, it blends smoothly into the flour and you get tough, dense pastry instead.
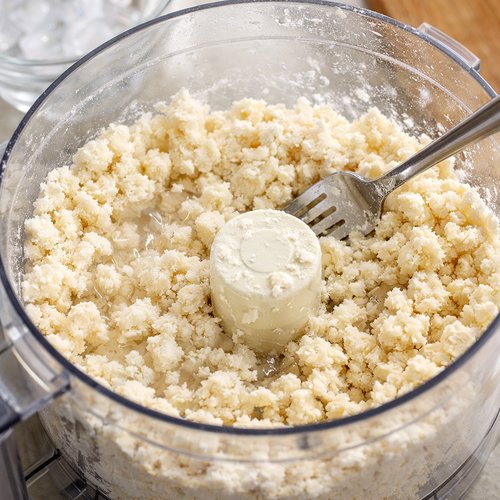
Add your flour, salt, and brown sugar to a food processor. If you have children helping, this is a great moment for them to pour the flour in and watch the processor mix things—but keep hands far away from the blade. Pulse the flour mixture a few times just to combine. Now add your cold butter and shortening cubes and pulse until the mixture looks like coarse breadcrumbs or peas. This should take about 10-15 pulses. You want to still see small pieces of fat—you’re not trying to create a smooth dough yet.
Step 2: Add Water and Bring the Dough Together
Sprinkle 6 tablespoons of ice water over the flour mixture and pulse gently—just 3-4 pulses. Open the processor and toss the mixture with a fork. If it looks crumbly and won’t hold together when you squeeze it, add 1 more tablespoon of water and toss again. Your goal is dough that just barely holds together when pressed, not dough that forms a ball. This is critical: do not overwork the dough by over-pulsing or handling it too much, or your pastry will become tough instead of tender.
Kids love this step because they get to use the fork like they’re really helping. Let them toss and check if the dough is ready. It teaches them to recognize texture, which is a crucial cooking skill.
Step 3: Chill the Dough
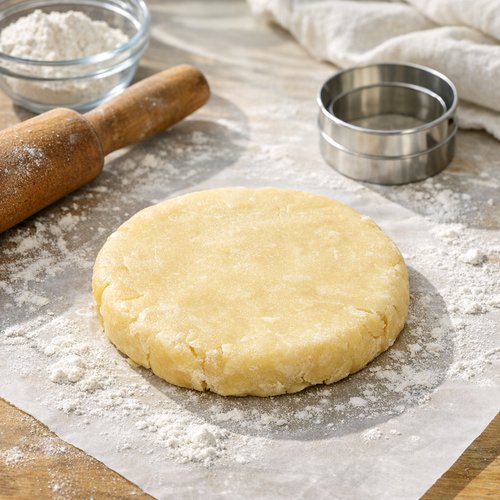
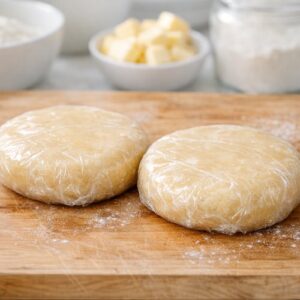
Divide your dough into two equal portions and shape each into a disk about 1 inch thick. Wrap each disk tightly in plastic wrap and refrigerate for at least 30 minutes. This is actually a perfect pause point if your family wants to take a break before continuing. You can make the filling during this time, or you can chill the dough for up to 48 hours if you want to bake the tarts another day.
Pro tip: I often prepare the dough on Saturday morning and bake tarts on Sunday afternoon. This makes the whole process feel less rushed and more like what it actually is—a leisurely family activity.

Step 4: Roll and Cut the Pastry
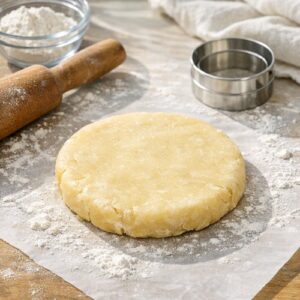
When you’re ready to continue, flour your work surface lightly and remove one disk of dough from the fridge. Let it sit at room temperature for about 5 minutes—this makes it easier to roll without cracking. Using a rolling pin, gently roll the dough to about ⅛-inch thickness. If you have children rolling, supervise closely and make sure they understand that the dough should be rolled gently, not aggressively, to keep it flaky.
Using a 4-inch round cutter (or a drinking glass works in a pinch), cut circles from the dough. Gather scraps, gently re-roll them, and cut more circles. You should get about 12 circles per disk, giving you 24 tarts total.
Step 5: Line Your Muffin Cups
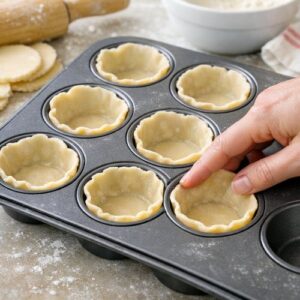
Fit each pastry circle gently into a muffin cup, pressing it to the bottom and sides. Older children can do this independently, but younger children need help to avoid tearing the dough. The dough doesn’t need to come all the way to the top of the cup—it should sit about halfway up the sides. Place the lined muffin tins in the freezer for at least 15 minutes while you prepare the filling. Cold pastry going into a hot oven is the secret to maximum flakiness. This is not a step to skip.

Step 6: Make the Filling
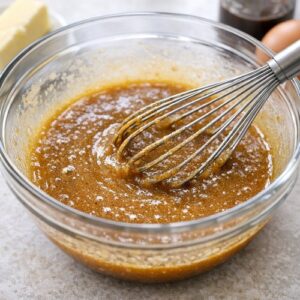
In a medium bowl, whisk together your brown sugar, corn syrup, melted butter, egg, vanilla extract, and salt until completely smooth and well combined. This should take about 1-2 minutes of whisking. Let kids do the whisking—it’s safe, it’s satisfying, and they get to watch the ingredients transform into something that looks completely different from what went in.
Take a moment here to talk with your kids about what’s happening. The egg is helping bind everything together. The corn syrup is what creates that glossy, caramel-like look and texture. The vanilla adds a depth of flavor you can’t quite identify but definitely improves everything. These little moments of explanation turn cooking into learning.

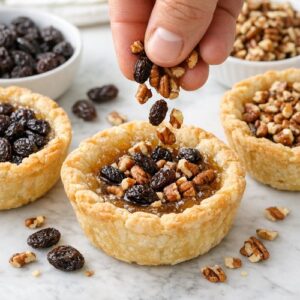
Step 7: Add Mix-Ins and Customize
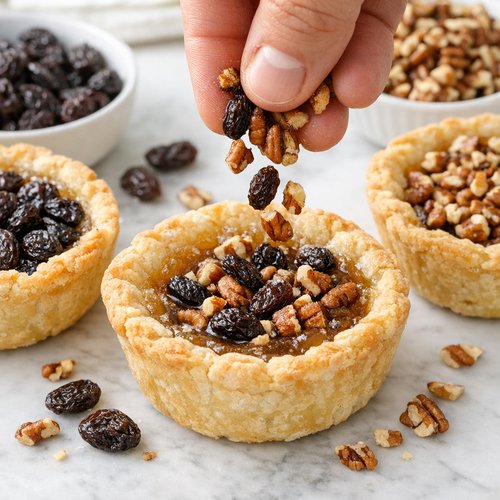
This is where customization happens and where picky eaters suddenly become willing participants. Sprinkle raisins (or your chosen substitute—pecans, walnuts, or chocolate chips) into a single layer at the bottom of each cold pastry shell. This prevents mix-ins from sinking to the bottom during baking and gives every bite something interesting.
If you have multiple children with different preferences, divide the prepared muffin tins now. Half can have raisins, a quarter can have pecans, and a quarter can have chocolate chips. Each child gets to see their preference going into their tarts. This ownership transforms the entire experience.
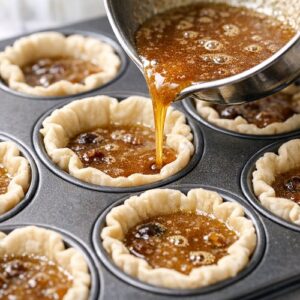
Step 8: Fill and Bake
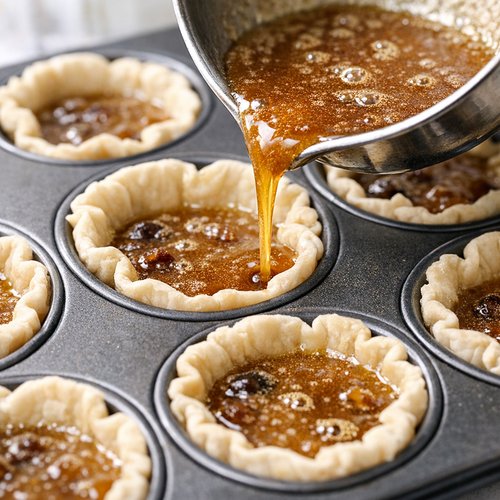
Pour the syrup mixture into each pastry cup until it comes about two-thirds of the way up the sides. Warn older children that this liquid is hot (from the melted butter) and be extremely careful around younger kids during this step. You can use a small measuring spoon or a ladle to make pouring easier and less messy. Don’t overfill—if the mixture reaches the rim of the cup, it will bubble over during baking and make a mess in your oven.
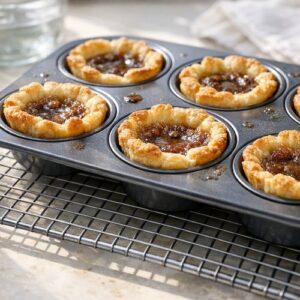
Place the filled muffin tins on the lower shelf of a preheated 425°F oven. Bake for 12-15 minutes, until the pastry is golden brown and the filling has puffed up and set slightly. You’ll see the filling bubble gently—that’s exactly what you want. The filling will firm up more as it cools. If your oven runs hot, check at 12 minutes. If it runs cool, you might need the full 15 minutes.
Step 9: Cool and Remove
This is the hardest part for kids—waiting. Let the tarts cool completely on a wire rack before attempting to remove them from the muffin tin. I know this feels eternal when they smell this good, but warm tarts are still soft inside and will stick to the pan if you try to remove them too early. Completely cooled tarts slip out of the cups easily and have set to the proper texture inside—still slightly gooey but stable enough to hold its shape.
Once cooled, run a thin knife around the edge of each tart and gently pop it out of the muffin cup. If you have a stubborn tart, place the entire muffin tin back in the oven at 350°F for 2-3 minutes to slightly warm the pan, which helps release the pastry.

Customization Station: Let Everyone Build Their Own
One of the most effective strategies I use when working with families dealing with picky eaters is giving children control over components. This simple psychological shift—from “eat what I made” to “choose what goes in yours”—changes everything about their willingness to try new foods. With butter tarts, you can easily set up a customization station that makes everyone feel invested in their own creation.
- Mix-In Bar – Set out small bowls of raisins, chopped pecans, chopped walnuts, semi-sweet chocolate chips, white chocolate chips, dried cranberries, and even a small bowl of unsweetened coconut flakes. Let each family member choose what goes in their portion of tarts. A child who might not eat a raisin tart will happily eat one loaded with their chosen chocolate chips.
- Filling Flavor Variations – Make the base filling (brown sugar, corn syrup, butter, egg, salt), then divide it into portions and let older kids add their own vanilla extract amount, a splash of maple syrup, or even a pinch of cinnamon. This teaches flavor building and gives them creative control.
- Pastry Options – If you’re feeling ambitious, make a small batch of dough using whole wheat pastry flour for the health-conscious family members while keeping the standard version for others. You could even add a tiny pinch of cinnamon to one batch and leave another plain.
Scaling for Different Family Sizes
The recipe as written makes 24 tarts, which works beautifully for a family of 4 with leftovers. But family sizes vary, and so do appetites. Let me help you scale this:
For a family of 2: Make half of everything. Use 1⅛ cups flour, ¼ cup shortening, ¼ cup butter, 3 tablespoons ice water for pastry. For filling, use ¼ cup brown sugar, ¼ cup corn syrup, 2 tablespoons butter, ½ egg (seriously—just crack an egg and use half, freezing the other half for another use), ½ teaspoon vanilla, and ¼ teaspoon salt. This will yield about 12 tarts, which gives you fresh tarts plus some frozen ones.
For a family of 6: Make 1.5 times the recipe. Use 3⅜ cups flour, ¾ cup shortening, ¾ cup butter, 9 tablespoons ice water for pastry. For filling, use ¾ cup brown sugar, ¾ cup corn syrup, 6 tablespoons butter, 1½ eggs (whisk before measuring), 1½ teaspoons vanilla, and ⅜ teaspoon salt. This yields 36 tarts—enough for generous portions with plenty leftover.
For a family of 8 or more: Simply double the entire recipe. You’ll have 48 tarts, which honestly isn’t too many when you have teenagers in the house or you want to give some as gifts. Use two muffin tins and they bake at the same time on different racks.
Can I Store Butter Tart Recipe?
As a registered dietitian who works with busy families, I understand that part of what makes a recipe practical is whether you can make it ahead and enjoy it throughout the week. Butter tarts are wonderfully forgiving in terms of storage, which means you can make a double batch and still have fresh-tasting tarts five days later.
Room Temperature Storage (Best for Within 2 Days): Store cooled tarts in an airtight container at room temperature for up to 2 days. The pastry stays crispy and the filling stays soft. This is ideal for eating them fresh.
Refrigerator Storage (Best for Up to 5 Days): Place cooled tarts in an airtight container and refrigerate for up to 5 days. The filling keeps beautifully, though the pastry gradually softens. For lunchboxes, grab one straight from the fridge and it will be ready to eat by lunchtime, having warmed to a pleasant texture. Kids often prefer them slightly cool from the fridge anyway.
Freezer Storage (Best for Up to 3 Months): Wrap completely cooled tarts individually in plastic wrap, then place them in a freezer-safe container or bag. They freeze beautifully for up to 3 months. To thaw, simply leave them at room temperature for 2-3 hours, or unwrap one and microwave for 20-30 seconds if you’re in a hurry. They taste almost as fresh as the day they were made.
Make-Ahead Pastry Tip: You can also freeze unbaked tart shells. Prepare the dough, cut and press it into muffin cups, then freeze the whole tin overnight. Once frozen solid, pop the shells out and store them in a freezer bag for up to 3 months. Bake directly from frozen, adding 2-3 minutes to your bake time.
Lunchbox Pro Move: Pack a frozen tart in your child’s lunchbox in the morning. By lunchtime, it will have thawed to perfect eating temperature without needing any refrigeration equipment. The tart itself acts as a natural coolant for other items in the box.
Nutrition Information
According to USDA nutrition data, one butter tart (based on this recipe yielding 24 tarts) contains approximately 185 calories, 9 grams of fat, 24 grams of carbohydrates, and 2 grams of protein. The filling provides quick energy from the corn syrup and sugar, while the egg contributes choline, which supports brain development and memory in growing children.
Now, I want to be honest with you as both a dietitian and a parent: butter tarts are a treat, not an everyday food. But treats made at home and made together are developmentally different from store-bought treats consumed alone. The nutrients matter, yes, but the emotional nourishment of creating and sharing food together matters just as much for your family’s overall health.
Expert’s Nutritional Tip: The filling contains both saturated fat (from butter and eggs) and simple sugars, which makes these energy-dense treats—perfect for active kids and athletes. However, the pastry made with a mixture of shortening and butter creates superior mouth-feel while shortening alone would reduce saturated fat slightly. My professional recommendation is to enjoy butter tarts as the occasional treat they’re meant to be, alongside plenty of whole foods. For a more frequent baking option, consider my Baked Lemon Donut Recipe, which provides a lighter option.
What to Serve Alongside for a Complete Family Meal
Butter tarts are rich, sweet treats best served with simple accompaniments that balance their intensity. I often think about how my mother paired her tarts—never with heavy foods, always with something that cleansed the palate and made the moment feel special. Here are my tested pairings:
- Cold Milk – The classic pairing. Whole milk works beautifully because its fat content complements the richness of the tart, and the cold temperature provides nice contrast to warm pastry. Children almost universally enjoy this pairing.
- Vanilla Ice Cream – Warm tart meets cold ice cream. The filling stays slightly gooey when warmed, and the ice cream melts into the syrup. This transforms butter tarts into a dessert-dessert.
- Strong Brewed Tea – Herbal tea, black tea, or even strong green tea cuts through the sweetness beautifully. This is more of a family moment for adults, but it’s lovely for older kids and teenagers learning to enjoy sophisticated flavor combinations.
- Fresh Fruit – Serve tarts alongside fresh berries or sliced apples. The acidity and freshness of fruit provide excellent balance to the sweet filling. Kids are more likely to eat fruit when it’s part of the same “special moment” as the treat.
- Savory Snacks – I love serving butter tarts as part of an afternoon tea or snack station alongside a savory element like cheese or nuts. This prevents the tarts from feeling like “just dessert” and creates a more balanced experience. Try pairing with my Baked Mac N Cheese Recipe for a surprising but delicious contrast.
Common Mistakes to Avoid
After years of teaching families to cook, I’ve noticed the same mistakes appearing again and again. These aren’t failures—they’re just opportunities to understand the “why” behind each step. Let me save you some troubleshooting:
Mistake 1: Warm Fat in the Pastry – This is the most common issue. You’ll notice the pastry becoming tough, dense, and hard to roll instead of tender and flaky. The solution is simple: keep your butter and shortening ice cold. Some people even freeze their food processor bowl for 10 minutes before use. Cold fat is non-negotiable for flaky pastry—this isn’t a suggestion, it’s the foundation of the entire recipe.
Mistake 2: Overmixing the Dough – When pastry dough is overworked, the gluten develops too much, creating tough results. You’ve seen this happen if your dough is smooth and elastic instead of crumbly and tender. The fix: handle dough minimally. A few pulses in the processor, gentle tossing with a fork, and minimal kneading. Your goal is dough that barely holds together.
Mistake 3: Skipping the Chill Before Baking – Some home bakers rush this step and place warm dough directly into the hot oven. The result is pastry that spreads instead of puffing, creating flat, tough tarts instead of crispy-edged beauties. Those 15-20 minutes in the freezer are crucial—the cold helps the pastry puff and prevents the fat from melting too quickly.
Mistake 4: Removing Tarts Too Soon – Warm, freshly-baked tarts look set but they’re still soft inside. Trying to remove them immediately causes them to stick to the pan and potentially tear. Let them cool completely on the rack. Yes, this takes patience, but it prevents frustration and wasted tarts.
Seasonal Variations
One of the joys of making butter tarts regularly is adapting them to the seasons and what’s available. This keeps the recipe from becoming boring and teaches kids to think about food seasonally—a skill that helps them develop a deeper relationship with cooking.
Spring Variation: Use candied lemon peel instead of raisins in the filling. Add a tiny pinch of lemon zest to the pastry dough. The bright, fresh flavor feels appropriate for spring and appeals to kids who like citrus. You could also add fresh lemon juice to the filling mixture—about ½ teaspoon—for extra brightness.
Summer Variation: Substitute dried blueberries or dried strawberries for raisins. Add ½ teaspoon of almond extract instead of vanilla to the filling. The berry-almond combination tastes like summer and feels lighter than traditional versions. Kids often love berry flavors, and this variation looks beautiful when you can see the colorful berries inside.
Fall Variation: Add ½ teaspoon of cinnamon and ¼ teaspoon of nutmeg to the filling. Use chopped pecans instead of raisins—pecans feel very autumnal. You could also add ½ teaspoon of maple extract along with the vanilla. This version tastes like a cozy fall afternoon.
Winter Variation: Add ½ teaspoon of peppermint extract or a pinch of ground ginger and cloves to the filling. Use dark chocolate chips instead of raisins. This variation feels festive and seasonal without being explicitly holiday-focused. Kids love the spice notes, and the chocolate makes it feel extra-special.

Butter Tart Recipe
Ingredients
For the Pastry Shells
- ½ cup unsalted butter (very cold, cut into small cubes
- 1 tablespoon brown sugar adds subtle sweetness and helps create golden color
- 6 tablespoon ice water (approximately
- 2¼ cup all-purpose flour (or use pastry flour for extra-tender crusts
- ½ teaspoon salt enhances all other flavors without tasting salty
- ½ cup vegetable shortening (very cold, cut into small cubes
For the Filling
- 1 large egg (room temperature for even mixing
- ¼ teaspoon salt balances sweetness and brings out depth
- ½ cup corn syrup creates that signature caramel-like consistency and shine
- ½ cup lightly packed brown sugar (the packed measurement matters
- 1 teaspoon pure vanilla extract (not imitation
- ¼ cup unsalted butter melted and slightly cooled before adding to egg
- ½ cup raisins or substitute with ½ cup chopped pecans, walnuts, or chocolate chips based on family preference
Instructions
Step 1: Prepare the Pastry Dough
- Start by gathering your cold butter and shortening in small cubes and placing them in the freezer while you measure your flour, salt, and brown sugar. Cold fat is essential for flaky pastry—this is the most important step, and I want you to understand why. When cold fat pieces melt in the oven, they create steam pockets that make the pastry light and crispy. If your fat is warm, it blends smoothly into the flour and you get tough, dense pastry instead. Add your flour, salt, and brown sugar to a food processor. If you have children helping, this is a great moment for them to pour the flour in and watch the processor mix things—but keep hands far away from the blade. Pulse the flour mixture a few times just to combine. Now add your cold butter and shortening cubes and pulse until the mixture looks like coarse breadcrumbs or peas. This should take about 10-15 pulses. You want to still see small pieces of fat—you're not trying to create a smooth dough yet.
Step 2: Add Water and Bring the Dough Together
- Sprinkle 6 tablespoons of ice water over the flour mixture and pulse gently—just 3-4 pulses. Open the processor and toss the mixture with a fork. If it looks crumbly and won't hold together when you squeeze it, add 1 more tablespoon of water and toss again. Your goal is dough that just barely holds together when pressed, not dough that forms a ball. This is critical: do not overwork the dough by over-pulsing or handling it too much, or your pastry will become tough instead of tender. Kids love this step because they get to use the fork like they're really helping. Let them toss and check if the dough is ready. It teaches them to recognize texture, which is a crucial cooking skill.

Step 3: Chill the Dough
- Divide your dough into two equal portions and shape each into a disk about 1 inch thick. Wrap each disk tightly in plastic wrap and refrigerate for at least 30 minutes. This is actually a perfect pause point if your family wants to take a break before continuing. You can make the filling during this time, or you can chill the dough for up to 48 hours if you want to bake the tarts another day. Pro tip: I often prepare the dough on Saturday morning and bake tarts on Sunday afternoon. This makes the whole process feel less rushed and more like what it actually is—a leisurely family activity.
Step 4: Roll and Cut the Pastry
- When you're ready to continue, flour your work surface lightly and remove one disk of dough from the fridge. Let it sit at room temperature for about 5 minutes—this makes it easier to roll without cracking. Using a rolling pin, gently roll the dough to about ⅛-inch thickness. If you have children rolling, supervise closely and make sure they understand that the dough should be rolled gently, not aggressively, to keep it flaky. Using a 4-inch round cutter (or a drinking glass works in a pinch), cut circles from the dough. Gather scraps, gently re-roll them, and cut more circles. You should get about 12 circles per disk, giving you 24 tarts total.
Step 5: Line Your Muffin Cups
- Fit each pastry circle gently into a muffin cup, pressing it to the bottom and sides. Older children can do this independently, but younger children need help to avoid tearing the dough. The dough doesn't need to come all the way to the top of the cup—it should sit about halfway up the sides. Place the lined muffin tins in the freezer for at least 15 minutes while you prepare the filling. Cold pastry going into a hot oven is the secret to maximum flakiness. This is not a step to skip.
Step 6: Make the Filling
- In a medium bowl, whisk together your brown sugar, corn syrup, melted butter, egg, vanilla extract, and salt until completely smooth and well combined. This should take about 1-2 minutes of whisking. Let kids do the whisking—it's safe, it's satisfying, and they get to watch the ingredients transform into something that looks completely different from what went in. Take a moment here to talk with your kids about what's happening. The egg is helping bind everything together. The corn syrup is what creates that glossy, caramel-like look and texture. The vanilla adds a depth of flavor you can't quite identify but definitely improves everything. These little moments of explanation turn cooking into learning.
Step 7: Add Mix-Ins and Customize
- This is where customization happens and where picky eaters suddenly become willing participants. Sprinkle raisins (or your chosen substitute—pecans, walnuts, or chocolate chips) into a single layer at the bottom of each cold pastry shell. This prevents mix-ins from sinking to the bottom during baking and gives every bite something interesting. If you have multiple children with different preferences, divide the prepared muffin tins now. Half can have raisins, a quarter can have pecans, and a quarter can have chocolate chips. Each child gets to see their preference going into their tarts. This ownership transforms the entire experience.
Step 8: Fill and Bake
- Pour the syrup mixture into each pastry cup until it comes about two-thirds of the way up the sides. Warn older children that this liquid is hot (from the melted butter) and be extremely careful around younger kids during this step. You can use a small measuring spoon or a ladle to make pouring easier and less messy. Don't overfill—if the mixture reaches the rim of the cup, it will bubble over during baking and make a mess in your oven. Place the filled muffin tins on the lower shelf of a preheated 425°F oven. Bake for 12-15 minutes, until the pastry is golden brown and the filling has puffed up and set slightly. You'll see the filling bubble gently—that's exactly what you want. The filling will firm up more as it cools. If your oven runs hot, check at 12 minutes. If it runs cool, you might need the full 15 minutes.
Step 9: Cool and Remove
- This is the hardest part for kids—waiting. Let the tarts cool completely on a wire rack before attempting to remove them from the muffin tin. I know this feels eternal when they smell this good, but warm tarts are still soft inside and will stick to the pan if you try to remove them too early. Completely cooled tarts slip out of the cups easily and have set to the proper texture inside—still slightly gooey but stable enough to hold its shape. Once cooled, run a thin knife around the edge of each tart and gently pop it out of the muffin cup. If you have a stubborn tart, place the entire muffin tin back in the oven at 350°F for 2-3 minutes to slightly warm the pan, which helps release the pastry.
FAQs
Can I make the dough ahead of time?
Absolutely. Prepare the dough, wrap it tightly in plastic wrap, and refrigerate for up to 48 hours or freeze for up to 3 months. This is actually my preferred method because it makes the actual baking day feel less chaotic. Thaw frozen dough in the refrigerator overnight before rolling. Many busy families find that making dough on Sunday evening and baking tarts on Friday evening creates a nice rhythm for the week.
My filling is too thin or didn’t set properly. What went wrong?
The most common cause is that the tarts didn’t bake long enough. The filling needs the full 12-15 minutes at 425°F to set properly. It should puff up in the oven and look slightly jiggly in the center but not liquid. If your oven runs cool (check with an oven thermometer), you might need 16-18 minutes. Additionally, opening the oven door frequently during baking lets heat escape and prevents proper setting. Resist the urge to peek until at least 12 minutes have passed.
Can I make these without corn syrup?
You can substitute all corn syrup with maple syrup or honey, though the texture will be slightly different—less caramel-like and more liquid. Alternatively, use three-quarters corn syrup and one-quarter molasses for a deeper flavor. Some people use equal parts corn syrup and honey for a balance. The corn syrup is important for the classic butter tart texture, but these substitutes work if you have dietary preferences or allergies. The filling won’t set quite as firmly, so you’ll need to cool tarts completely before removing them from the tin.
Why do my tarts stick to the muffin tin?
Sticky tarts usually mean they weren’t cooled completely before removal, or the muffin tin wasn’t properly prepared. Make absolutely sure your muffin tin is clean and dry before use—any moisture can cause sticking. Let tarts cool completely on a rack (usually 45-60 minutes depending on your kitchen temperature) before attempting removal. If you’re still having trouble, lightly grease the muffin cups with cooking spray or butter before adding the pastry—this doesn’t affect taste and prevents frustration.
How do I make butter tarts with my picky eater who won’t try new things?
Start with just making the pastry shells together. Even if your child refuses to eat the filling, making the shells is valuable—they’re learning to cook, seeing the transformation of ingredients, and building confidence in the kitchen. Then, set up the customization station where they choose the exact mix-ins that go into their tart. A child who selects dark chocolate chips instead of raisins is far more likely to eat a tart filled with their chosen ingredient than one you decided for them. Sometimes the most picky eaters need to feel in control before they’re willing to try something new.
More Family-Friendly Recipes
- this simple cake – A slightly fancier dessert that’s still family-friendly and showcases how to make restaurant-quality treats at home
- Basic Bun Recipe – A foundational bread recipe that teaches kids yeast baking and creates wonderful moments around the dinner table
- my oven-baked chicken – A savory main dish that balances the sweetness of your dessert course and teaches about balancing flavors in a meal
Butter tarts represent something I hold dear as both a registered dietitian and a mother: the understanding that the healthiest diet includes joy, tradition, and the shared experience of creating something delicious together. These little golden pastries with their gooey centers aren’t just food—they’re edible reminders that love is built in kitchens, one generation at a time.
I hope you and your family gather around butter tarts, make messes with flour, laugh at things that don’t go perfectly, and taste something that says “I took time to make this for you.” That’s where real nourishment happens. That’s where memories become delicious.
Happy Cooking!