
This post contains affiliate links. As an Amazon Associate I earn from qualifying purchases.
I still remember standing at my mother’s kitchen counter at fifteen, watching her create magic in a single skillet. She’d sear chicken until it gleamed golden, then somehow transform simple pasta into something that tasted like pure comfort. That one-pan approach taught me everything about how heat, timing, and the right technique can turn basic ingredients into a meal that nourishes both body and soul. Today, I’m sharing that same philosophy with you through this chicken and orzo recipe—a dish that has fed my own family more times than I can count. Like many beloved chicken recipes that come straight from the heart, this one combines protein, carbohydrates, and fat in perfect balance, creating a meal that sustains you for hours.
The Food Science Behind Perfect Chicken and Orzo
As a registered dietitian, I’ve learned that the best recipes aren’t accidents—they’re built on solid food science. This chicken and orzo recipe works because it respects three critical principles: the Maillard reaction, moisture management, and proper protein cooking temperatures. When you sear chicken thighs in butter, you’re creating hundreds of new flavor compounds through that golden crust. Then, by cooking the orzo in that same pan with the residual fat and fond, you’re building layers of flavor that make every single bite taste intentional and restaurant-quality. The beauty here is that it’s not complicated—it’s just precise.
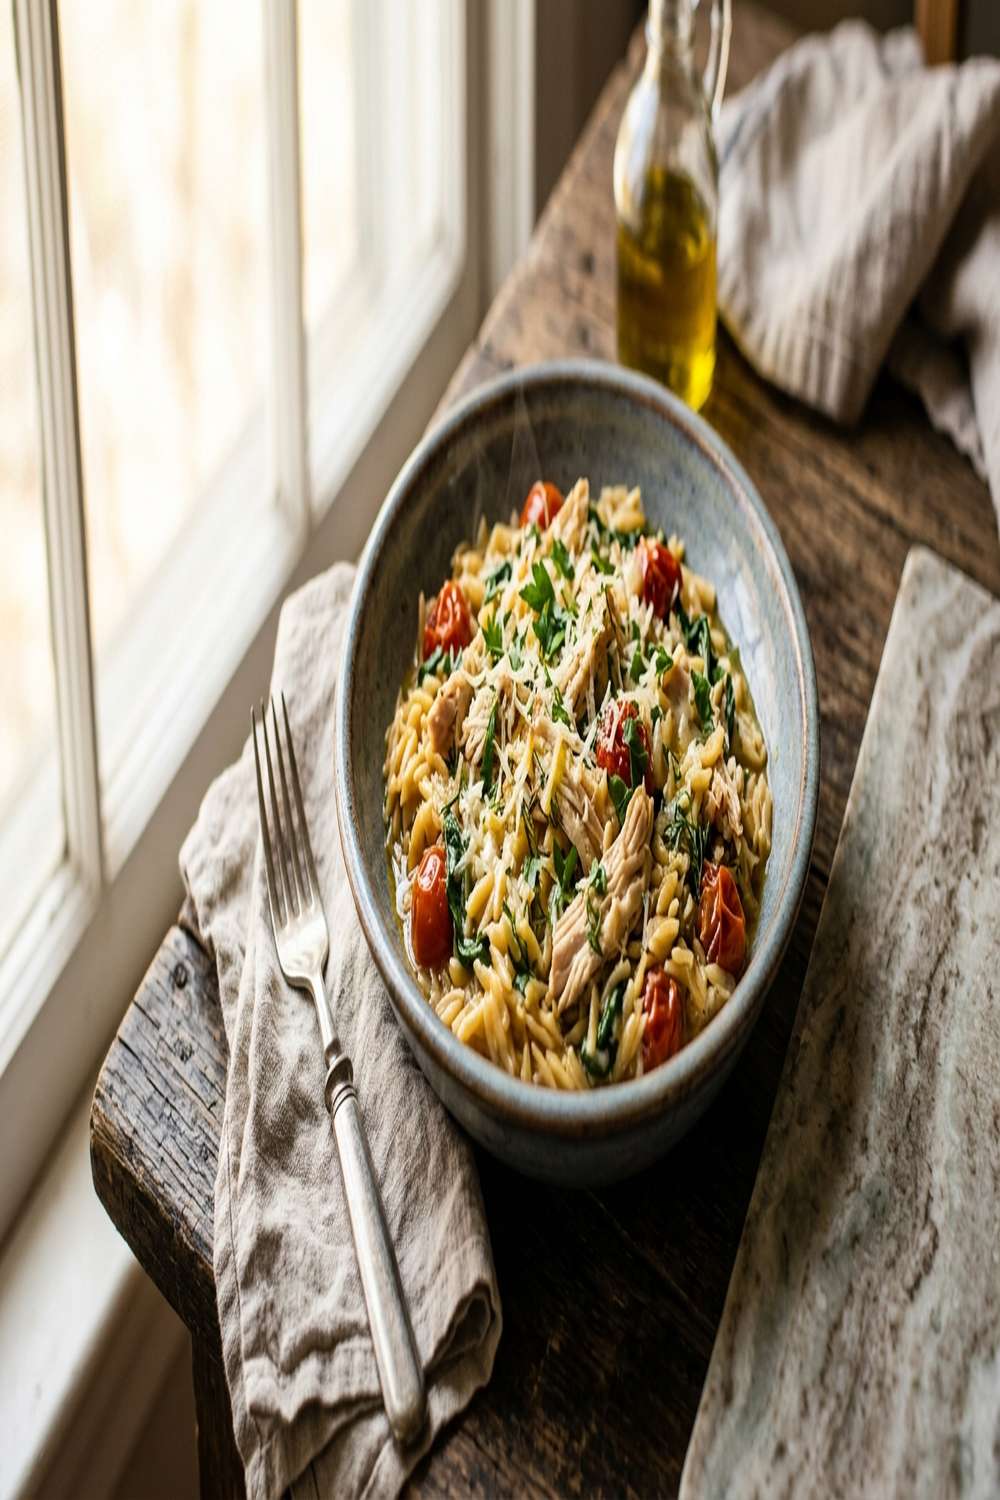
The Science Behind Chicken and Orzo Recipe
The Maillard reaction is what transforms this dish from ordinary to exceptional. When chicken thighs hit a hot butter-lined pan at medium heat, the proteins and sugars on their surface break down and recombine, creating over 1,000 new flavor compounds. That’s why a golden-brown crust tastes so dramatically different from pale, steamed chicken. The butter matters here too—its milk solids brown at the edges, adding a nutty depth that olive oil alone cannot provide. Then, when you toast the orzo in that golden butter, the pasta’s starches begin to caramelize slightly, creating a subtle toasted grain flavor that carries through the entire dish. Finally, when you pour in the stock, those caramelized bits dissolve into the liquid, creating what professional chefs call “fond”—pure, concentrated flavor that seasons everything without a pinch of extra salt.
Why This Recipe Is Nutritionally Superior
This isn’t just delicious—it’s genuinely nourishing. I designed this recipe specifically for people who want real food that actually fuels their bodies. The combination of chicken thighs, whole-grain orzo, and butter creates a complete macronutrient profile that keeps blood sugar stable and provides sustained energy.
- Complete protein (25-30g per serving) – Chicken thighs contain all nine essential amino acids plus selenium and B vitamins; USDA data shows thighs provide more bioavailable iron than breasts
- Complex carbohydrates (35-40g per serving) – Orzo provides sustained energy release, plus resistant starch that supports digestive health
- Healthy fats (12-15g per serving) – Butter and chicken fat improve nutrient absorption of fat-soluble vitamins A, D, E, and K
- B-complex vitamins – Chicken provides niacin, B6, and B12; orzo adds thiamine and folate for energy metabolism
Ingredient Deep Dive
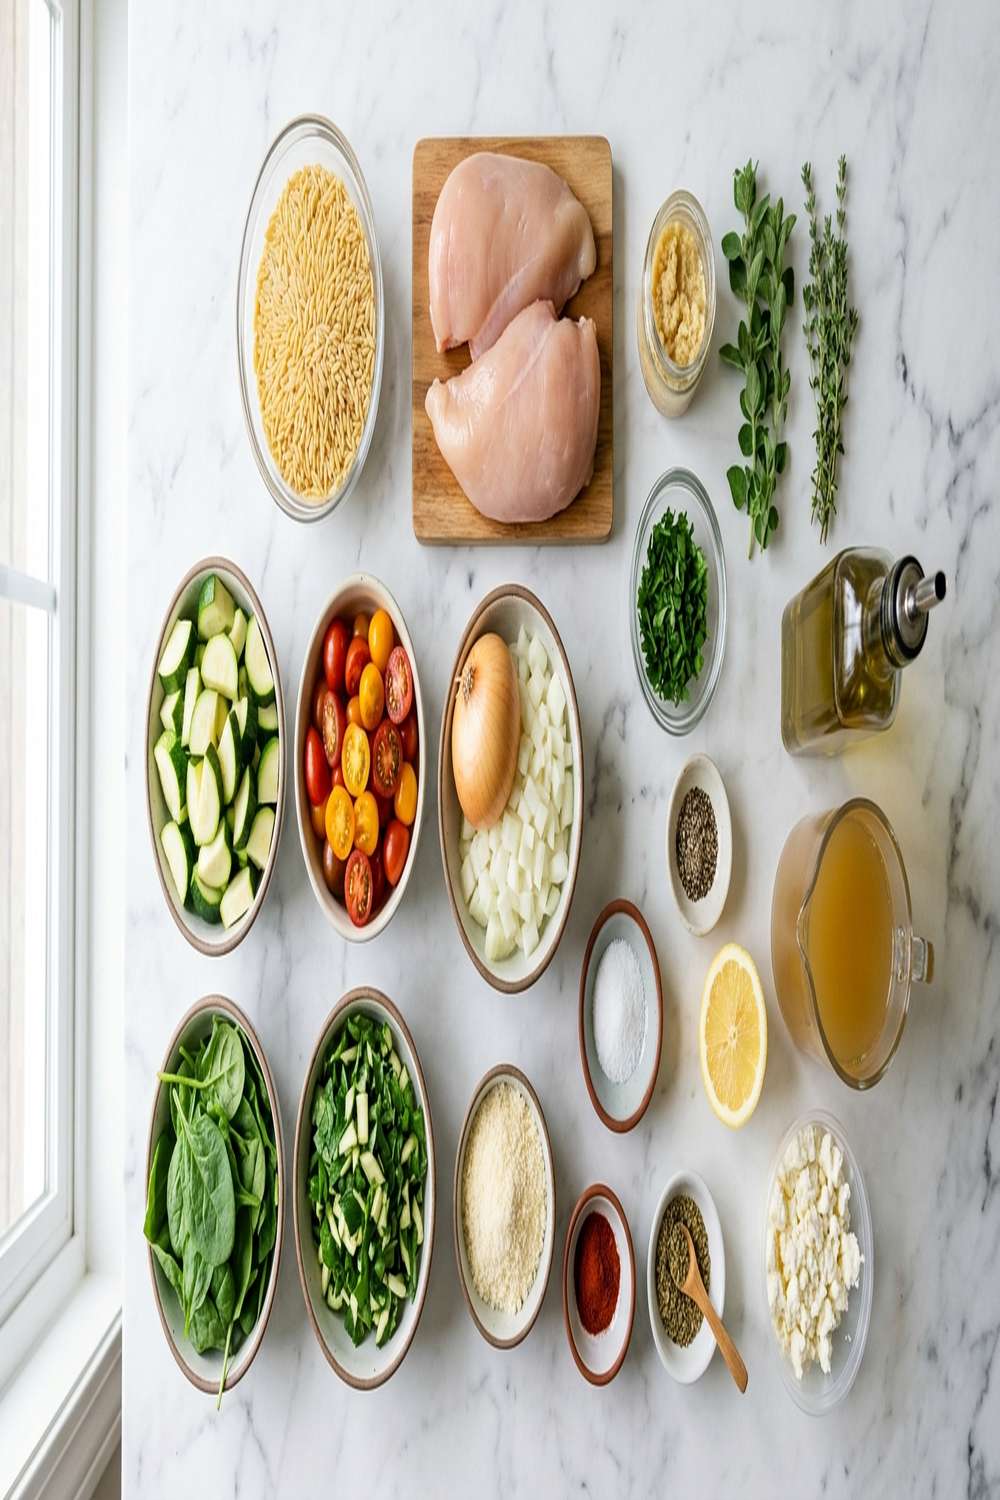
Every ingredient in this recipe serves a specific purpose. I’ve chosen each one because it contributes to both flavor and nutrition. Let me walk you through exactly what each ingredient does and why it matters.
- 1 pound uncooked orzo pasta (small rice-shaped pasta that absorbs broth while maintaining texture; toasts beautifully to develop nutty flavors)
- Kosher salt and fresh ground pepper (kosher salt dissolves evenly; pepper adds piperine, which enhances nutrient absorption)
- 3 tablespoons unsalted butter (provides fat for the Maillard reaction and browning; milk solids create nutty flavor depth)
- 4 garlic cloves, minced (releases allicin when minced, creating complex savory notes; mellows and sweetens during the cooking process)
- Fresh parsley, chopped (adds bright flavor, chlorophyll for liver support, and visual appeal that makes us eat more mindfully)
- Parmesan cheese, grated (umami flavor from glutamates; calcium for bone health; adds creamy richness without cream)
- 32 ounces chicken stock (provides moisture and dissolved collagen that creates silky mouthfeel; sodium content seasons the entire dish naturally)
- 1 pound boneless, skinless chicken thighs (darker meat contains more myoglobin and fat, staying juicy even with longer cooking; reaches safe temperature at 165°F internally)
- 2 tablespoons unsalted butter, melted (finishing fat that adds richness and helps fat-soluble vitamins reach your bloodstream more efficiently)
The Technique: How to Make Chicken and Orzo Recipe Properly
This recipe only works when you understand the “why” behind each step. I’m going to teach you the professional technique I use in my own kitchen, with the reasoning behind every decision. The beauty is that this is actually stress-free once you understand the science.
Step 1: Prepare Your Chicken and Heat Your Pan Properly
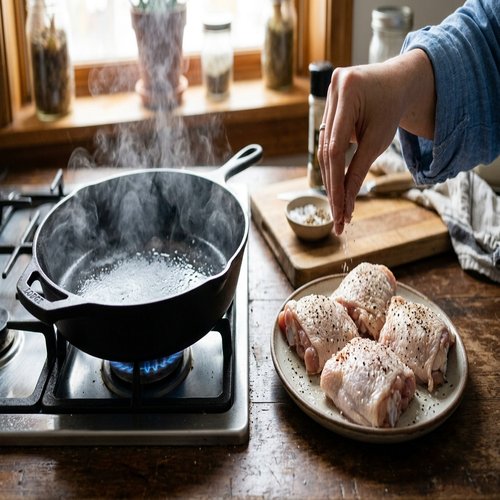
Start by placing 3 tablespoons of unsalted butter in a large cast iron or ceramic skillet. Heat it over medium heat until it foams and the foaming subsides—this takes about 2-3 minutes. You’ll know it’s ready when you smell that nutty, toasted aroma. While the butter heats, pat your chicken thighs completely dry with paper towels. This is non-negotiable. Moisture on the chicken surface creates steam, which prevents browning and locks in that metallic, boiled taste. Sprinkle all sides generously with kosher salt and fresh cracked pepper. The salt begins penetrating the muscle tissue immediately, helping it retain moisture during cooking through a process called osmosis.
Step 2: Sear the Chicken for a Golden Crust
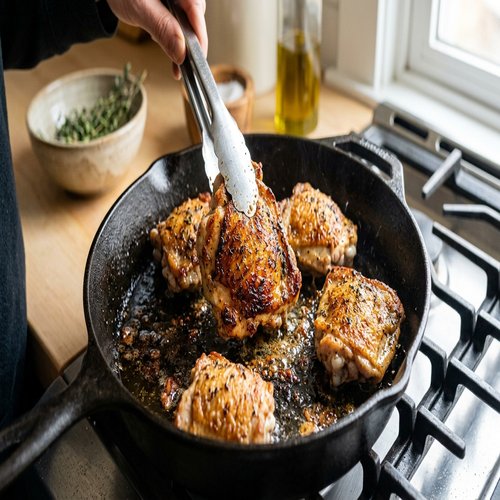
When your butter is foaming and fragrant, carefully place the chicken thighs skin-side down into the pan. You’ll hear an immediate sizzle—that’s the sound of the Maillard reaction beginning. Do not move the chicken. Leave it undisturbed for 3 to 4 minutes. This is when all that browning magic happens. Peek underneath at the 3-minute mark. You’re looking for deep golden-brown color, almost caramelized at the edges. Then flip each piece and cook the other side for another 3 to 4 minutes until equally golden. The internal temperature doesn’t need to reach 165°F at this stage—that happens during the braising step. Once both sides are beautifully golden, transfer the chicken to a clean plate.
Step 3: Toast the Orzo to Build Flavor Layers
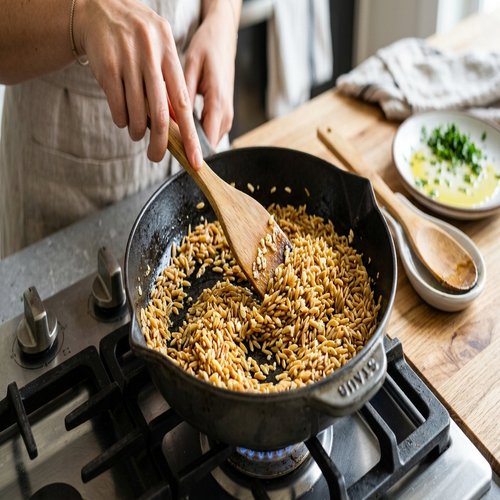
Look at your skillet now. There should be golden butter and chicken drippings—this is liquid gold. If it looks dry, add 1 tablespoon more butter. Add your uncooked orzo to the pan and stir constantly for about 1-2 minutes. The pasta will drink up that butter and begin toasting. You’re aiming for a light golden color on the pasta grains. Add your minced garlic and stir continuously for another minute until the garlic becomes fragrant but not brown. The heat should still be medium, never higher. This toasting step creates what we call “toasted grain notes”—complex flavors that make people ask what secret ingredient you used.
Step 4: Add the Stock and Braise Everything Together
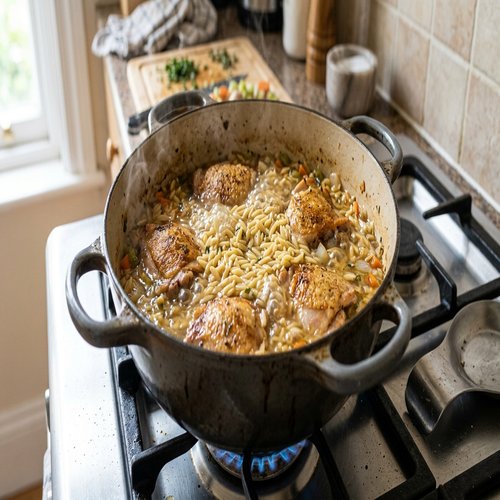
Now pour in your 32 ounces of chicken stock slowly. Stir well to distribute the orzo evenly. The mixture will bubble and steam as the cold stock hits the hot pan—this is exactly right. Nestle your seared chicken thighs back into the pan, pressing them gently into the orzo so they’re partially submerged. Bring the entire mixture to a boil. You’ll see the liquid churning and the orzo beginning to soften at the edges. Once it reaches a full boil, reduce the heat to medium-low and cover with a lid or even a sheet of foil. This transforms your skillet into a braising vessel. The cover traps steam, which cooks the chicken gently while the orzo absorbs liquid evenly.
Step 5: Monitor Carefully for Perfect Doneness
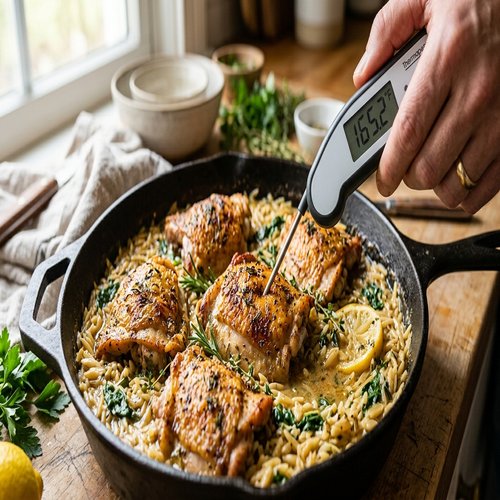
Check the pan at the 12 to 15-minute mark. Every stovetop simmers differently, so timing isn’t absolute. Lift the lid carefully and look for two things: the liquid level should be mostly absorbed (a few tablespoons of broth still visible is perfect), and the orzo should look creamy and tender, not crunchy. If there’s still lots of liquid and the pasta is firm, re-cover and cook another 3-5 minutes. Insert an instant-read thermometer into the thickest part of a chicken thigh without touching bone. You’re aiming for 165°F internal temperature. Most thighs reach this around the 15-18 minute mark, but larger pieces may need 20 minutes. Remove from heat the moment the chicken hits 165°F—cooking beyond this dries it out.
Step 6: Finish With Butter, Herbs, and Cheese
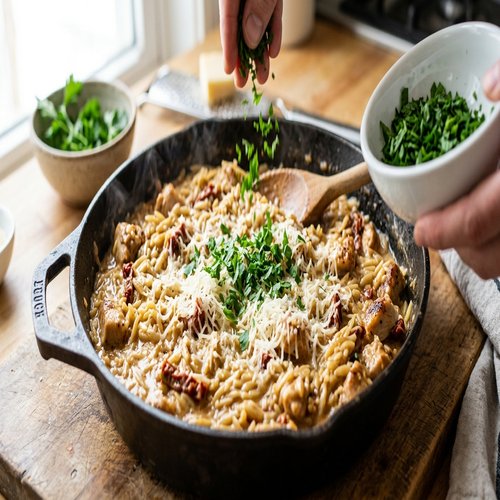
Drizzle 2 tablespoons of melted unsalted butter over the entire dish. This enriches the braising liquid and creates a silky, luxurious mouthfeel. Scatter fresh chopped parsley generously over everything. Sprinkle with freshly grated Parmesan cheese. The herb’s bright chlorophyll cuts through the richness while the cheese adds umami depth and calcium. Serve immediately while the steam rises and the aroma fills your kitchen with comfort.
Professional Tips From the Kitchen
- Use chicken thighs, never breasts – Thighs contain more collagen and fat, which means they stay juicy and tender even if you slightly overcook them. Breasts will turn dry and stringy because they lack sufficient fat to braise properly.
- Don’t skip the drying step – Moisture is browning’s enemy. Even if it seems excessive, pat your chicken completely dry. This single step determines whether you get restaurant-quality crust or pale, steamed chicken.
- Taste before serving – Since orzo absorbs liquid, it also absorbs seasoning. Taste a bite before serving. You may need an extra pinch of salt or fresh pepper. This final adjustment takes thirty seconds and transforms the dish from good to exceptional.
- Use cast iron when possible – Cast iron distributes heat more evenly than stainless steel, meaning more consistent browning and fewer hot spots that burn the orzo at the edges.
- Stock temperature matters – Room-temperature or warm stock helps maintain your cooking temperature better than cold stock straight from the refrigerator. There’s no need to heat it, but don’t use it cold.
Ingredient Substitutions and Their Impact
- Chicken thighs → Chicken breasts – Breasts will cook faster (12-15 minutes total) but will be noticeably drier. You’ll need to watch them carefully and remove them at exactly 165°F. The final dish will be leaner (less fat), so increase the finishing butter to 3 tablespoons for richness.
- Unsalted butter → Olive oil – You’ll lose the nutty, toasted flavor that comes from butter’s milk solids. The dish becomes lighter and brighter, which works beautifully but tastes quite different. You’ll need about 4 tablespoons of quality extra-virgin olive oil total.
- Chicken stock → Vegetable stock – The flavor becomes lighter and more delicate. Vegetable stock works, but the final dish loses some depth. If using vegetable stock, add 1 teaspoon of soy sauce or fish sauce to restore umami.
- Parmesan → Pecorino Romano – Romano is sharper and saltier. Use about 25% less than the recipe calls for. The dish will be punchier and more assertive, less creamy.
- Fresh parsley → Fresh basil – Basil creates an entirely different flavor profile—more Italian, more aromatic. Use the same amount, but add it just before serving so the heat doesn’t turn it black and bitter.
Dietary Adaptations
For gluten-free: Replace traditional orzo with gluten-free rice-shaped pasta or quinoa. Rice-shaped gluten-free pasta cooks slightly faster (start checking at 12 minutes), and may require 1-2 tablespoons less liquid since it absorbs differently. Quinoa creates a different texture—more toothsome, less creamy—but adds complete protein and makes this dish even more nutrient-dense.
For dairy-free: Replace butter with avocado oil or ghee (which is technically dairy-free since the milk solids are removed). Skip the Parmesan entirely or use nutritional yeast for umami and B vitamins. The dish will be lighter but still deeply flavorful. Add 1 teaspoon of white miso paste dissolved in the stock for richness that replaces the cheese’s umami.
For lower-carb: Replace orzo with shirataki noodles or cauliflower rice. If using shirataki, reduce the stock to 24 ounces and skip the toasting step—just add them directly to the braising liquid. With cauliflower rice, reduce stock further to 20 ounces since rice releases water as it cooks. This adaptation cuts carbs from 40g to 8g per serving while maintaining protein and fat.
For vegan: Replace chicken thighs with extra-firm tofu pressed and cut into bite-sized pieces, or use king oyster mushrooms cut into thick coins for a meaty texture. Replace butter with refined coconut oil or vegan butter. Use vegetable stock and miso paste instead of Parmesan. The cooking time remains identical since you’re still searing the protein and braising together.
Can I Store Chicken and Orzo Recipe?
Yes, and it actually improves overnight. As it sits, the orzo absorbs more of the braising liquid, becoming creamier, and the flavors meld more deeply. Store it in an airtight glass container in the refrigerator for up to 4 days. The chicken stays tender and moist because it’s surrounded by liquid. To reheat, place it in a covered skillet over medium-low heat for 5-7 minutes, stirring occasionally, until warmed through. Add a splash of water or extra stock if it’s dried out. You can also freeze portions in airtight containers for up to 3 months. Thaw overnight in the refrigerator before reheating. The texture remains excellent because the orzo has already absorbed the liquid—there’s no separate sauce to break down during freezing.
Nutrition Information
Per serving (approximately 1.5 cups, serves 4): This recipe provides approximately 485 calories, 38 grams of protein, 42 grams of carbohydrates, and 14 grams of fat, with 4 grams of dietary fiber. The protein-to-carb ratio creates sustained energy that keeps blood sugar stable for 3-4 hours, making this perfect for a mid-day or evening meal when you need to stay focused. The combination of complete protein from chicken, complex carbs from orzo, and fat from butter means you’ll feel satisfied for hours—there’s no blood sugar crash or energy dip an hour later. According to USDA data, one serving provides approximately 35% of your daily B6, 28% of your daily niacin, and 22% of your daily selenium. The iron from chicken (3.2mg) is highly bioavailable because it’s heme iron from animal sources, meaning your body absorbs approximately 15-35% of it, compared to 2-20% from plant sources. This makes it an excellent choice for people managing iron levels.
What Can I Serve With Chicken and Orzo Recipe?
This one-pan dish is actually complete as served, but I love pairing it with complementary flavors that enhance without overwhelming. The braised, buttery richness of this recipe pairs beautifully with bright, acidic, or fresh elements that cleanse the palate and balance the meal nutritionally.
- Crispy roasted vegetables – The roasted caramelization of Brussels sprouts, carrots, or cauliflower creates textural contrast. Roast them with olive oil and garlic while your chicken cooks, and they’ll be ready simultaneously.
- Fresh green salad with lemon vinaigrette – The acidity cuts through the richness while raw greens add fresh enzymes and micronutrients. Make a simple vinaigrette with fresh lemon juice, Dijon mustard, and olive oil.
- Garlic bread or crusty bread – Because there’s braising liquid in this dish, you’ll want something to soak it up. A thick slice of toasted bread with just a rub of fresh garlic is perfect and adds minimal preparation.
- Roasted asparagus or green beans – These mild vegetables add nutritional balance and a slight earthiness that complements the herby parsley garnish beautifully.
- A simple baked potato – If you’re serving this as a main course and want extra starch, bake a potato alongside. It soaks up the braising liquid just like bread, with added magnesium and potassium.
Make-Ahead Guide
I love recipes that work with real-life schedules. Here’s how to build this meal strategically throughout your day or week. The day before: Combine your minced garlic, measured orzo, and kosher salt in a small container. Measure your chicken stock into a separate container. This takes 5 minutes and means your actual cooking time tomorrow is just 25 minutes. Two hours before: Remove your chicken from the refrigerator and pat it dry. Let it sit uncovered on a plate at room temperature. This brings it closer to room temperature, which means more even, faster browning and better texture. You can also chop your parsley and grate your Parmesan at this point. During your workday: Cook the entire recipe in a single skillet and divide into four portions once cooled slightly. Store in airtight glass containers. This becomes lunch or dinner for the next four days with zero reheating drama. The dish actually tastes better by day two or three as the flavors meld and the orzo becomes even creamier.
Expert’s Nutritional Tip
Here’s something I wish more people understood: the fat in this recipe is not something to fear—it’s something to celebrate. The butter and chicken fat serve three critical nutritional functions that most low-fat cooking completely misses. First, they’re necessary for absorbing fat-soluble vitamins A, D, E, and K from the chicken and vegetables. Without sufficient fat, your body essentially cannot absorb these nutrients, regardless of how much you eat. Second, fat triggers the release of cholecystokinin (CCK), a hormone that signals satiety to your brain. This is why you feel satisfied for hours after this meal and not hungry an hour later like you might be after a low-fat alternative. Third, the fat creates a slower, more stable glucose response. The protein, carbohydrate, and fat together mean blood sugar rises gradually and steadily, preventing the energy crashes that come from carbohydrate-alone meals. This is clinical nutrition working in a home kitchen.
Common Mistakes to Avoid
Mistake 1: Using chicken breasts instead of thighs. I understand the impulse—breasts seem leaner, more “healthy.” But breasts lack the collagen and fat necessary for braising. They’ll be dry no matter how carefully you time them. Thighs contain more myoglobin and collagen, meaning they stay juicy and tender. Nutritionally, yes, they contain more fat—but that fat is necessary for nutrient absorption and satiety. Don’t skip it.
Mistake 2: Overcrowding the pan. If your skillet is too small, the chicken steams instead of sears. The moisture trapped around the chicken prevents browning. Use a 12-inch skillet minimum. If your pan is smaller, cook the chicken in batches.
Mistake 3: Skipping the toasting step for orzo. Just dumping untoasted orzo into the broth creates a dish that tastes like plain pasta soup. The 1-2 minutes of toasting the dry orzo in butter creates hundreds of complex flavor compounds. This step takes 90 seconds and makes the difference between forgettable and unforgettable.
Mistake 4: Not checking the temperature at 12 minutes. Every stovetop behaves differently. A “simmer” on your stove may actually be a gentle boil on mine. Start checking at 12 minutes. Overcooked chicken becomes tough and dry. Slightly underdone orzo can be fixed with a few minutes more, but overcooked protein cannot be recovered.
Seasonal Variations
Spring version: Replace the fresh parsley with fresh tarragon or chervil. Add 1 cup of fresh spring peas or asparagus pieces directly into the braising liquid 3 minutes before the chicken is done. Add the zest of one lemon before serving. Spring feels lighter and brighter.
Summer version: Add fresh basil instead of parsley. Include cherry tomatoes (halved) and fresh corn kernels in the braising liquid. A squeeze of fresh lemon juice at the end brightens everything. This becomes almost Mediterranean.
Fall version: Replace 8 ounces of the chicken stock with dry white wine or apple cider. Add fresh thyme sprigs while the chicken braises. Include mushrooms (sliced), and finish with toasted nuts like walnuts or pecans. The earthiness of fall vegetables and herbs makes this feel like comfort food.
Winter version: Add root vegetables—carrots, parsnips, or small potatoes—directly to the braise. Replace fresh parsley with fresh rosemary or sage. Add a splash of balsamic vinegar (1 tablespoon) before finishing with butter. Winter demands heartier flavors and denser textures. Like many warming stovetop dinners that nourish you deeply, this version becomes pure soul food.
Chicken And Orzo Recipe
Ingredients
- 1 pound uncooked orzo pasta small rice-shaped pasta that absorbs broth while maintaining texture; toasts beautifully to develop nutty flavors
- Kosher salt and fresh ground pepper kosher salt dissolves evenly; pepper adds piperine, which enhances nutrient absorption
- 3 tablespoon unsalted butter provides fat for the Maillard reaction and browning; milk solids create nutty flavor depth
- 4 garlic cloves, minced releases allicin when minced, creating complex savory notes; mellows and sweetens during the cooking process
- Fresh parsley, chopped adds bright flavor, chlorophyll for liver support, and visual appeal that makes us eat more mindfully
- Parmesan cheese, grated umami flavor from glutamates; calcium for bone health; adds creamy richness without cream
- 32 ounce chicken stock provides moisture and dissolved collagen that creates silky mouthfeel; sodium content seasons the entire dish naturally
- 1 pound boneless, skinless chicken thighs darker meat contains more myoglobin and fat, staying juicy even with longer cooking; reaches safe temperature at 165°F internally
- 2 tablespoon unsalted butter, melted finishing fat that adds richness and helps fat-soluble vitamins reach your bloodstream more efficiently
Instructions
Step 1: Prepare Your Chicken and Heat Your Pan Properly
- Start by placing 3 tablespoons of unsalted butter in a large cast iron or ceramic skillet. Heat it over medium heat until it foams and the foaming subsides—this takes about 2-3 minutes. You'll know it's ready when you smell that nutty, toasted aroma. While the butter heats, pat your chicken thighs completely dry with paper towels. This is non-negotiable. Moisture on the chicken surface creates steam, which prevents browning and locks in that metallic, boiled taste. Sprinkle all sides generously with kosher salt and fresh cracked pepper. The salt begins penetrating the muscle tissue immediately, helping it retain moisture during cooking through a process called osmosis.
Step 2: Sear the Chicken for a Golden Crust
- When your butter is foaming and fragrant, carefully place the chicken thighs skin-side down into the pan. You'll hear an immediate sizzle—that's the sound of the Maillard reaction beginning. Do not move the chicken. Leave it undisturbed for 3 to 4 minutes. This is when all that browning magic happens. Peek underneath at the 3-minute mark. You're looking for deep golden-brown color, almost caramelized at the edges. Then flip each piece and cook the other side for another 3 to 4 minutes until equally golden. The internal temperature doesn't need to reach 165°F at this stage—that happens during the braising step. Once both sides are beautifully golden, transfer the chicken to a clean plate.
Step 3: Toast the Orzo to Build Flavor Layers
- Look at your skillet now. There should be golden butter and chicken drippings—this is liquid gold. If it looks dry, add 1 tablespoon more butter. Add your uncooked orzo to the pan and stir constantly for about 1-2 minutes. The pasta will drink up that butter and begin toasting. You're aiming for a light golden color on the pasta grains. Add your minced garlic and stir continuously for another minute until the garlic becomes fragrant but not brown. The heat should still be medium, never higher. This toasting step creates what we call "toasted grain notes"—complex flavors that make people ask what secret ingredient you used.
Step 4: Add the Stock and Braise Everything Together
- Now pour in your 32 ounces of chicken stock slowly. Stir well to distribute the orzo evenly. The mixture will bubble and steam as the cold stock hits the hot pan—this is exactly right. Nestle your seared chicken thighs back into the pan, pressing them gently into the orzo so they're partially submerged. Bring the entire mixture to a boil. You'll see the liquid churning and the orzo beginning to soften at the edges. Once it reaches a full boil, reduce the heat to medium-low and cover with a lid or even a sheet of foil. This transforms your skillet into a braising vessel. The cover traps steam, which cooks the chicken gently while the orzo absorbs liquid evenly.
Step 5: Monitor Carefully for Perfect Doneness
- Check the pan at the 12 to 15-minute mark. Every stovetop simmers differently, so timing isn't absolute. Lift the lid carefully and look for two things: the liquid level should be mostly absorbed (a few tablespoons of broth still visible is perfect), and the orzo should look creamy and tender, not crunchy. If there's still lots of liquid and the pasta is firm, re-cover and cook another 3-5 minutes. Insert an instant-read thermometer into the thickest part of a chicken thigh without touching bone. You're aiming for 165°F internal temperature. Most thighs reach this around the 15-18 minute mark, but larger pieces may need 20 minutes. Remove from heat the moment the chicken hits 165°F—cooking beyond this dries it out.
Step 6: Finish With Butter, Herbs, and Cheese
- Drizzle 2 tablespoons of melted unsalted butter over the entire dish. This enriches the braising liquid and creates a silky, luxurious mouthfeel. Scatter fresh chopped parsley generously over everything. Sprinkle with freshly grated Parmesan cheese. The herb's bright chlorophyll cuts through the richness while the cheese adds umami depth and calcium. Serve immediately while the steam rises and the aroma fills your kitchen with comfort.
Notes
FAQs
Why does my chicken come out tough and dry?
Three reasons typically cause this. First, you’re cooking it too long. Check at 12 minutes, not 20. Second, you’re using chicken breasts instead of thighs. Breasts lack sufficient fat and collagen for braising. Third, you’re not maintaining a true simmer. A rolling boil will overcook the chicken faster than you realize. Cover the pan, reduce heat to low, and you’ll see just a gentle bubble breaking the surface. That’s the right temperature.
Can I use boneless, skinless chicken breasts successfully?
Technically yes, but I wouldn’t recommend it. Breasts cook 3-5 minutes faster than thighs, so start checking at 10 minutes. You’ll need to watch them vigilantly because the margin between perfectly done and dry is about 30 seconds. If you must use breasts, pound them to even thickness first, which helps them cook uniformly. Better yet, simply purchase thighs. They cost less per pound and deliver superior results every time.
What if my orzo is still hard and crunchy at the end?
This means there wasn’t enough liquid, or your simmer was too high and evaporated the liquid too quickly. If you catch this issue while cooking, add another cup of stock immediately and re-cover. If you discover it after removing from heat, you can resurrect it. Place the skillet back on the stove, add 1 cup of warm stock, cover, and simmer for 5 more minutes. The orzo will absorb the liquid and soften.
How do I scale this recipe for more people?
This recipe easily doubles or triples. For 8 servings: use 6 tablespoons butter, 2 pounds chicken thighs, 2 pounds orzo, 8 cloves garlic, and 64 ounces stock. You’ll need a larger skillet or even a Dutch oven. Cooking time remains the same because you’re still achieving the same temperature and liquid absorption. The only variable is evaporation—a wider pan may evaporate slightly more liquid, so check at 15 minutes instead of 12.
Can I make this in a Dutch oven instead of a skillet?
Absolutely. Heat the Dutch oven on the stovetop and follow all the same steps—sear the chicken, toast the orzo, add stock. Then cover and move it to a 375°F oven for 15-20 minutes instead of simmering on the stovetop. The dry heat of the oven creates even more consistent cooking. Check that the internal temperature hits 165°F before removing from the oven. Many people prefer the Dutch oven method because it requires less active monitoring.
More Recipes You’ll Love
- my oven-baked chicken – Sweet and savory glazed chicken that’s equally forgiving and comforting
- Crispy Cheesy Potato Stacks – A beautiful side dish that pairs perfectly with braised proteins
- this cozy soup – Another one-pot wonder that demonstrates how proper broth technique creates magic
Making this chicken and orzo recipe is genuinely an act of self-love. You’re choosing to nourish yourself with real food, made with intention, that actually satisfies your body. Every time you sear that chicken until it’s golden, toast that orzo until it’s fragrant, and watch the magic happen in a single pan, you’re building confidence in your kitchen. That confidence spreads. You start believing you can cook other dishes. You start understanding how food works instead of just following orders. You create memories around your table that last far longer than the meal itself. That’s what my mother taught me in her kitchen, and that’s what I’m teaching you now. Happy Cooking!