This post contains affiliate links. As an Amazon Associate I earn from qualifying purchases.
Learning to make a cheese quesadilla isn’t just about this one dish—it’s about mastering a fundamental cooking technique that unlocks dozens of other recipes. I’m talking about the art of controlled heat melting and the perfect golden sear. Once you understand how to coax cheese into creamy perfection while achieving that crispy, golden exterior, you’ll find yourself making everything from baked mac and cheese to pressed panini sandwiches with confidence. This is the technique that separates home cooks from people who consistently create restaurant-quality meals in their own kitchens.
Master the Technique Behind the Cheese Quesadilla (And Never Struggle With Melting Cheese Again)
I still remember the exact moment this clicked for me—I was in my mother’s kitchen on a Tuesday afternoon, and she was making lunch for my younger brother. He was being picky that day, as kids do, and she pulled out two flour tortillas and some cheddar. But what struck me wasn’t the simplicity of the ingredients; it was the intentionality of her movements.
She didn’t rush. She didn’t crank the heat up high. She warmed her skillet slowly, added just enough butter to coat the pan evenly, and then watched—really watched—as the tortilla warmed through. When she added the cheese, she scattered it deliberately, almost medically, creating an even layer. Then she covered it with the second tortilla and waited for that magical moment when the cheese began melting from the residual heat.
She knew something I didn’t know then: controlling heat and understanding how cheese behaves under different temperatures is the secret to so many dishes. That afternoon, my brother ate every bite. Years later, after becoming a registered dietitian and working in clinical nutrition, I realized my mother had been teaching me texture science without using a single technical term.
That simple quesadilla became my foundation for understanding how to cook with dairy, how to achieve texture contrast, and how patience creates better food than speed ever will.
The Core Technique Explained
The core technique here is what I call “controlled-heat cheese melting with the sear-and-flip method.” It sounds fancier than it is, but here’s what’s actually happening: you’re using medium-high heat to warm your tortilla just enough to soften it and create a slight golden crust, while simultaneously allowing the cheese between two tortillas to melt gradually from both direct heat below and trapped steam heat from above.
This is different from high-heat searing because we’re not trying to shock the cheese into separation. We’re asking it to transition smoothly from solid to creamy. The butter (or oil) serves as a heat conductor—it helps distribute warmth evenly and prevents sticking. When you flip the quesadilla, you’re not just cooking the other side; you’re redistributing the melted cheese and ensuring even browning on both sides.
The science is beautiful: cheese contains milk proteins and fat. When you heat it gently, those proteins relax and the fat becomes more fluid, creating that creamy texture. Too much heat too fast, and the proteins contract and squeeze out the fat, leaving you with a separated, greasy mess. The right temperature—around medium-high, which is usually 350-375°F on your skillet surface—creates the perfect environment for emulsification to happen naturally.
What This Technique Unlocks
Once you master controlled-heat cheese melting with the flip-and-sear method, you’ll be amazed at what you can suddenly cook. This isn’t just about quesadillas anymore. This technique is the foundation for so many beloved comfort meals.
- Grilled cheese sandwiches – uses the exact same heat control and flip technique to create melted cheese inside with a golden, crispy exterior
- Panini and pressed sandwiches – applies the same principle of even heat distribution and cheese melting under controlled temperatures
- Cheese-filled crepes – teaches you how to manage cheese melting inside a delicate wrapper while building a light golden exterior
- Crispy mac and cheese patties – uses the sear-and-flip technique to create a crunchy outside while keeping the inside creamy
- Vegetable and cheese-filled omelets – applies heat control to fold and set dairy-based fillings without overcooking
- Cheese-crusted fish fillets – demonstrates how to melt cheese as a topping while achieving a golden crust underneath
The Ingredients—Chosen to Teach the Technique
Every ingredient in this recipe has been chosen deliberately to teach you something. There are no filler ingredients here—each one plays a specific role in helping you understand and master the melting technique.
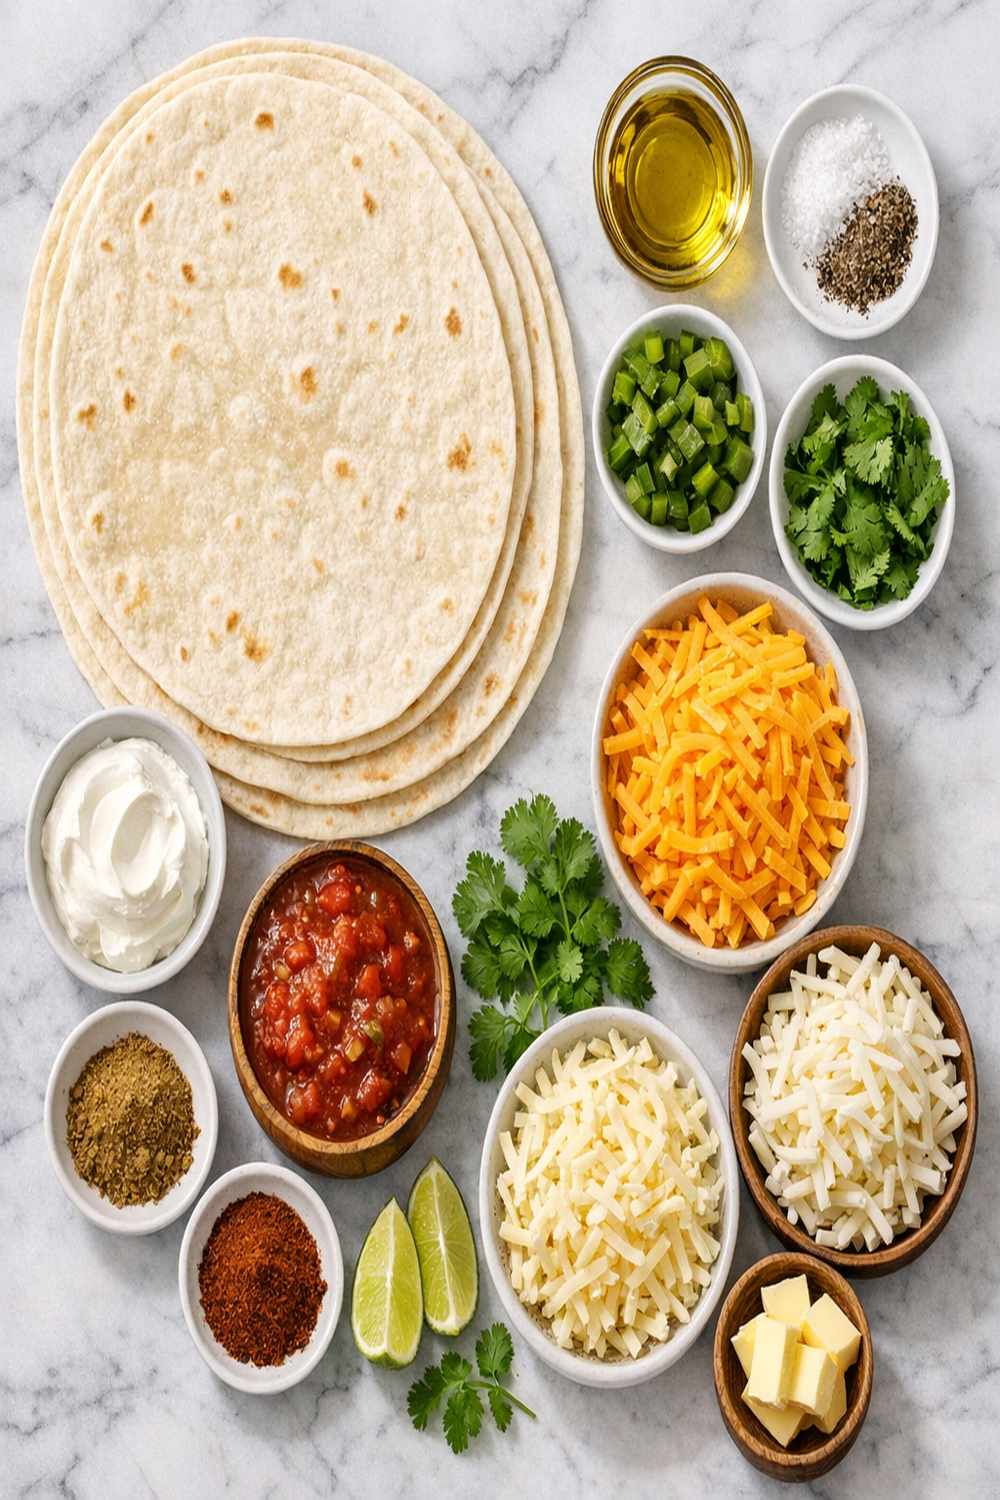
- ½ cup shredded cheddar cheese (sharp or mild—the shred size matters; pre-shredded allows you to focus on heat control rather than cheese prep)
- 2 10-inch flour tortillas (room temperature, because cold tortillas take longer to warm and can result in overcooked cheese)
- 2 teaspoons unsalted butter or extra virgin olive oil (chosen because both conduct heat differently—butter creates richer browning through the milk solids, oil distributes heat evenly; choose based on what you’re trying to learn)
- Fresh cilantro or green onions for optional topping (teaches you how fresh herbs add brightness to rich cheese dishes)
- ¼ teaspoon fine sea salt (brings out the cheese flavor and helps you taste the difference in your technique)
- Pinch of freshly ground black pepper (adds complexity and teaches you how seasonings complement dairy)
Expert’s Nutritional Tip: Cheddar cheese provides about 110 calories, 7 grams of protein, and 9 grams of fat per ounce. The protein supports muscle maintenance and satiety, making this quick meal actually quite nutritious despite its simplicity. The fat carries the fat-soluble vitamins A and D, which are essential for bone health and immune function.
The Masterclass: How to Make a Cheese Quesadilla Recipe
What follows isn’t just a recipe—it’s a teaching moment. As you move through each step, pay attention to what you see, hear, and feel. These sensory cues are how experienced cooks navigate the kitchen without constantly looking at a timer.
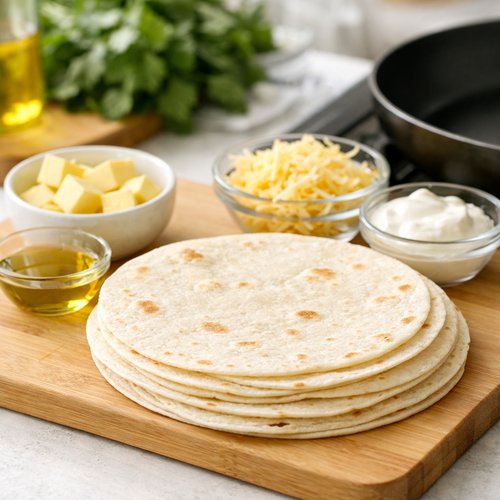
Step 1: Prepare Your Station and Choose Your Fat
Before any heat touches your skillet, take a moment to set yourself up for success. Place your tortillas on a clean cutting board within arm’s reach. Have your cheese measured and ready. This is called mise en place, and it prevents the dreaded scramble when your pan is hot and ready.
Now, decide on your fat: butter or oil? If you choose butter, you’re committing to a richer, more flavorful crust with those beautiful brown milk solids. If you choose oil, you’re prioritizing even heat distribution and a crisper texture. Neither is wrong—they teach you different lessons about fat’s role in cooking. For this masterclass, I recommend starting with butter. It’s more forgiving, and the visual cues are clearer.
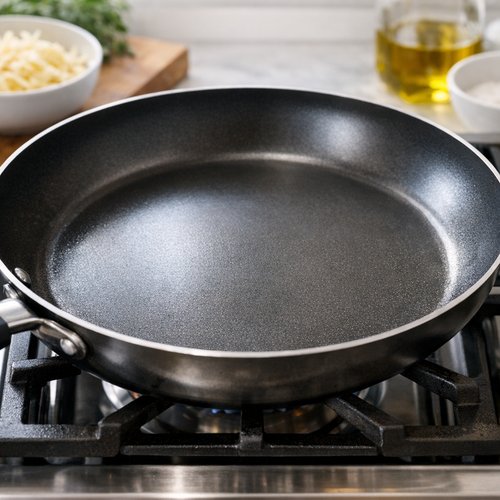
Step 2: Warm Your Skillet and Melt Your Fat Slowly
Place a large non-stick skillet over medium-high heat. This is where patience enters the equation. Don’t add your butter immediately. Let the empty pan warm for about 30-45 seconds. You’ll notice the surface begin to shimmer slightly.
Now add your 2 teaspoons of butter. Watch what happens: it will melt, foam slightly, and the foam will eventually subside. This foaming is the water in the butter evaporating. Once the foam subsides and you smell a nutty aroma, your pan is ready—that’s the milk solids beginning to brown, and it signals that your temperature is perfect for tortilla-to-pan contact.
This is a crucial teaching moment: the smell is your first indicator that you’ve reached the right temperature. Your nose will always tell you the truth about what’s happening in your pan.
Step 3: Add Your First Tortilla and Create an Even Cheese Layer
Gently place your first tortilla into the warm butter. You should hear a soft sizzle—not an aggressive hiss, just a gentle sound of contact. If it’s completely silent, your pan isn’t hot enough yet. If it’s violently loud, your heat is too high.
Let this tortilla warm for about 20-30 seconds. You’re not trying to brown it yet; you’re just warming it through so it becomes pliable and its starches begin to soften. This warming makes it easier to fold later and prevents cracks.
Now comes the critical part: scatter your cheese in an even, single layer across the entire surface of the tortilla. Don’t pile it in the center. Don’t create thick spots. Your eye is your best tool here. Imagine you’re tiling a floor—each piece should cover roughly the same amount of surface area. This even distribution ensures that when you flip, the cheese has melted uniformly.
Step 4: Cover With Your Second Tortilla and Begin the Melt
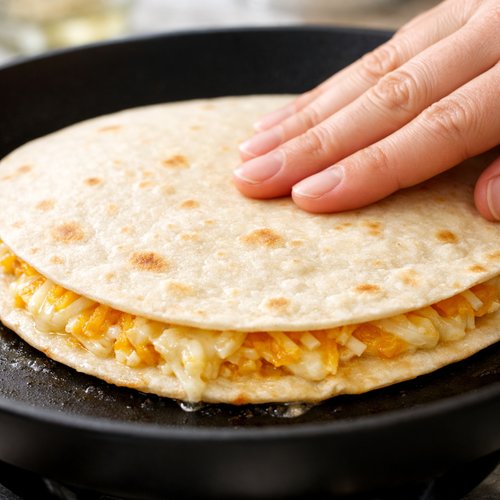
Carefully place your second tortilla on top of the cheese. Press down very gently—you’re not making a sandwich, you’re just seating the tortilla into the cheese so they make good contact. This gentle pressure helps the cheese begin adhering to both tortillas.
Now you wait. This is the hardest part for impatient cooks. Set a timer for 2 to 2½ minutes and resist the urge to peek constantly. However, at around the 1-minute mark, carefully lift the edge of the quesadilla with a thin spatula and peek underneath. You’re looking for a light golden color, not brown. The bottom should feel firm enough to move, but not brittle.
What’s happening underneath while you wait? The heat is moving upward through the bottom tortilla, creating steam that rises and softens the top tortilla from above, while the cheese between them is slowly transitioning from solid to creamy. This two-directional heat approach is why this technique works so beautifully.
Step 5: Execute the Perfect Flip
This is where technique really shows itself. Your spatula should be thin and sturdy—not flimsy. Slide it underneath the entire quesadilla, supporting as much of the surface as possible. If you’re nervous, use two spatulas: one underneath supporting, one on top gently guiding.
Flip in one confident motion, not hesitantly. Hesitation causes quesadillas to fold or stick. You want decisive movement. The quesadilla should land flat in the butter with a soft sizzle.
If it folded or broke, don’t panic. You haven’t failed—you’ve learned something about your spatula size or timing. Mental note for next time.
Step 6: Cook the Second Side With Awareness
Now you’re cooking the second side. This side usually takes 1½ to 2 minutes—slightly less than the first side, because the cheese is already melted and the tortilla is already warmed. You’re just looking for that light golden color.
About halfway through (around 45 seconds), carefully lift an edge and check your progress. You should see a light golden-brown crust forming. If you see dark brown, your heat is too high. If you see pale yellow, you need a bit more time or slightly higher heat.
This second side teaches you about heat’s cumulative effect. The first side built warmth; the second side just needs to finish the job.
Step 7: Remove and Rest
When both sides achieve that light golden color, transfer your quesadilla to a clean cutting board using your spatula. Let it rest for 30 seconds—this allows the cheese to set up slightly and prevents it from running out when you cut.
This rest period is professional kitchen wisdom. It seems small, but it makes a real difference in the eating experience.
Step 8: Cut and Serve
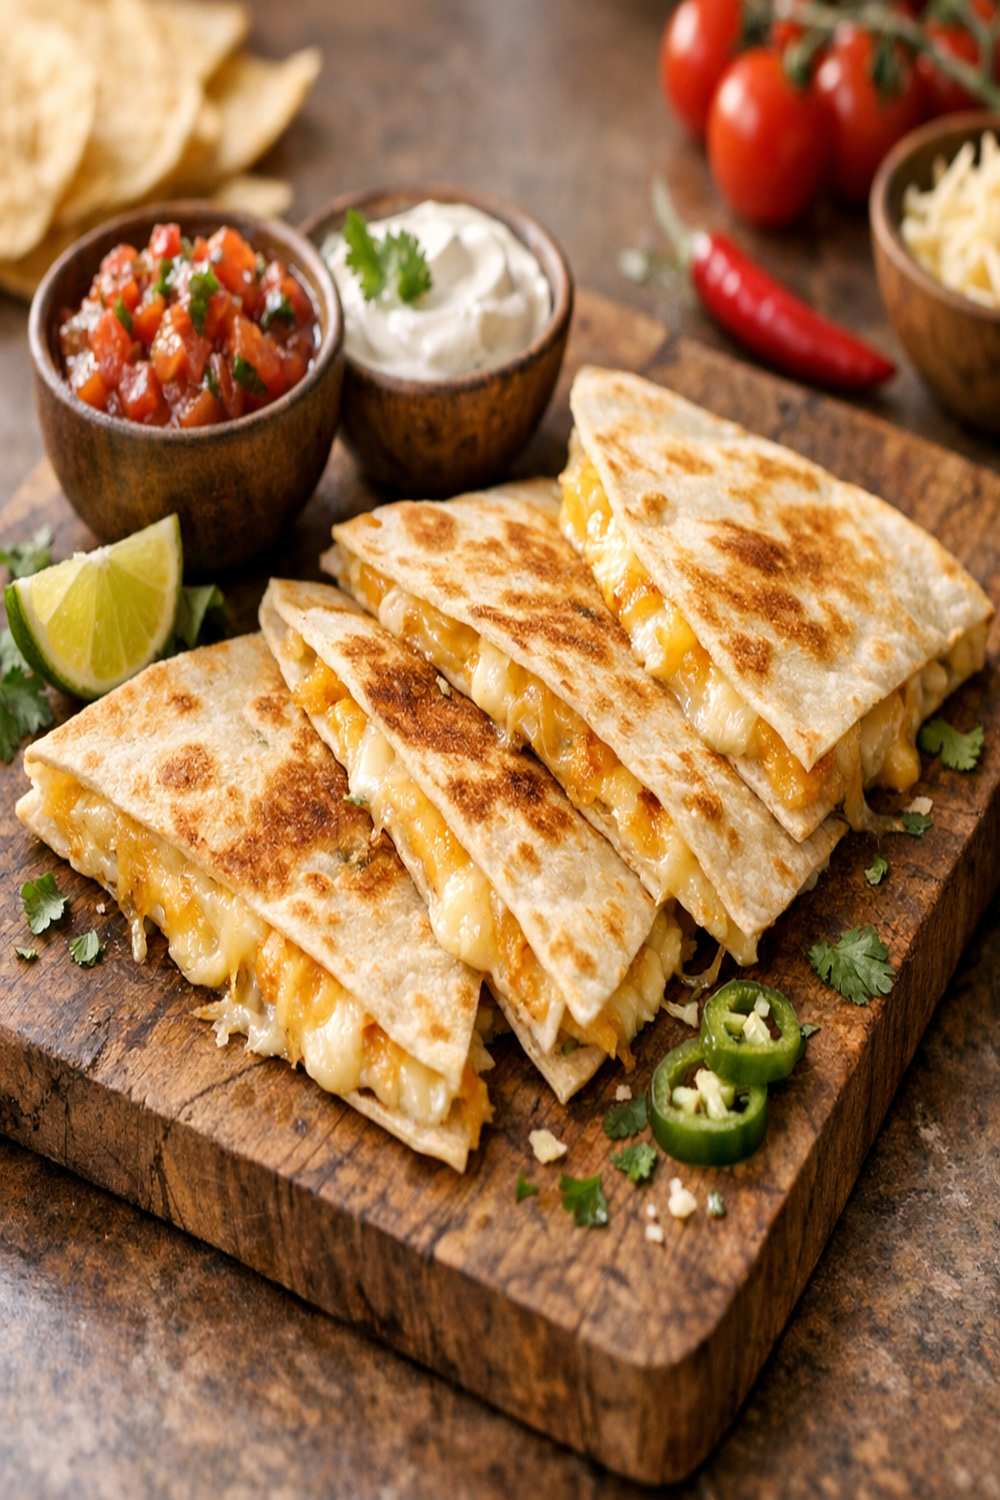
Using a sharp knife or pizza cutter, cut your quesadilla into 6 triangles. A pizza cutter is actually the professional choice here—it glides through the warm tortilla and melted cheese without dragging or tearing.
Arrange your triangles on a plate with the points facing outward—this is how restaurants do it, and it actually helps cool them slightly while looking intentional and beautiful.
Serve immediately with guacamole, salsa, sour cream, or cilantro-lime crema. The cheese will be hot enough to still be flowing, but cool enough to eat safely.
How to Know You’ve Mastered the Technique
True mastery shows itself in small, observable ways. These are the sensory markers that tell you you’ve internalized what’s happening in your pan.
- Even browning on both sides with no burnt spots – Your quesadilla displays a consistent light golden color across its entire surface, indicating you maintained even heat and temperature throughout cooking
- Cheese stays inside the tortillas, doesn’t leak out – The cheese has melted into a creamy interior without separating or escaping the sides, proving your temperature control was correct
- Tortillas are tender and flexible, not crispy or brittle – Your timing was perfect; the tortilla absorbed just enough heat to warm through without drying out
- You can flip confidently without hesitation – Your hands know where the spatula should go, and your eyes recognize the exact moment of readiness without needing to check multiple times
- The sound and smell guide you more than the timer – You’ve learned to read your pan’s signals and no longer rely primarily on a timer
Common Technique Mistakes and How to Fix Them
- Cheese separates and becomes greasy – Your heat was too high or you cooked it too long. Solution: Lower your heat to medium (not medium-high) next time, and reduce cooking time on the second side to 1-1½ minutes. Watch for the color cue instead of timing.
- Tortillas brown too dark while cheese inside is barely melted – Your heat is too high but you’re not giving the cheese enough time to warm. Solution: Lower your heat slightly and add 30 seconds to your first-side cooking time. The cheese needs heat from both directions.
- Quesadilla feels heavy and dense, cheese didn’t melt evenly – You either piled the cheese too thickly in spots or didn’t distribute it evenly. Solution: Next time, spread cheese more carefully, and consider grating your own cheese if pre-shredded isn’t giving you the distribution you want.
- Can’t flip it without it falling apart or folding – You’re using a spatula that’s too small or flexible, or you’re flipping before the bottom has set enough. Solution: Use a wide, sturdy spatula (at least 4 inches across), and wait until that golden color is clearly visible before flipping.
- Top tortilla is still doughy while bottom is golden – The two-directional heat isn’t working because your second tortilla isn’t making good contact with the melted cheese. Solution: Press down slightly more firmly when you place the second tortilla, and ensure your first tortilla’s surface is relatively smooth before adding cheese.
Practice Variations to Build Your Skill
Level 1—The Foundation (What We’ve Covered): Make a basic cheese quesadilla with one type of cheese and two tortillas. Master the heat control and flip technique. Make it three times and you’ll stop thinking about timing and start responding to what you see and hear.
Level 2—The Challenge: Make a quesadilla with two different cheeses (try mixing cheddar with Oaxaca or fresh mozzarella). Different cheeses melt at different rates and have different fat contents. This teaches you how cheese chemistry changes your approach. You’ll discover that soft cheeses melt faster and require slightly lower heat, while aged cheeses need slightly more heat to fully emulsify.
Level 3—The Mastery Move: Add thin vegetable slices (like roasted peppers, caramelized onions, or sautéed mushrooms) between the cheese and one tortilla. Now you’re managing three layers of ingredients with different moisture contents and cooking times. This teaches you how to adjust your heat and timing when adding ingredients that release steam. Vegetables release moisture, which creates more steam, which cooks the cheese differently.
Make-Ahead Guide for Busy Weeknights
Prepare your ingredients up to 4 hours ahead: Shred your cheese, measure it into small containers, and store it in the refrigerator. Keep your tortillas at room temperature in their original packaging. This means you can have a quesadilla on the table in 5 minutes, even on your busiest day.
You cannot make quesadillas completely ahead of time and reheat them—the texture becomes tough and the cheese separates. However, you can assemble them completely and cook them fresh in under 5 minutes. Some busy parents I’ve worked with assemble all their quesadillas in the morning (tortilla, cheese, tortilla, wrapped in plastic), then cook them individually for lunch or dinner as needed.
For meal prep: Cook quesadillas and cool them completely on a wire rack. Store in an airtight container in the refrigerator for up to 3 days. To reheat: Place in a 325°F oven for 8-10 minutes until warmed through and cheese re-melts slightly. Avoid the microwave—it makes tortillas tough.
Can I Store Cheese Quesadilla Recipe?
Yes, but with understanding about what happens to the texture. A freshly made quesadilla is always superior, but I know real life doesn’t always allow for fresh cooking.
Refrigerator storage: Cool completely on a wire rack, then wrap individually in plastic wrap or foil. Store for up to 3 days. The tortilla will firm up and the cheese will set, making the texture less ideal than fresh, but it’s still perfectly edible.
Freezer storage: Wrap cooled quesadillas individually in plastic wrap, then place in a freezer bag. Freeze for up to 2 months. To reheat from frozen: Place in a 325°F oven for 15-20 minutes until heated through.
Reheating tips: Always use the oven rather than the microwave. The oven restores some of the tortilla’s texture and allows the cheese to re-melt gently. The microwave creates rubbery, tough tortillas and can cause cheese to separate further.
Pro tip: If you’re storing multiple quesadillas, separate them with parchment paper so they don’t stick together during storage.
Nutrition Information
Based on USDA nutritional data for the basic recipe (makes 1 quesadilla, serves 2 as an appetizer or 1 as a light meal):
Per serving: 285 calories | 12g protein | 16g fat | 26g carbohydrates | 1.2g fiber | 620mg sodium
Protein content makes this a surprisingly substantial snack or light lunch. The 16 grams of fat comes primarily from the cheese and butter, providing satiety and supporting the absorption of fat-soluble vitamins. The 26 grams of carbohydrates come entirely from the flour tortillas, which also provide B vitamins and iron.
From a dietitian’s perspective, this is a nutrient-dense quick meal. It’s not a vegetable-focused meal, but it’s not empty calories either. If I’m recommending this to clients, I suggest pairing it with something produce-based—a side salad, some raw vegetables with guacamole, or fresh fruit—to round out the micronutrient profile.
Sodium note: Most of the sodium comes from the cheese itself. If you’re managing sodium intake, you could use a lower-sodium cheddar or reduce the amount slightly and add fresh herbs or citrus to compensate for flavor.
What to Serve With Cheese Quesadilla Recipe?
A great quesadilla deserves thoughtful accompaniments. These aren’t just sides—they’re opportunities to teach yourself how different flavors and textures play together.
- Fresh guacamole or sliced avocado – The cool creaminess contrasts beautifully with the hot, melted cheese. Avocado’s subtle richness complements the boldness of aged cheddar. If you’ve mastered creamy emulsions (which you have now!), try making guacamole from scratch. The smashing and folding technique uses similar hand skills to your cheese melting.
- Cilantro-lime crema – Sour cream mixed with fresh cilantro, lime juice, and a pinch of cumin creates brightness that cuts through the cheese’s richness. This teaches you how acidic elements balance fatty foods.
- Fresh tomato salsa – The acidity in the tomato and lime juice awakens your palate between bites of rich quesadilla. Choose tomatoes that are truly ripe; this is one place where quality matters dramatically.
- Black bean soup – A warm, earthy companion that turns your quesadilla into a complete meal. The protein from beans + the protein from cheese + the carbohydrates from tortillas creates nutritional balance.
- Simple green salad with lime vinaigrette – Crisp lettuce and bright citrus dressing provide textural contrast and volume. This is how fine restaurants approach sides—not as afterthoughts, but as essential components of the eating experience.
- Roasted street corn – Corn with cotija cheese, lime, and chili powder offers another take on the cheese theme while adding grilled, slightly smoky flavor notes that complement the quesadilla beautifully.
For a complete weeknight dinner that demonstrates several cooking techniques, try serving your quesadilla with homemade flour tortillas (teaching yourself dough development and lamination) alongside a simple salad.
Seasonal Variations
Spring: Add thin slices of fresh spring onions or asparagus that you’ve lightly sautéed. The green, grassy flavors are clean and bright. Spring cheese pairings: sharp white cheddar or fresh queso fresco mixed with the cheddar.
Summer: Use roasted red peppers (charred until soft and sweet) and fresh basil. Summer teaches you about caramelization—heat brings out natural sugars in vegetables. This is why summer produce tastes better; it’s been sun-sweetened. Pair with aged white cheddar or Oaxaca cheese for creaminess.
Fall: Add sautéed mushrooms and crispy bacon (teaches you how to render fat and build savory depth). Fall cheese pairing: sharp aged cheddar mixed with aged gouda for complexity.
Winter: Use caramelized onions (slow-cooked for 30 minutes until deep golden and sweet) with fresh rosemary. Winter cooking teaches you patience and the transformation that long, gentle heat creates. Winter cheese pairing: sharp or extra-sharp cheddar to stand up to the onions’ intensity.

Cheese Quesadilla Recipe
Ingredients
- ½ cup shredded cheddar cheese (sharp or mild
- 2 10- inch flour tortillas room temperature, because cold tortillas take longer to warm and can result in overcooked cheese
- 2 teaspoon unsalted butter or extra virgin olive oil (chosen because both conduct heat differently
- Fresh cilantro or green onions for optional topping teaches you how fresh herbs add brightness to rich cheese dishes
- ¼ teaspoon fine sea salt brings out the cheese flavor and helps you taste the difference in your technique
- Pinch of freshly ground black pepper adds complexity and teaches you how seasonings complement dairy
Instructions
Step 1: Prepare Your Station and Choose Your Fat
- Before any heat touches your skillet, take a moment to set yourself up for success. Place your tortillas on a clean cutting board within arm's reach. Have your cheese measured and ready. This is called mise en place, and it prevents the dreaded scramble when your pan is hot and ready. Now, decide on your fat: butter or oil? If you choose butter, you're committing to a richer, more flavorful crust with those beautiful brown milk solids. If you choose oil, you're prioritizing even heat distribution and a crisper texture. Neither is wrong—they teach you different lessons about fat's role in cooking. For this masterclass, I recommend starting with butter. It's more forgiving, and the visual cues are clearer.

Step 2: Warm Your Skillet and Melt Your Fat Slowly
- Place a large non-stick skillet over medium-high heat. This is where patience enters the equation. Don't add your butter immediately. Let the empty pan warm for about 30-45 seconds. You'll notice the surface begin to shimmer slightly. Now add your 2 teaspoons of butter. Watch what happens: it will melt, foam slightly, and the foam will eventually subside. This foaming is the water in the butter evaporating. Once the foam subsides and you smell a nutty aroma, your pan is ready—that's the milk solids beginning to brown, and it signals that your temperature is perfect for tortilla-to-pan contact. This is a crucial teaching moment: the smell is your first indicator that you've reached the right temperature. Your nose will always tell you the truth about what's happening in your pan.
Step 3: Add Your First Tortilla and Create an Even Cheese Layer
- Gently place your first tortilla into the warm butter. You should hear a soft sizzle—not an aggressive hiss, just a gentle sound of contact. If it's completely silent, your pan isn't hot enough yet. If it's violently loud, your heat is too high. Let this tortilla warm for about 20-30 seconds. You're not trying to brown it yet; you're just warming it through so it becomes pliable and its starches begin to soften. This warming makes it easier to fold later and prevents cracks. Now comes the critical part: scatter your cheese in an even, single layer across the entire surface of the tortilla. Don't pile it in the center. Don't create thick spots. Your eye is your best tool here. Imagine you're tiling a floor—each piece should cover roughly the same amount of surface area. This even distribution ensures that when you flip, the cheese has melted uniformly.

Step 4: Cover With Your Second Tortilla and Begin the Melt
- Carefully place your second tortilla on top of the cheese. Press down very gently—you're not making a sandwich, you're just seating the tortilla into the cheese so they make good contact. This gentle pressure helps the cheese begin adhering to both tortillas. Now you wait. This is the hardest part for impatient cooks. Set a timer for 2 to 2½ minutes and resist the urge to peek constantly. However, at around the 1-minute mark, carefully lift the edge of the quesadilla with a thin spatula and peek underneath. You're looking for a light golden color, not brown. The bottom should feel firm enough to move, but not brittle. What's happening underneath while you wait? The heat is moving upward through the bottom tortilla, creating steam that rises and softens the top tortilla from above, while the cheese between them is slowly transitioning from solid to creamy. This two-directional heat approach is why this technique works so beautifully.
Step 5: Execute the Perfect Flip
- This is where technique really shows itself. Your spatula should be thin and sturdy—not flimsy. Slide it underneath the entire quesadilla, supporting as much of the surface as possible. If you're nervous, use two spatulas: one underneath supporting, one on top gently guiding. Flip in one confident motion, not hesitantly. Hesitation causes quesadillas to fold or stick. You want decisive movement. The quesadilla should land flat in the butter with a soft sizzle. If it folded or broke, don't panic. You haven't failed—you've learned something about your spatula size or timing. Mental note for next time.

Step 6: Cook the Second Side With Awareness
- Now you're cooking the second side. This side usually takes 1½ to 2 minutes—slightly less than the first side, because the cheese is already melted and the tortilla is already warmed. You're just looking for that light golden color. About halfway through (around 45 seconds), carefully lift an edge and check your progress. You should see a light golden-brown crust forming. If you see dark brown, your heat is too high. If you see pale yellow, you need a bit more time or slightly higher heat. This second side teaches you about heat's cumulative effect. The first side built warmth; the second side just needs to finish the job.
Step 7: Remove and Rest
- When both sides achieve that light golden color, transfer your quesadilla to a clean cutting board using your spatula. Let it rest for 30 seconds—this allows the cheese to set up slightly and prevents it from running out when you cut. This rest period is professional kitchen wisdom. It seems small, but it makes a real difference in the eating experience.
Step 8: Cut and Serve
- Using a sharp knife or pizza cutter, cut your quesadilla into 6 triangles. A pizza cutter is actually the professional choice here—it glides through the warm tortilla and melted cheese without dragging or tearing. Arrange your triangles on a plate with the points facing outward—this is how restaurants do it, and it actually helps cool them slightly while looking intentional and beautiful. Serve immediately with guacamole, salsa, sour cream, or cilantro-lime crema. The cheese will be hot enough to still be flowing, but cool enough to eat safely.
Notes
FAQs
What’s the difference between using butter and oil, and which should I choose?
Butter contains milk solids that brown and create a richer, more flavorful crust. Oil distributes heat more evenly and creates a crisper texture with a slightly lighter flavor. For learning purposes, start with butter—it’s more forgiving and gives clearer visual signals. Once you’ve mastered butter, experiment with oil to understand how different fats change the cooking process. Neither is wrong; they teach you different lessons about fat’s role in creating texture.
Can I use pre-shredded cheese, or should I shred it myself?
Pre-shredded cheese works fine and is perfectly acceptable for learning the technique. However, knowing that pre-shredded cheese contains anti-caking agents (cellulose) that can prevent perfectly smooth melting will help you understand why homemade-shredded cheese melts slightly more smoothly. For your first attempts, use what you have. Once you’ve mastered the basic technique, try freshly shredded cheese and notice the textural difference. This teaches you that ingredients matter.
My quesadilla keeps falling apart when I flip it. What am I doing wrong?
The most common cause is that the bottom tortilla hasn’t firmed up enough before you flip. You need to see that light golden color before you attempt the flip. The second cause is using a spatula that’s too small or too flexible. Get the biggest, sturdiest spatula you own, and slide it completely underneath the quesadilla before flipping. Confidence matters—flip decisively, not hesitantly.
How do I know when the cheese is melted enough?
The most reliable indicator is gently lifting the edge of the quesadilla and pressing down on the top tortilla. The cheese should have some give (it’s soft), but it should feel like it’s holding the tortillas together. It should look creamy, not solid. Visual cues matter more than timing here. If you’re unsure, add 15 more seconds and check again. It’s better to cook slightly longer than not long enough.
Can I add vegetables between the tortillas, and does that change the technique?
Yes, absolutely, and it does change the technique slightly. Vegetables release moisture, which creates steam, which means your cooking times might be slightly longer (add 30 seconds to each side) and your heat needs to be slightly lower to prevent the extra moisture from creating too much steam that separates the cheese. Dry vegetables (like roasted peppers) work better than wet ones (like fresh tomatoes). This teaches you about moisture management in cooking.
More Recipes Using This Technique
These recipes all teach you the same fundamental lesson about controlled-heat cheese melting and texture development:
- Baked Mac and Cheese – uses controlled heat to melt cheese into a creamy sauce that coats pasta evenly, then high heat creates a golden crust on top
- Creamy White Chicken Chili – teaches how to add cheese to a hot liquid without separating it by controlling temperature and stirring technique
Learning to make a perfect cheese quesadilla taught you something profound: cooking is about understanding heat, understanding how ingredients respond to that heat, and using your senses to navigate the process. These aren’t just recipes you’re learning; they’re techniques that will serve you in countless other dishes for the rest of your cooking life.
You now understand controlled heat. You understand texture. You understand how to read your pan instead of just reading a timer. These skills compound—each time you apply them, you get better. Each time you cook, you’re not just making food; you’re building intuition and confidence in your own kitchen.
That’s the real gift of mastering this technique. You’re not just making a quick cheese quesadilla anymore. You’re becoming the kind of cook who can walk into any kitchen and create something delicious without anxiety or uncertainty.
I hope you’ll make this recipe. Make it several times. Notice what changes when you adjust the heat or the timing. Pay attention to the smells and sounds. Let your hands learn the movement of the flip. Teach it to someone you care about—that’s when cooking truly becomes the soul-deep love my mother showed me in her kitchen.
Happy Cooking!