
This post contains affiliate links. As an Amazon Associate I earn from qualifying purchases.
I still remember standing in my mother’s kitchen on a Wednesday evening, watching her pound chicken breasts thin and dip them in egg and breadcrumbs. The smell of tomato sauce simmering on the stove and melting cheese in the oven filled our home with warmth that had nothing to do with the temperature. She’d serve it over pasta, and somehow that simple meal said everything she couldn’t find words for. Years later, as a registered dietitian, I realized she was teaching me that nourishment isn’t just about nutrition facts—it’s about love made edible. Today, I’m bringing that same soul-deep comfort into your kitchen with an easier method. My air fryer version captures that exact magic my mother created, but without the stress or the splatter. This is chicken parm the way it should be: simple, delicious, and ready when life gets busy.
Authentic Chicken Parm Air Fryer Recipe: The Story Behind the Dish
Chicken Parmesan carries the weight of two cultures in every bite. It’s Italian tradition meeting Italian-American innovation—a beautiful bridge between the old world and the new. My mother’s kitchen was filled with stories from her own mother’s Calabrese heritage, yet this dish represented something else entirely: the evolution of food when people carried their hearts across oceans and had to make do with what they found in their new home.
Growing up, I watched my mother transform simple ingredients into moments of connection. She understood something I later confirmed through my dietitian training: the way we prepare food matters as much as the food itself. Every technique, every layer of cheese, every golden breadcrumb exists for a reason. When I discovered the air fryer could honor those same traditions while fitting into the realities of modern life, I knew I had to share it.
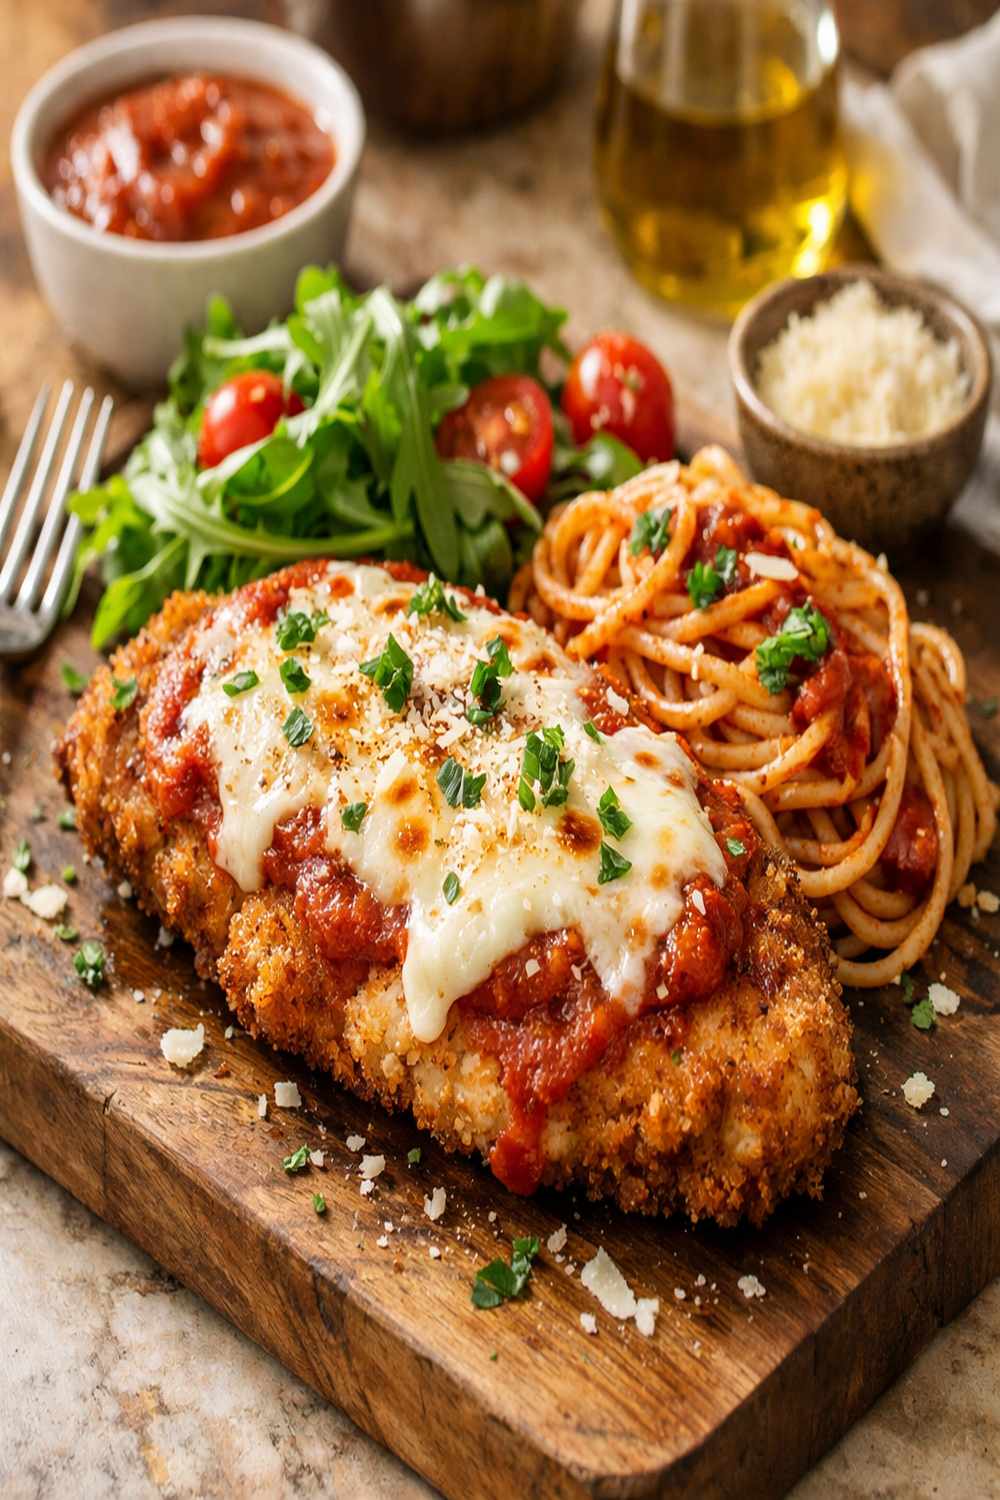
The History and Cultural Significance of Chicken Parm Air Fryer Recipe
Chicken Parmesan, or Chicken Parmigiana, traces its roots to Southern Italy, particularly Naples and Sicily. The dish evolved from eggplant parmigiana, a classic preparation using fresh eggplant layered with tomato sauce and cheese. When Italian immigrants arrived in America in the late 1800s and early 1900s, they adapted this beloved technique to chicken—a protein that was more affordable and accessible in their new home.
The authentic Italian version, “Pollo alla Parmigiana,” is often served as a second course (after pasta) and features a more delicate preparation. The American-Italian version—what we cook today—became heartier, more generous with cheese, and perfectly suited to being the main event on a family dinner table. This isn’t a departure from tradition; it’s tradition evolving, the way food does when it travels and takes root in new soil.
The air fryer method I’m sharing represents the latest chapter in this evolution. Rather than deep frying or baking, we’re using circulating hot air to achieve that golden, crispy exterior while keeping the chicken tender inside. It honors the technique’s goal—creating texture contrast and melding flavors through heat—while removing the complexity and mess that once kept weeknight dinners stressful.
What Makes an Authentic Chicken Parm Air Fryer Recipe
Authenticity in chicken parm isn’t about rigidity—it’s about respect. Respect for technique, for ingredient quality, and for the cultural lineage of the dish. Whether you’re making it the traditional oven way or using an air fryer, certain elements define this preparation and shouldn’t be compromised.
- Proper pounding and butterflying – This creates an even thickness so the chicken cooks uniformly and the coating adheres properly. It’s not just technique; it’s respect for the ingredient. Uneven chicken means dry edges and raw centers, and that’s not the comfort food we’re after.
- The triple-dredge method – Egg, then breadcrumb mixture, creates structure and protects the chicken during cooking. This layering is what transforms simple breading into the golden shield that keeps chicken moist while delivering texture.
- Quality cheese matters – Fresh mozzarella and real Parmesan (not the green can) make the difference between authentic and imitation. The cheese shouldn’t just sit on top; it should meld with the sauce and chicken into something unified.
- Tomato-based sauce – Whether homemade or quality jarred, the sauce should taste like tomatoes first, with herbs as supporting players. This base flavor unites all the components.
The Ingredients – Sourcing the Real Thing
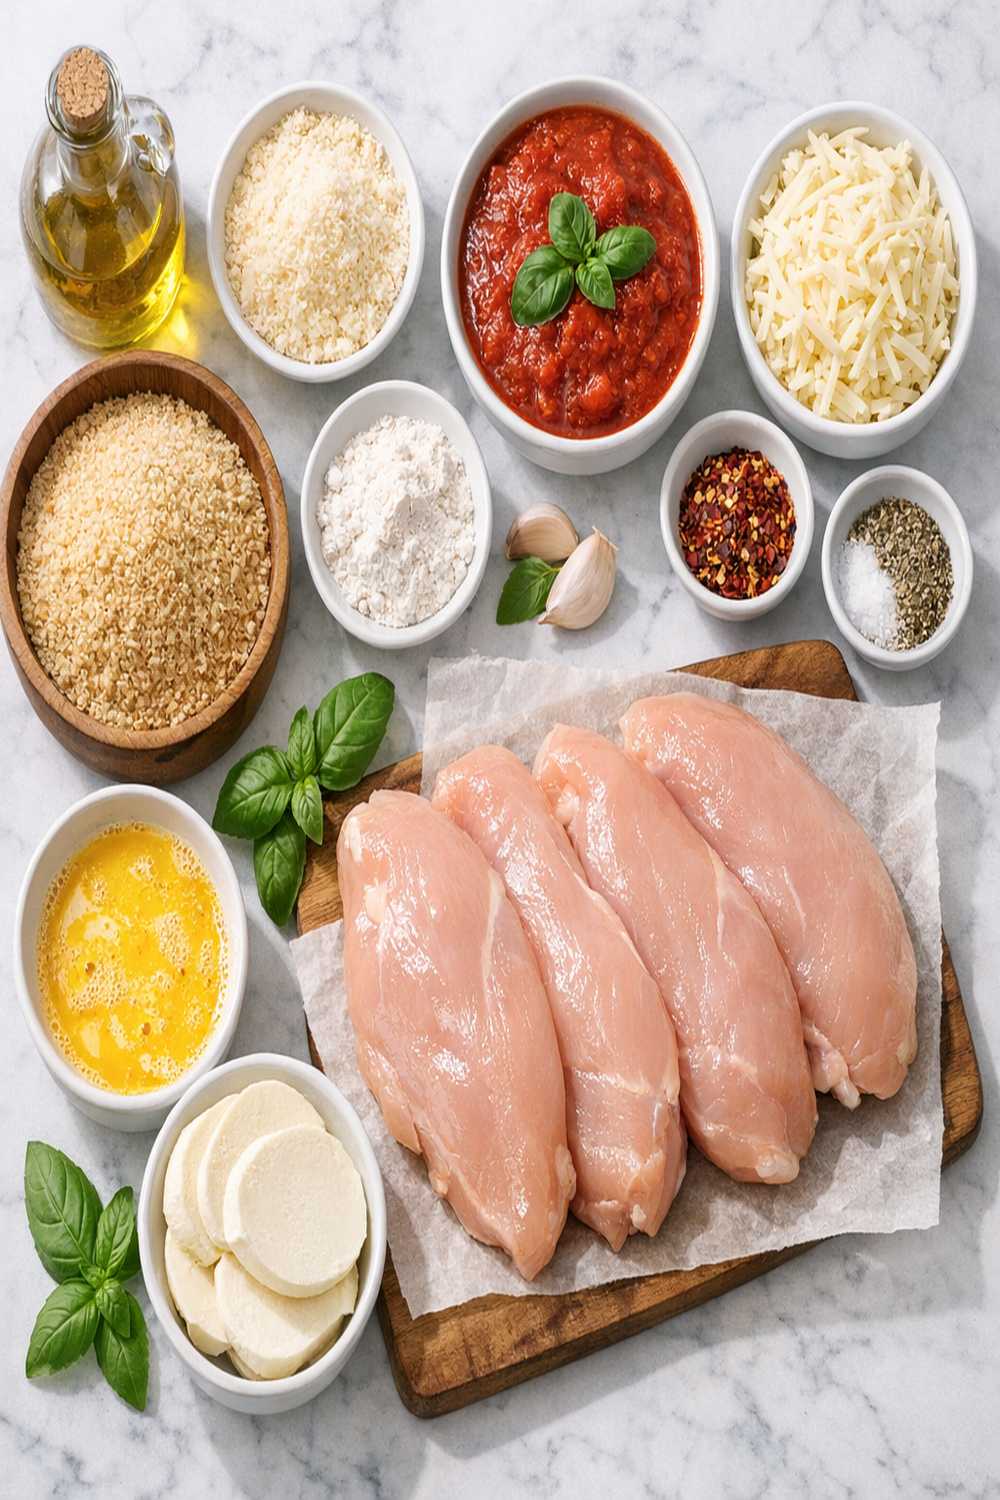
Finding authentic ingredients for chicken parm doesn’t require a specialty trip. Most supermarkets now carry excellent quality versions of everything you need. The key is reading labels and choosing items that honor the tradition without unnecessary additives. Let me guide you through each component so you know exactly what to look for and why it matters.
- ¼ teaspoon freshly ground black pepper (grind just before using for maximum flavor)
- ½ cup shredded mozzarella cheese (whole milk mozzarella melts better than part-skim)
- ¼ cup plus 1 tablespoon grated Parmesan cheese (freshly grated from a wedge, or high-quality pre-shredded without cellulose)
- ½ teaspoon Italian seasoning blend (or equal parts dried oregano, basil, and thyme)
- ¼ cup tomato sauce or marinara (choose brands with 5 ingredients or fewer—tomatoes, salt, garlic, oil, and maybe basil)
- ¾ cup panko-style breadcrumbs (these stay crispier than standard breadcrumbs due to their larger, airier structure)
- ¾ teaspoon kosher salt (sea salt or kosher salt dissolves evenly, unlike table salt which can create bitter spots)
- ¼ teaspoon paprika (adds warmth and color to the coating)
- 1 large boneless, skinless chicken breast or 2 small ones (look for meat that’s pale pink, never gray, and avoid packages with excess liquid)
- 2 teaspoons olive oil spray (for the air fryer basket and chicken)
- Fresh basil leaves for garnish (optional but traditional—adds brightness after cooking)
- 2 large eggs (room temperature helps them coat the chicken more evenly)
The Traditional Method: How to Make Authentic Chicken Parm Air Fryer Recipe
Cooking chicken parm in an air fryer is about honoring the traditions that came before while embracing the tools we have now. Every step I’m sharing with you has a purpose rooted in culinary technique. This isn’t a shortcut version that sacrifices quality—it’s an evolution that respects the original while making it accessible for real life.
Step 1: Prepare Your Workspace and Chicken
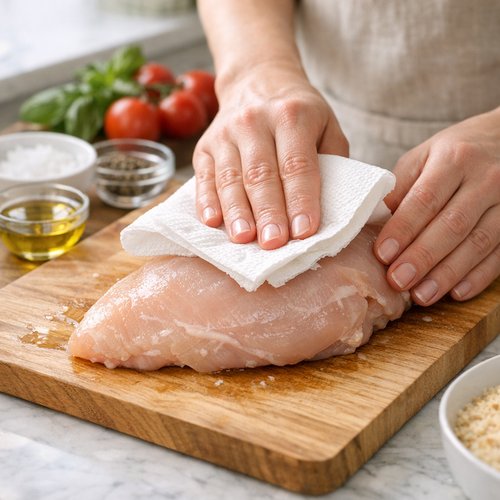
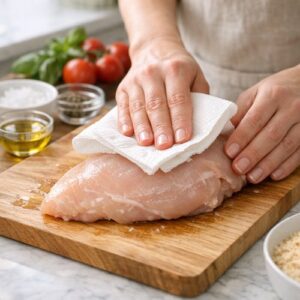
Start by setting up a clean workspace. Pat your chicken breast dry with paper towels—this is critical because moisture prevents browning and proper coating adhesion. Place the dried chicken on a cutting board. Now comes the butterflying technique my mother taught me: place your hand flat on top of the chicken breast and use a sharp knife to slice horizontally through the middle, being careful to leave about half an inch uncut on one side so it opens like a book.
This creates two thinner, more uniform pieces that cook evenly. Pat the inside surfaces dry as well. The drier your chicken, the better your coating will adhere and the crispier your finished dish will be. This single step prevents the rubbery, peeling-off coating that disappoints so many home cooks.
Step 2: Set Up Your Dredging Station
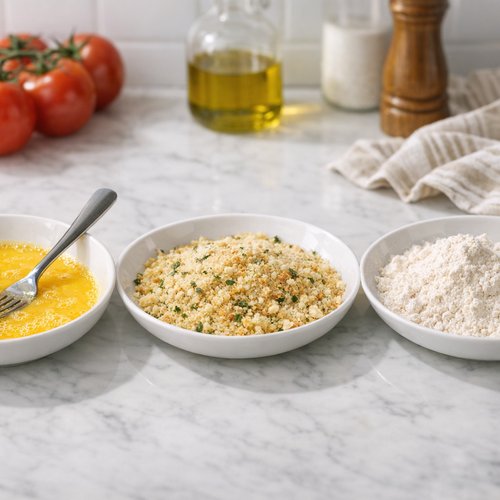
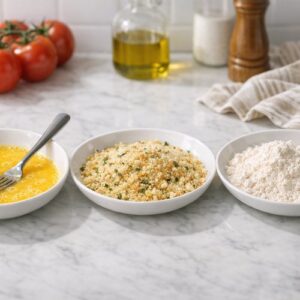
Prepare three shallow dishes or plates in a row. In the first, whisk your eggs together with a fork until completely combined. In the second, mix your panko breadcrumbs, ¼ cup Parmesan, Italian seasoning, salt, paprika, and black pepper. Stir this mixture well so the seasonings and cheese distribute evenly. The third dish stays empty—this is where you’ll place your finished, coated pieces before air frying.
Organization matters here. The dredging process goes faster and cleaner when you’re not hunting for bowls mid-stream. I learned this in my clinical nutrition training where we emphasized efficiency without sacrificing quality—the same principle applies to home cooking.
Step 3: Coat with Egg and Breadcrumb Mixture
Take your first chicken piece and place it in the egg mixture. Turn it to coat both sides completely, allowing excess egg to drip back into the bowl. The egg is your adhesive—it’s what makes the breadcrumb coating stick through the cooking process. Don’t rush this step.
Now place the egg-coated chicken into the breadcrumb mixture. Press firmly with your fingers, working the breadcrumbs into the egg coating. Flip and repeat on the other side. This pressing action is what creates that satisfying crunch in every bite. Gently shake off excess crumbs and place on your empty dish. Repeat with the second piece.
Step 4: Preheat Your Air Fryer and Prepare the Basket
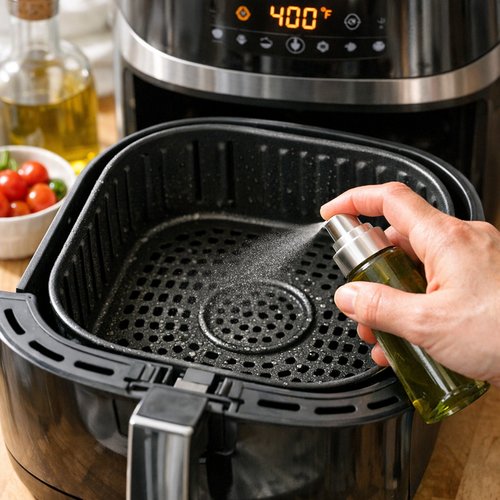
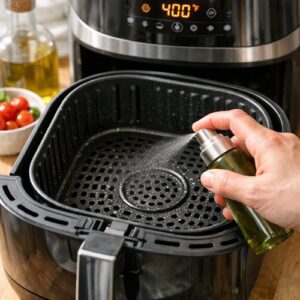
Set your air fryer to 400 degrees Fahrenheit and let it preheat for about 3 minutes. While it’s heating, spray your air fryer basket lightly with olive oil spray. This prevents sticking and helps the chicken brown evenly. Don’t oversaturate—you want a light coating, not a puddle.
Why 400 degrees? This temperature is hot enough to crisp the coating and cook the chicken through without burning the outside before the inside reaches food safety temperature. It’s the sweet spot I’ve learned through countless batches and refined through my dietitian’s understanding of how proteins respond to heat.
Step 5: Cook the First Side
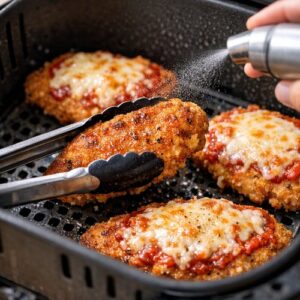
Place your breaded chicken pieces in the preheated basket in a single layer. Spray the top surface of each piece lightly with olive oil spray. This helps them brown and crisp beautifully. Cook for 5 minutes at 400 degrees without moving them. Resist the urge to peek—the air circulation does its work best when the basket stays closed.
Step 6: Flip and Cook the Second Side
After 5 minutes, carefully flip your chicken pieces using tongs. Spray the newly exposed surface with a light coating of oil spray. Cook for another 5 minutes. At this point, your chicken should be golden brown on both sides and the internal temperature should be approaching 165 degrees Fahrenheit (the safe temperature for poultry according to USDA guidelines).
The coating should sound crispy when you touch it, and it should have that beautiful golden color that tells you the Maillard reaction—the chemical transformation that creates flavor and texture—has happened properly.
Step 7: Add Sauce and Cheese
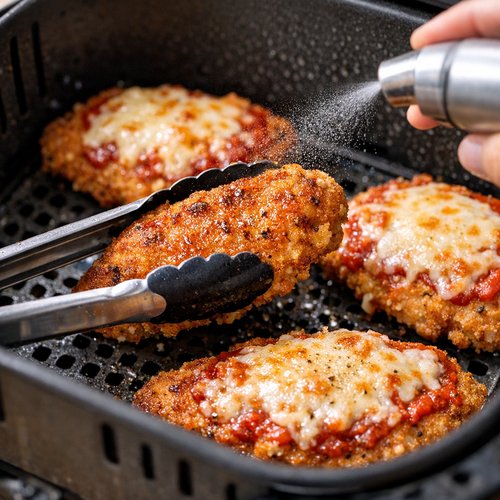
Now comes the final assembly. Divide your tomato sauce between the two chicken pieces, spreading it evenly over the top surface of each. Top each piece with ¼ cup of shredded mozzarella cheese, then finish with half of the remaining 1 tablespoon of Parmesan. The Parmesan on top creates pockets of extra umami flavor.
The reason we add sauce and cheese at the end rather than the beginning is that they need just enough time to meld together and melt without drying out your perfectly cooked chicken. Timing is everything here.
Step 8: Final Cook and Temperature Check
Return your assembled chicken to the air fryer at 400 degrees for 2 minutes. This gives the cheese time to melt completely and the sauce to warm through without overcooking the chicken. After 2 minutes, carefully remove your chicken and check the internal temperature with a meat thermometer—it must reach a minimum of 165 degrees Fahrenheit.
If it hasn’t reached temperature, return it to the air fryer for another minute and check again. This is non-negotiable for food safety. Once you hit 165 degrees, you’re done. If you have a meat thermometer, use it every single time—it removes guesswork and guarantees perfectly cooked chicken.
Let your finished chicken parm rest for 2 minutes before serving. This allows the juices to redistribute, keeping your chicken moist and tender.
Regional Variations Around the World
- Southern Italy (Naples and Sicily) – The original eggplant-based version remains thinner, more delicate, and often includes a béchamel layer beneath the cheese. It’s typically served as a second course rather than a main, and the portions are smaller and more refined.
- Italian-American (United States) – This version is heartier with more generous cheese topping and thicker coatings. It became a main course rather than a secondary dish, designed to fill and satisfy. It often includes more sauce and sits atop pasta, transforming it into a complete meal.
- Modern European interpretations – Some contemporary chefs in Italy and Europe have returned to local traditions while incorporating global influences, sometimes adding fresh herbs like basil after cooking or using buffalo mozzarella for a more delicate cheese experience.
Traditional Serving Customs
In Italy, chicken parm (when served) is traditionally plated as a protein course on its own, with perhaps a simple salad dressed with lemon and olive oil on the side. Bread comes alongside to soak up any extra sauce. It’s about letting the chicken be the star without overwhelming it with accompaniments.
In Italian-American tradition, which is what most of us grew up with, chicken parm sits proudly atop a bed of spaghetti or pasta, the sauce uniting all the elements. It’s served as the main event with perhaps garlic bread and a simple green salad. It’s generous, celebratory, and designed to nourish deeply.
In my family’s kitchen, we serve it with love and a certain formality—good plates, proper napkins, time taken to sit together. The presentation matters because it signals that this meal is an expression of care. Even on a Tuesday night, chicken parm deserves that respect.
Can I Store Chicken Parm Air Fryer Recipe?
Yes, and this is where the air fryer version shines for busy families. Store leftover chicken parm in an airtight container in the refrigerator for up to 3 days. The coating stays relatively crispy because air frying doesn’t create the steam that traditional baking sometimes does.
To reheat, place your chicken parm in a 350-degree air fryer for 3-4 minutes, just until warmed through and the cheese is melty again. This reheating method preserves the texture far better than microwaving, which can turn the coating soggy.
You can also freeze unbaked, breaded chicken pieces for up to 3 months. Simply freeze them on a baking sheet before transferring to a freezer bag. When you’re ready to cook, add 2-3 minutes to your initial cooking time and proceed as normal—no thawing necessary. This makes chicken parm an excellent make-ahead option for meal prep.
Nutrition Information
One serving of air fryer chicken parm (one chicken breast with sauce and cheese) contains approximately 320 calories, 28 grams of protein, 12 grams of fat (mostly from the cheese and eggs), and 18 grams of carbohydrates (primarily from the breadcrumb coating). The sodium content is approximately 680 milligrams, largely from the cheese and sauce.
From a dietitian’s perspective, what excites me about this dish is the protein-to-calorie ratio. At 28 grams of protein per serving, this meal keeps you satisfied for hours. The egg coating provides choline for brain health, and the tomato sauce delivers lycopene, a powerful antioxidant. Parmesan cheese provides bioavailable calcium and vitamin B12, nutrients that aging bodies need to absorb effectively.
According to USDA dietary guidelines, this single serving covers about 56% of the daily recommended protein for a 2,000-calorie diet, making it genuinely nourishing rather than indulgent. The air frying method reduces fat compared to deep frying by approximately 75%, which means you’re getting all the satisfaction with a lighter feel in your body afterward.
This is food that nourishes on every level—the comfort level, the nutritional level, and the cultural connection level.
What Can I Serve With Chicken Parm Air Fryer Recipe
The beauty of chicken parm is its flexibility with accompaniments. The dish itself is rich and complete, so your sides should provide balance and brightness.
Pasta is the traditional choice—spaghetti, angel hair, or fettuccine all work beautifully. Some of my sauce drips onto the pasta, creating a unified dish. If you’re looking for a homemade pasta option that’s equally stress-free, my Baked Mac N Cheese Recipe shows the same love-through-food approach in a different format.
Fresh salad provides textural contrast. A simple arugula salad dressed with lemon juice and good olive oil cuts through the richness beautifully. The peppery green balances the cheese and tomato perfectly.
Garlic bread is non-negotiable for soaking up extra sauce. Use a good crusty bread, split lengthwise, brushed with olive oil and garlic, and toasted until crispy.
Roasted vegetables like zucchini, bell peppers, or green beans offer color and nutrition without competing for attention. Roast them at 400 degrees for about 12 minutes while your chicken cooks.
Steamed broccoli brings Italian heritage forward—broccoli rabe is traditional in Southern Italian cooking, slightly bitter and garlicky, a perfect counterpoint to creamy cheese.
If you’re planning a complete Italian-inspired meal, consider pairing this with Baked Lemon Donut Recipe for dessert—something light and citrus-forward that cleanses the palate after a rich main course.
Expert’s Nutritional Tip
Here’s what I’ve learned through years of clinical practice: the combination of protein (from chicken and cheese), fat (from the egg and cheese), and carbohydrates (from the breadcrumb coating) makes this meal exceptionally satiating. Most people eating this feel full and satisfied for 4-5 hours without blood sugar crashes or energy dips.
The key is the protein’s amino acid profile. Chicken provides all nine essential amino acids, and the Parmesan adds methionine, which supports methylation cycles in your body. This isn’t just delicious—it’s genuinely therapeutic food that your body knows how to use effectively. Paired with a vegetable and whole grain (if you choose pasta), this becomes a metabolically balanced meal that fuels rather than depletes.
Make-Ahead Guide
One of my favorite things about this recipe is how well it works for meal preparation. Here’s my professional approach to making this work with a busy schedule:
Day 1 (Prep): Butterfly and dry your chicken, then bread all the pieces. Store them in a single layer on parchment paper in an airtight container in your refrigerator for up to 24 hours. The coating will firm up and adhere better as it sits.
Day 2 (Cook): Your air fryer work takes exactly 12 minutes from start to finish (preheating included). You can add sauce and cheese the moment before eating, or prepare them and reheat quickly in the air fryer. I often bread chicken on Sunday for Monday and Tuesday dinners.
Freezing option: Bread your chicken, freeze on a sheet pan, then transfer to freezer bags. Add 2-3 minutes to cooking time when cooking from frozen. This method gives you restaurant-quality dinners ready whenever you need them.
Common Mistakes to Avoid
- Not patting chicken dry before breading – Moisture is the enemy of crispy coating. Dry chicken every single time, even if you think it looks dry enough. Your results depend on this step.
- Overcrowding the air fryer basket – Air circulation is what makes air frying work. If pieces touch or overlap, they’ll steam rather than crisp. Work in batches if needed. One batch of perfectly crispy chicken beats two batches of mediocre results.
- Skipping the oil spray – Light coating of oil is essential for browning and crispness. Don’t skip this thinking you’re being healthier—the tiny amount of oil creates the texture that makes this dish satisfying.
- Not checking internal temperature – This is food safety, not suggestion. Invest in a simple meat thermometer and use it every time. No guessing, no hoping, just certainty.
Seasonal Variations
Summer version: Use fresh tomato sauce made from farmers market tomatoes. Top with fresh basil added after cooking for brightness. Serve alongside a hearty tomato-based salad.
Fall version: Add a pinch of nutmeg to your breadcrumb coating and use roasted red pepper sauce instead of basic tomato. Pair with roasted root vegetables.
Winter version: Use your favorite canned tomatoes (San Marzano is traditional) and add a small pinch of red pepper flakes to the coating for warmth. Serve with hearty pasta like rigatoni.
Spring version: Use the lightest, most delicate fresh mozzarella you can find. Add fresh lemon zest to the breadcrumb mixture for brightness. Serve with asparagus or fresh green beans.

Chicken Parm Air Fryer Recipe
Ingredients
- ¼ teaspoon freshly ground black pepper grind just before using for maximum flavor
- ½ cup shredded mozzarella cheese whole milk mozzarella melts better than part-skim
- ¼ cup plus 1 tablespoon grated Parmesan cheese freshly grated from a wedge, or high-quality pre-shredded without cellulose
- ½ teaspoon Italian seasoning blend or equal parts dried oregano, basil, and thyme
- ¼ cup tomato sauce or marinara (choose brands with 5 ingredients or fewer
- ¾ cup panko-style breadcrumbs these stay crispier than standard breadcrumbs due to their larger, airier structure
- ¾ teaspoon kosher salt sea salt or kosher salt dissolves evenly, unlike table salt which can create bitter spots
- ¼ teaspoon paprika adds warmth and color to the coating
- 1 large boneless, skinless chicken breast or 2 small ones look for meat that's pale pink, never gray, and avoid packages with excess liquid
- 2 teaspoon olive oil spray for the air fryer basket and chicken
- Fresh basil leaves for garnish (optional but traditional
- 2 large eggs room temperature helps them coat the chicken more evenly
Instructions
Step 1: Prepare Your Workspace and Chicken
- Start by setting up a clean workspace. Pat your chicken breast dry with paper towels—this is critical because moisture prevents browning and proper coating adhesion. Place the dried chicken on a cutting board. Now comes the butterflying technique my mother taught me: place your hand flat on top of the chicken breast and use a sharp knife to slice horizontally through the middle, being careful to leave about half an inch uncut on one side so it opens like a book. This creates two thinner, more uniform pieces that cook evenly. Pat the inside surfaces dry as well. The drier your chicken, the better your coating will adhere and the crispier your finished dish will be. This single step prevents the rubbery, peeling-off coating that disappoints so many home cooks.
Step 2: Set Up Your Dredging Station
- Prepare three shallow dishes or plates in a row. In the first, whisk your eggs together with a fork until completely combined. In the second, mix your panko breadcrumbs, ¼ cup Parmesan, Italian seasoning, salt, paprika, and black pepper. Stir this mixture well so the seasonings and cheese distribute evenly. The third dish stays empty—this is where you'll place your finished, coated pieces before air frying. Organization matters here. The dredging process goes faster and cleaner when you're not hunting for bowls mid-stream. I learned this in my clinical nutrition training where we emphasized efficiency without sacrificing quality—the same principle applies to home cooking.
Step 3: Coat with Egg and Breadcrumb Mixture
- Take your first chicken piece and place it in the egg mixture. Turn it to coat both sides completely, allowing excess egg to drip back into the bowl. The egg is your adhesive—it's what makes the breadcrumb coating stick through the cooking process. Don't rush this step. Now place the egg-coated chicken into the breadcrumb mixture. Press firmly with your fingers, working the breadcrumbs into the egg coating. Flip and repeat on the other side. This pressing action is what creates that satisfying crunch in every bite. Gently shake off excess crumbs and place on your empty dish. Repeat with the second piece.
Step 4: Preheat Your Air Fryer and Prepare the Basket
- Set your air fryer to 400 degrees Fahrenheit and let it preheat for about 3 minutes. While it's heating, spray your air fryer basket lightly with olive oil spray. This prevents sticking and helps the chicken brown evenly. Don't oversaturate—you want a light coating, not a puddle. Why 400 degrees? This temperature is hot enough to crisp the coating and cook the chicken through without burning the outside before the inside reaches food safety temperature. It's the sweet spot I've learned through countless batches and refined through my dietitian's understanding of how proteins respond to heat.
Step 5: Cook the First Side
- Place your breaded chicken pieces in the preheated basket in a single layer. Spray the top surface of each piece lightly with olive oil spray. This helps them brown and crisp beautifully. Cook for 5 minutes at 400 degrees without moving them. Resist the urge to peek—the air circulation does its work best when the basket stays closed.
Step 6: Flip and Cook the Second Side
- After 5 minutes, carefully flip your chicken pieces using tongs. Spray the newly exposed surface with a light coating of oil spray. Cook for another 5 minutes. At this point, your chicken should be golden brown on both sides and the internal temperature should be approaching 165 degrees Fahrenheit (the safe temperature for poultry according to USDA guidelines). The coating should sound crispy when you touch it, and it should have that beautiful golden color that tells you the Maillard reaction—the chemical transformation that creates flavor and texture—has happened properly.
Step 7: Add Sauce and Cheese
- Now comes the final assembly. Divide your tomato sauce between the two chicken pieces, spreading it evenly over the top surface of each. Top each piece with ¼ cup of shredded mozzarella cheese, then finish with half of the remaining 1 tablespoon of Parmesan. The Parmesan on top creates pockets of extra umami flavor. The reason we add sauce and cheese at the end rather than the beginning is that they need just enough time to meld together and melt without drying out your perfectly cooked chicken. Timing is everything here.
Step 8: Final Cook and Temperature Check
- Return your assembled chicken to the air fryer at 400 degrees for 2 minutes. This gives the cheese time to melt completely and the sauce to warm through without overcooking the chicken. After 2 minutes, carefully remove your chicken and check the internal temperature with a meat thermometer—it must reach a minimum of 165 degrees Fahrenheit. If it hasn't reached temperature, return it to the air fryer for another minute and check again. This is non-negotiable for food safety. Once you hit 165 degrees, you're done. If you have a meat thermometer, use it every single time—it removes guesswork and guarantees perfectly cooked chicken. Let your finished chicken parm rest for 2 minutes before serving. This allows the juices to redistribute, keeping your chicken moist and tender.
Notes
FAQs
Can I use chicken breasts that are already thin, or do I need to butterfly them?
Butterflying is strongly recommended because it creates even thickness and double the surface area for golden, crispy coating. Store-bought thin chicken is often unevenly pounded, creating some parts that are too thin (and dry) and others that are too thick (and undercooked). Butterflying gives you control and consistency. It takes 30 seconds and makes a real difference.
Is panko breadcrumb essential, or can I use regular breadcrumbs?
Panko is genuinely superior for air frying. Its larger, airier structure crisps better and stays crispier longer. Regular breadcrumbs create a denser, sometimes soggy coating. If panko is truly unavailable, you can use regular breadcrumbs, but your texture won’t be quite the same. This is one ingredient worth seeking out.
Can I make this recipe without an air fryer?
Absolutely. Bake at 400 degrees Fahrenheit on a parchment-lined baking sheet for 12-15 minutes for the initial cooking (instead of 10 minutes total in the air fryer). The coating won’t be quite as crispy, but the flavor will be identical. You can also pan-fry in a skillet with about ½ inch of oil, 3-4 minutes per side, then finish with sauce and cheese under the broiler for 2-3 minutes.
What’s the best cheese to use—fresh mozzarella or low-moisture mozzarella?
Low-moisture mozzarella (the kind in the shredded bags) is better for this application because fresh mozzarella has too much water content and becomes stringy rather than melting smoothly into the sauce. If you want to get fancy and use fresh mozzarella, add it in the last minute of cooking only, just long enough to warm through. For traditional air fryer chicken parm, low-moisture shredded mozzarella is your best choice.
How do I know when the chicken is done cooking?
Use a meat thermometer inserted into the thickest part of the chicken. The internal temperature must reach 165 degrees Fahrenheit minimum for food safety. The coating should be golden brown and crispy. If your coating is dark but the temperature is only 160 degrees, let it cook a bit longer—don’t judge doneness by color alone. Temperature is the only reliable indicator.
More Recipes From This Tradition
- my oven-baked chicken – A lighter Italian preparation using fresh tomato, mozzarella, and basil
- my oven-baked chicken – A different take on simple, soulful chicken cookery
- Baked Breaded Tilapia Recipe – The same crispy coating technique applied to seafood
Making chicken parm in your air fryer is making a choice about what matters in your kitchen and your life. It’s saying that real food, made with care, deserves space in your busy days. It’s honoring the mothers and grandmothers who made this dish with whatever they had, creating memory and nourishment in equal measure.
This isn’t fancy cooking. It’s essential cooking. It’s the kind of meal that holds families together, that says “I’m thinking about you” without needing words. Every golden, crispy piece of chicken is an extension of love made edible, the same way my mother’s kitchen taught me decades ago.
I hope you’ll make this for someone you care about—or for yourself, because you deserve this kind of nourishment too. Let me know how it turns out. Happy Cooking!