This post contains affiliate links. As an Amazon Associate I earn from qualifying purchases.
Before you throw that leftover loaf away, I want to stop you right there. Turn it into something even better. This cheesy garlic bread recipe was born from exactly that moment—standing in my kitchen, staring at a half-eaten baguette from last night’s dinner, wondering what I could create. My mother always taught me that the best meals come from resourcefulness and love, not waste. That afternoon, I discovered that day-old bread transforms into something absolutely magical when you add butter, garlic, and melted cheese. Let me show you how to do the same thing.
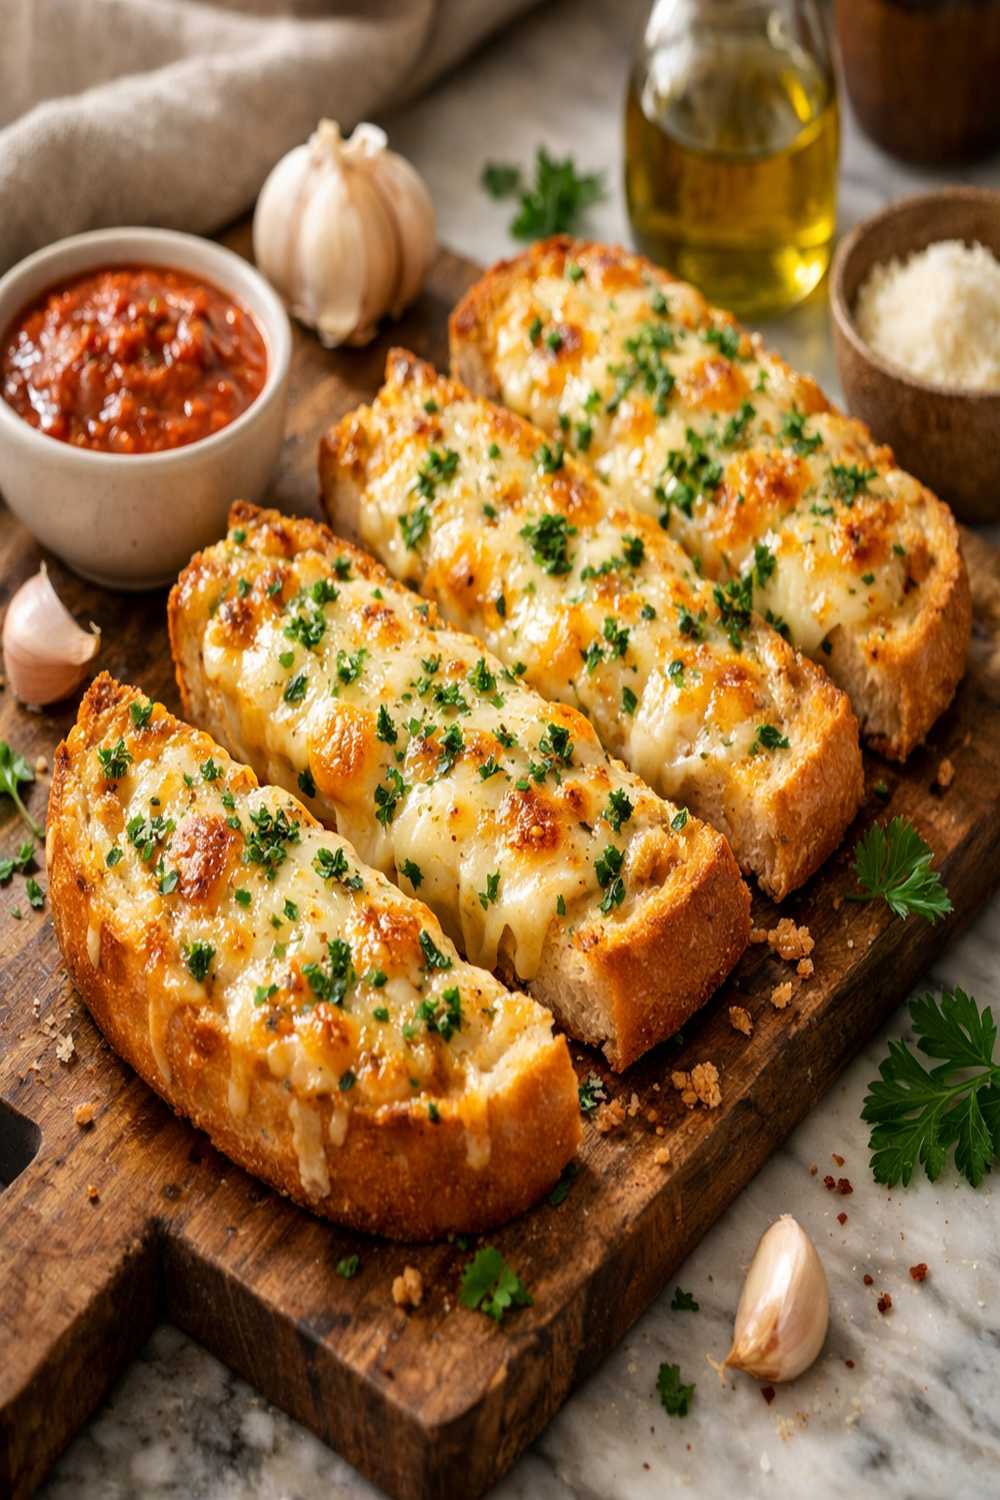
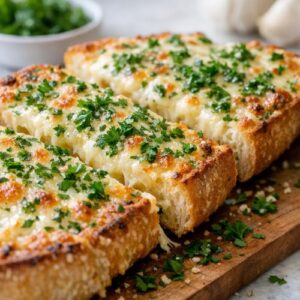
How to Transform Last Night’s Bread Into Restaurant-Quality Cheesy Garlic Bread (Better Than You’d Expect)
I grew up watching my mother rescue forgotten bread from the back of our pantry. She’d slice it, brush it with herbs and butter, and suddenly we had something that made the whole kitchen smell like home. That’s the moment I learned that “leftovers” isn’t a sad word—it’s an invitation to creativity. This cheesy garlic bread recipe became one of my family’s most requested sides because it proves that yesterday’s bread deserves a second life.
The magic happens when you understand that bread actually gets better after a day. It loses moisture, which means it crisps up beautifully when you add heat. The surface becomes the perfect canvas for garlic butter and melted cheese. What could’ve been discarded becomes the star of your dinner table.
What Leftovers Work Best
Not all bread is created equal when it comes to transformation. After years of working with families on meal planning and nutrition, I’ve learned exactly which breads shine and which ones need different treatment. The key is understanding moisture content and structure.
- Day-old crusty bread (baguettes, French bread, ciabatta) – This is your absolute best choice. The crust holds up beautifully to toasting, and the interior soaks in butter and garlic without becoming mushy. This is what we’re aiming for.
- Leftover sandwich bread (sourdough, whole wheat) – These work wonderfully because they have enough structure to handle the toppings. They’ll crisp at the edges while staying tender inside.
- Soft rolls or dinner rolls – You can use these, but watch them carefully. They’ll crisp faster because they’re smaller and have less dense structure. Cut them in half and check around the 12-minute mark.
- Soft white bread or wonder bread – I’d skip this for this recipe. It tends to become tough and cardboard-like rather than crispy. Use it for homemade goldfish instead, where that texture works in your favor.
The Transformation Pantry: What to Keep on Hand
As a registered dietitian, I know that a well-stocked pantry is the difference between throwing food away and creating something nourishing. These are the bridge ingredients—the ones that transform yesterday’s bread into tonight’s showstopper. I always keep these on hand because they’re foundational to so many recipes and they have a long shelf life.
Unsalted butter is my starting point because it lets the garlic and cheese shine without competing flavors. Fresh garlic cloves are non-negotiable—the minced kind from a jar simply doesn’t deliver the same transformation. Good quality cheese makes all the difference in the final taste and texture. These three ingredients, combined with what you already have, create something that tastes like you spent hours in the kitchen when you really spent minutes.
The Ingredients
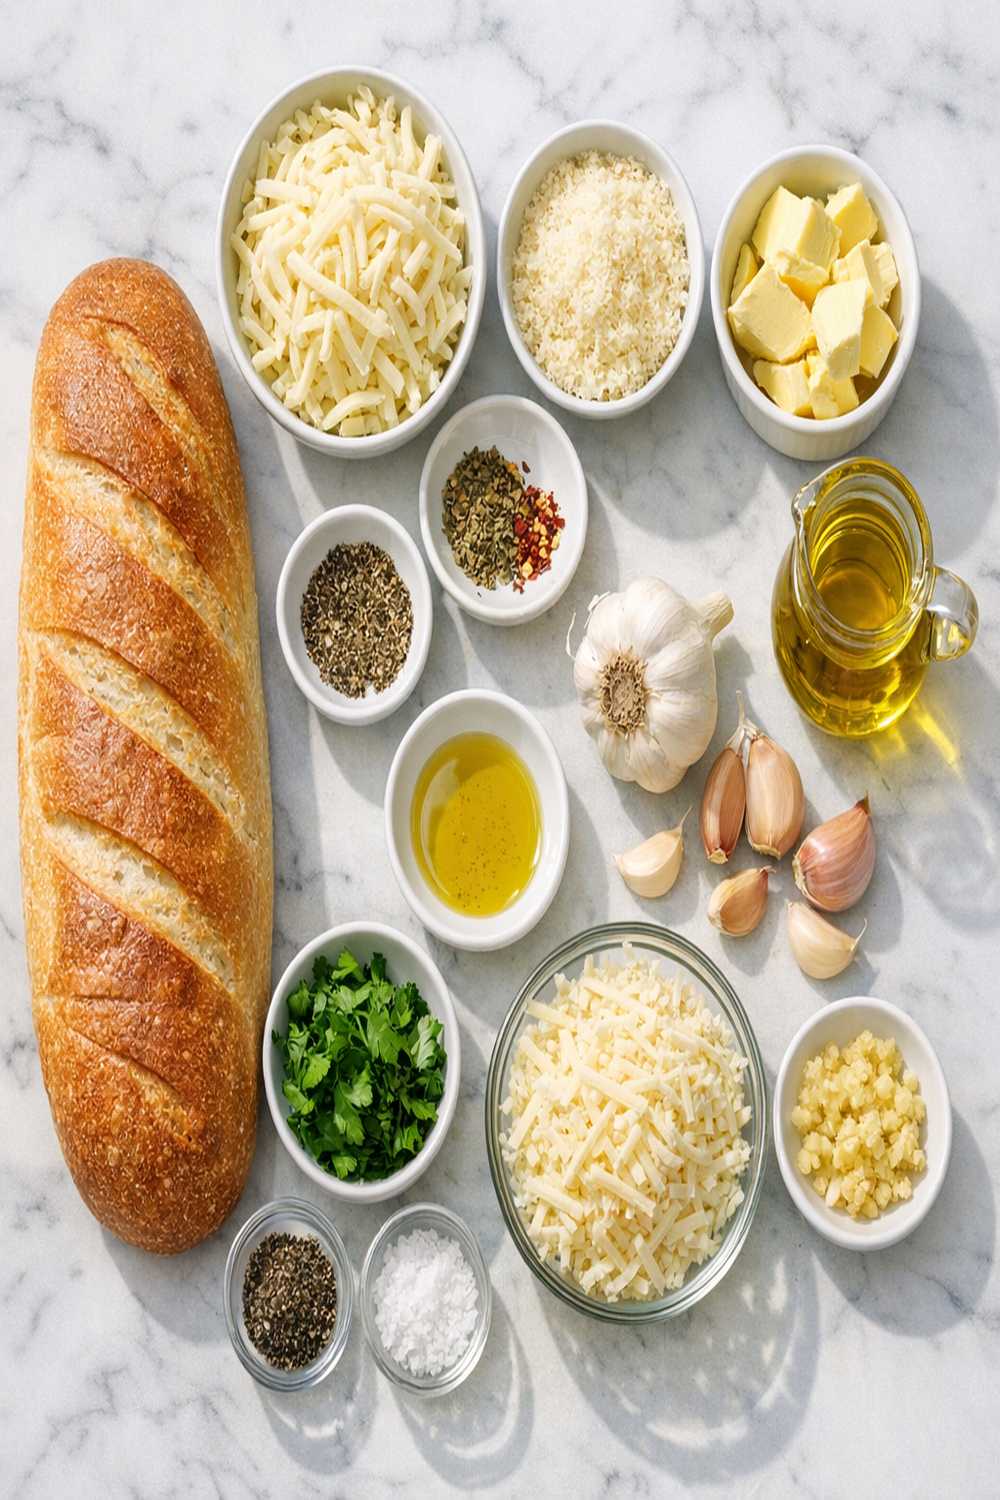
This recipe makes enough for 4 to 6 servings as a side dish, depending on your crowd. I’ve designed it to work with what most families have in their pantry, with flexibility built in. Notice I’m using fresh garlic and real cheese—these choices matter for nutrition and flavor.
- 3 garlic cloves, minced finely (fresh, not from a jar)
- 2 tablespoons fresh parsley, chopped (dried parsley works too, use 2 teaspoons)
- 2 to 2½ cups grated mozzarella cheese (freshly grated is superior to pre-shredded)
- 1 crusty bread loaf, approximately 12 inches long (day-old works perfectly, or use what you have)
- ½ teaspoon salt (adjust based on your cheese saltiness)
- ¼ teaspoon black pepper (optional but recommended)
- 100 grams unsalted butter, softened (about 7 tablespoons, or ½ cup)
The Transformation: How to Make Cheesy Garlic Bread From Leftovers
Now comes the magic. What makes this work is understanding the two-temperature baking method. We start at a lower heat to warm everything through and let the bread revive. Then we crank it up to melt the cheese perfectly without burning the bottom. This technique is something I’ve refined with families over years of meal planning.
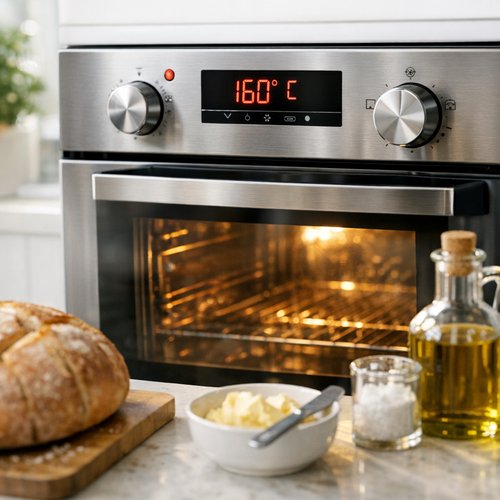
Step 1: Wake Up Your Oven and Prepare Your Workspace
Set your oven to 160°C (320°F). This lower starting temperature is intentional. Lower heat allows your leftover bread to revive and warm through gently, which means the interior will soften and warm while the exterior begins to crisp. While your oven reaches temperature, gather your ingredients on the counter—this takes the stress out of cooking.
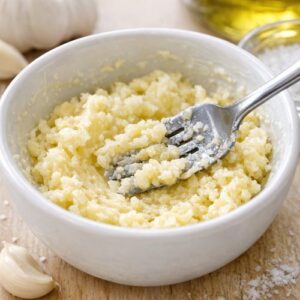
Step 2: Create Your Garlic Butter Base
In a small bowl, combine your softened butter with the minced garlic and salt. Use a fork to mash these together until the garlic is evenly distributed throughout the butter. This is where the transformation starts. Fresh garlic releases its oils when minced, and the butter carries those oils throughout your bread. If your butter is too cold to mash easily, let it sit for a few minutes. You want a spreadable consistency, not melted butter.

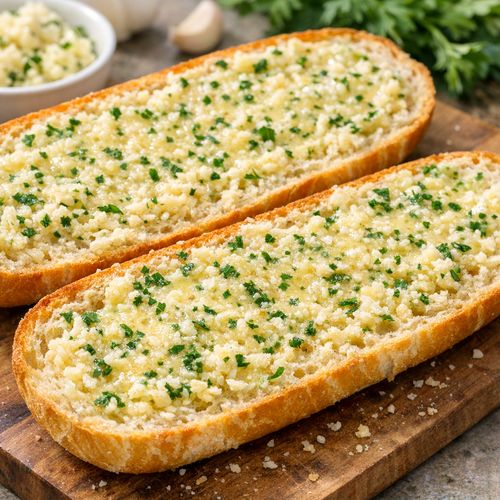
Step 3: Split and Butter Your Bread
Take your bread loaf and cut it horizontally into two halves, creating two flat surfaces. Spread your garlic butter generously over both cut sides, working from the center outward. Don’t miss any patches—those bare spots will crisp differently than the buttered areas. This is hands-on cooking that feels good, the kind my mother taught me builds confidence in the kitchen.
If your bread is particularly dry (and day-old bread often is), the butter will soak in immediately. That’s perfect. It means your bread is absorbing moisture and flavor.
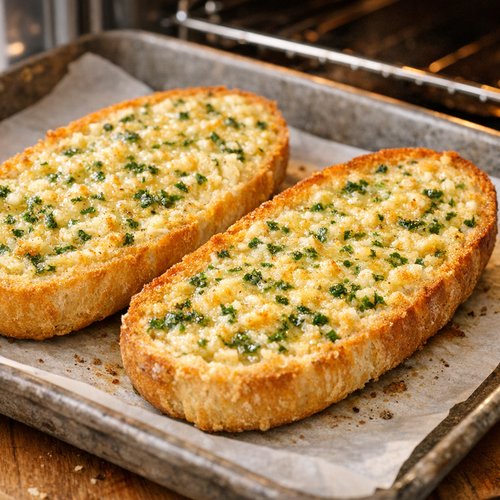
Step 4: First Bake – The Revival Phase
Place your buttered bread halves on a baking sheet, butter-side up. Bake at 160°C (320°F) for exactly 20 minutes. During this time, the bread warms through, the butter soaks in, and the edges begin to develop a light golden color. Walk away and start preparing whatever you’re serving alongside this—a soup, a main dish, a salad. This 20 minutes buys you time.
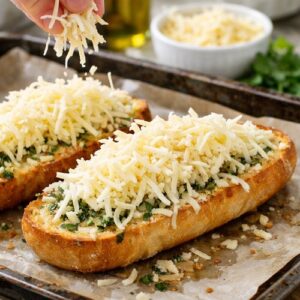
Step 5: Add Your Cheese Crown
After 20 minutes, remove the bread from your oven. Now comes the moment that makes this dish special. Increase your oven temperature to 200°C (390°F). While the oven preheats, distribute your grated mozzarella evenly over both bread halves. Don’t just pile it in the center—spread it edge to edge. This ensures every piece gets that melted, bubbly cheese.
If you’re using pre-shredded cheese, it’ll melt fine, but freshly grated cheese melts into a silkier, more cohesive layer. It’s a small choice that makes a noticeable difference in the final dish.

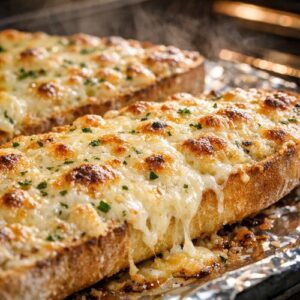
Step 6: Final Melt – The Finish
Return the bread to your now-hotter oven at 200°C (390°F). Bake for 7 to 10 minutes, watching carefully after the 6-minute mark. The cheese should bubble at the edges and turn a light golden brown. This is not a time to walk away. Every oven runs differently—some might need only 7 minutes while others need the full 10. The moment the cheese bubbles visibly, you’re done. Overcooked cheese becomes tough and separates.

Step 7: Finish and Serve Immediately
Remove the bread from the oven and immediately sprinkle fresh parsley over the hot cheese. The heat will slightly wilt the parsley, releasing its oils and color. Let the bread rest for just 2 minutes—this helps it set. Using a sharp bread knife, cut the bread into pieces about 2 inches wide. Serve immediately while the cheese is still creamy and the bread is still warm.
This is not a dish that waits. The magic is in the temperature contrast and the freshness. Serve it alongside your meal as a side that everyone will remember.

How to Adapt Based on What You Have
Real cooking happens in the adaptation. This is where your creativity shines and where I encourage you to trust your instincts.
- If you only have fresh bread – Slice it and let it sit uncovered on a cutting board for a few hours to dry out slightly. Or proceed with the recipe but reduce the initial baking time to 15 minutes. Fresh bread releases more moisture.
- If you don’t have mozzarella – Use cheddar, parmesan, or any melting cheese you have. A mix works beautifully too. Avoid feta or goat cheese—they don’t melt the same way.
- If your leftovers are particularly dry – Brush the cut sides with a bit of water before applying the garlic butter. This rehydrates the bread slightly without diluting flavor.
- If you’re sensitive to salt – Go easy on the salt in the garlic butter since cheese brings its own sodium. You can always add more but you can’t remove it.
- If you love herbs more – Add oregano, basil, or thyme to your garlic butter. Start with ¼ teaspoon dried or 1 tablespoon fresh, chopped.
- If you have roasted garlic – Use 2 to 3 cloves of roasted garlic instead of fresh. It’ll be sweeter and less sharp.
Zero Waste: Using Every Last Bit
As a nutrition professional, I’m passionate about waste reduction because it connects directly to food security and sustainability. This recipe is already a zero-waste champion, but let me show you how to squeeze every bit of value.
If you have bread ends or pieces too small to make into bread halves, chop them into ½-inch cubes, toss with the garlic butter, spread on a baking sheet, and bake at 200°C for 12 to 15 minutes until golden. You’ve just made homemade croutons. Those croutons transform a simple green salad into something special, or float them in a soup like bacon potato soup for added texture and flavor.
Any leftover garlic butter stays fresh in the refrigerator for up to two weeks. Spread it on roasted vegetables, melt it over baked chicken, or toss it with pasta. Extra grated cheese that didn’t make it into this recipe? Freeze it in a labeled bag for up to three months. It works wonderfully in baked mac and cheese or sprinkled over casseroles.
Can I Store Cheesy Garlic Bread Recipe?
Here’s the honest truth: cheesy garlic bread is at its absolute best fresh from the oven. The texture, the melted cheese, the warmth—that’s the whole experience. But I understand that real life means leftovers.
In the refrigerator: Store cooled bread in an airtight container for up to 3 days. The cheese will firm up and the bread will soften slightly. To revive it, wrap it loosely in foil and warm it in a 160°C oven for about 8 minutes. This reheats gently without drying it out further.
In the freezer: You can freeze this for up to 2 months. Cool it completely first, wrap pieces individually in plastic wrap, then place them in a freezer bag. Label it with the date. To reheat from frozen, unwrap and bake at 180°C for about 12 to 15 minutes until heated through and cheese is melted again.
Important note: Remember that this is already day-2 food (using leftover bread). It’s safe because baking kills any concerns, but the sooner you enjoy it, the better the quality. Plan to serve this within a day of making it for the best experience.
Nutrition Information
Let me break down what you’re actually eating, because as a registered dietitian, I believe you deserve to know. Per serving (approximately 1 piece, based on 6 servings total):
Calories: 285 | Total Fat: 18g | Saturated Fat: 11g | Cholesterol: 42mg | Sodium: 380mg | Total Carbohydrate: 24g | Dietary Fiber: 1g | Protein: 10g | Calcium: 280mg (28% of daily value)
This data reflects USDA nutritional guidelines for bread, butter, and cheese. Here’s what matters: you’re getting protein from the cheese, carbohydrates from the bread (energy for your body), and calcium for bone health. The fat is primarily from butter and cheese—real food fats that your body uses for hormone production and nutrient absorption. This isn’t a “light” dish, and I’m not going to pretend it is. It’s a satisfying, nourishing side that brings people together.
Expert’s Nutritional Tip: Fresh garlic, even in small amounts, contains compounds called allicins that research suggests may support cardiovascular health. By making your own garlic butter instead of using store-bought spreads, you’re getting fresh garlic compounds that pre-made versions simply don’t contain. The nutrition extends beyond calories and macronutrients into the phytonutrients your body craves.
What to Serve With Cheesy Garlic Bread Recipe?
This bread is magnificent alongside meals that benefit from a rich, savory complement. Think about textures and flavors that create balance on the plate.
A bright green salad with acidic dressing cuts through the richness beautifully. Something fresh and cool against warm, melted cheese. Soups are a natural pairing—the bread becomes a perfect vehicle for sopping up broth. Tomato-based dishes work wonderfully too, where the acidity complements the savory cheese.
- Tomato soup or minestrone – The acidity balances the cheese richness, and the bread becomes a perfect spoon.
- Simple green salad with vinaigrette – Fresh greens and bright dressing provide contrast to the warm bread.
- Roasted vegetables – Simple roasted broccoli, zucchini, or Brussels sprouts add nutrition and texture variety.
- Chili or hearty stew – Perfect for tearing off pieces and using as bread bowls.
- Grilled protein – Steak, chicken, or fish all benefit from this garlic bread as a side. The garlic flavor complements rather than competes.
- Pasta dishes – Especially lighter preparations like tortellini vegetable soup where the bread becomes the hearty element.
Common Mistakes to Avoid
After years of cooking with families, I’ve seen where this recipe tends to go wrong. Let me save you from these common pitfalls.
Mistake 1: Using cold butter. Cold butter won’t spread evenly and will tear your bread. Let it soften at room temperature for 15 minutes before spreading. You want it soft enough to spread easily but not so warm it separates.
Mistake 2: Skipping the two-temperature baking method. Some people think they can just do one high-heat bake. This burns the bottom while leaving the center cold. The 160°C start warms your bread through gently. The 200°C finish melts the cheese without overcooking the bread. Trust the two-step process.
Mistake 3: Using pre-minced jarred garlic. I understand the convenience factor, but jarred garlic has a different flavor profile. It’s been preserved and has a slightly bitter aftertaste. Fresh garlic cloves take 30 seconds to mince with a knife. This small choice changes everything.
Mistake 4: Overloading the cheese. More isn’t always better. Two cups is plenty. Overloading means the cheese won’t melt evenly, and you’ll get burnt spots on top while the interior stays cold. Spread it in a single layer and trust that it’s enough.
Seasonal Variations: Adapting Throughout the Year
Cooking seasonally connects you to the ingredients at their peak. Here’s how I adapt this recipe based on what’s fresh.
Spring: Add 1 tablespoon of fresh dill or chives minced into your garlic butter. The brightness feels like the season tastes.
Summer: After the cheese melts, top with fresh tomato slices and basil before serving. The warmth of the bread brings out the sweetness of summer tomatoes.
Fall: Mix 1 teaspoon of thyme into your garlic butter. Maybe add a pinch of smoked paprika. Serve alongside roasted vegetables that match the season.
Winter: This is when I’m most likely to make it because day-old bread is always available. I sometimes add crispy bacon bits and a bit of rosemary. Hearty, warming, exactly what winter needs.
Make-Ahead Guide: Meal Prep for the Week
Here’s how I use this recipe strategically in my own meal planning.
The night before: Prepare your garlic butter and store it in an airtight container in the refrigerator. You can keep this for up to one week. The next evening, all you need to do is slice your bread, spread the butter, and bake. This cuts your active cooking time in half.
Two days ahead: If you want to get further ahead, you can assemble the bread with garlic butter (but not cheese) and wrap it tightly in plastic wrap. Store in the refrigerator. When you’re ready to cook, just add cheese and bake according to the directions, though you might need an extra 2 to 3 minutes since it’s cold.
The freezer strategy: Make a full batch when you have time, cool it completely, wrap pieces individually in plastic wrap, then place in a labeled freezer bag. This gives you homemade cheesy garlic bread ready whenever you need it. Thaw at room temperature for 15 minutes, then reheat wrapped in foil at 160°C for 8 to 10 minutes.
The key to successful make-ahead cooking is understanding which components you can prepare in advance. With this recipe, that’s your garlic butter. The assembly and baking happen at the end so you get that fresh, warm, just-made experience.

Cheesy Garlic Bread Recipe
Ingredients
- 3 garlic cloves, minced finely fresh, not from a jar
- 2 tablespoon fresh parsley, chopped dried parsley works too, use 2 teaspoons
- 2 to 2½ cups grated mozzarella cheese freshly grated is superior to pre-shredded
- 1 crusty bread loaf, approximately 12 inches long day-old works perfectly, or use what you have
- ½ teaspoon salt adjust based on your cheese saltiness
- ¼ teaspoon black pepper optional but recommended
- 100 gram unsalted butter, softened about 7 tablespoons, or ½ cup
Instructions
Step 1: Wake Up Your Oven and Prepare Your Workspace
- Set your oven to 160°C (320°F). This lower starting temperature is intentional. Lower heat allows your leftover bread to revive and warm through gently, which means the interior will soften and warm while the exterior begins to crisp. While your oven reaches temperature, gather your ingredients on the counter—this takes the stress out of cooking.

Step 2: Create Your Garlic Butter Base
- In a small bowl, combine your softened butter with the minced garlic and salt. Use a fork to mash these together until the garlic is evenly distributed throughout the butter. This is where the transformation starts. Fresh garlic releases its oils when minced, and the butter carries those oils throughout your bread. If your butter is too cold to mash easily, let it sit for a few minutes. You want a spreadable consistency, not melted butter.
Step 3: Split and Butter Your Bread
- Take your bread loaf and cut it horizontally into two halves, creating two flat surfaces. Spread your garlic butter generously over both cut sides, working from the center outward. Don't miss any patches—those bare spots will crisp differently than the buttered areas. This is hands-on cooking that feels good, the kind my mother taught me builds confidence in the kitchen. If your bread is particularly dry (and day-old bread often is), the butter will soak in immediately. That's perfect. It means your bread is absorbing moisture and flavor.

Step 4: First Bake - The Revival Phase
- Place your buttered bread halves on a baking sheet, butter-side up. Bake at 160°C (320°F) for exactly 20 minutes. During this time, the bread warms through, the butter soaks in, and the edges begin to develop a light golden color. Walk away and start preparing whatever you're serving alongside this—a soup, a main dish, a salad. This 20 minutes buys you time.

Step 5: Add Your Cheese Crown
- After 20 minutes, remove the bread from your oven. Now comes the moment that makes this dish special. Increase your oven temperature to 200°C (390°F). While the oven preheats, distribute your grated mozzarella evenly over both bread halves. Don't just pile it in the center—spread it edge to edge. This ensures every piece gets that melted, bubbly cheese. If you're using pre-shredded cheese, it'll melt fine, but freshly grated cheese melts into a silkier, more cohesive layer. It's a small choice that makes a noticeable difference in the final dish.
Step 6: Final Melt - The Finish
- Return the bread to your now-hotter oven at 200°C (390°F). Bake for 7 to 10 minutes, watching carefully after the 6-minute mark. The cheese should bubble at the edges and turn a light golden brown. This is not a time to walk away. Every oven runs differently—some might need only 7 minutes while others need the full 10. The moment the cheese bubbles visibly, you're done. Overcooked cheese becomes tough and separates.
Step 7: Finish and Serve Immediately
- Remove the bread from the oven and immediately sprinkle fresh parsley over the hot cheese. The heat will slightly wilt the parsley, releasing its oils and color. Let the bread rest for just 2 minutes—this helps it set. Using a sharp bread knife, cut the bread into pieces about 2 inches wide. Serve immediately while the cheese is still creamy and the bread is still warm. This is not a dish that waits. The magic is in the temperature contrast and the freshness. Serve it alongside your meal as a side that everyone will remember.
FAQs
Can I use salted butter instead of unsalted?
Yes, absolutely. If you’re using salted butter, reduce the salt in the recipe to ¼ teaspoon. Salted butter’s salt content varies by brand, so taste as you go. Remember that your cheese also brings sodium, so you have flexibility here. Always taste and adjust rather than automatically adding the full amount of salt.
Is store-bought garlic bread okay, or am I starting from scratch?
You can use store-bought garlic bread—it’s literally designed for this purpose. But if you’re asking because you want to know if homemade is worth the effort, yes, it absolutely is. Homemade takes about 25 minutes start to finish. You know exactly what’s in it, and the flavor is noticeably fresher. Store-bought works in a pinch, but homemade is worth planning for.
What if the cheese gets brown spots before it’s fully melted?
This means your oven runs hot. Next time, check at the 6-minute mark instead of waiting the full 7 to 10 minutes. If it’s already happened, remove the bread immediately. The cheese underneath has likely melted even if the top looks overdone. Brown spots don’t mean failure—they’re just a sign of oven personality.
Can I add other toppings like bacon or vegetables?
Absolutely. This is your canvas. Add cooked bacon pieces before the cheese, or top with diced fresh tomatoes after cooking. Add sautéed mushrooms or caramelized onions. Keep the base recipe the same, but adapt the toppings to what you have and what sounds good. That’s when cooking becomes fun.
How do I know if my bread is too old to use?
If your bread is moldy, discard it. If it’s hard as a rock and won’t slice, it’s borderline—you can still use it, but soak it slightly longer in a water spray before buttering. If it smells off or has any unusual odor, trust your nose and don’t use it. Generally, bread stays good for about 5 days at room temperature before it becomes a texture issue rather than a safety issue. This recipe specifically loves day-old or slightly older bread, so that’s your sweet spot.
More Leftover Transformation Recipes
Once you catch the transformation bug, you’ll start seeing potential in everything. Here are recipes that teach the same principle: yesterday’s ingredients become today’s showstopper.
- Baked Mac N Cheese Recipe – Transform leftover pasta and cheese into something creamy and baked.
- Bacon Potato Soup Crock Pot Recipe – Use up leftover potatoes and bacon in a warm, soul-satisfying way.
- Air Fry Ravioli Recipe – Frozen or refrigerated leftover ravioli becomes something crispy and completely new.
- Bacon Wrapped Smokies Recipe – Turn simple ingredients into an impressive appetizer or side that feels special.
The Joy of Making Something From Almost Nothing
This is where my passion for cooking really lives. Not in complexity or fancy techniques, but in the moment when someone tastes what you made and their eyes light up. They don’t ask “what’s this?” They just enjoy it. And when you tell them it came from yesterday’s bread, from your pantry staples, from your creativity—that moment teaches them something. It teaches them that resourcefulness is a form of love.
My mother understood this. She turned leftover bread into garlic bread the same way she turned leftover vegetables into soup and yesterday’s rice into something crispy and delicious. She was teaching me that waste wasn’t inevitable, that limitations were actually invitations to be more creative, and that feeding people well was about understanding what you had and transforming it with confidence.
This cheesy garlic bread recipe is my inheritance from her. It’s simple enough that anyone can make it, flexible enough that it works with what you have, and delicious enough that people will ask for seconds. It’s proof that the best meals often come from the most humble beginnings.
So next time you have leftover bread, reach for it instead of discarding it. Slice it, butter it, add cheese, and bake it. Watch your family gather around the warm, garlicky, cheesy comfort of something you made from what you already had. That’s the magic I want you to experience. That’s real cooking. That’s love on a plate.
Happy Cooking!