
This post contains affiliate links. As an Amazon Associate I earn from qualifying purchases.
You know that soul-warming chicken stew from your favorite cozy restaurant? The one with tender chicken, golden broth, and vegetables so soft they melt on your tongue? Here’s what I discovered: you can make it better at home. I’ve spent years in my kitchen recreating those restaurant magic moments, and I’m sharing my reverse-engineered version with you. This isn’t just a copycat recipe—it’s your ticket to that same comfort, minus the price tag. If you’re looking for more ways to use bone-in chicken, you’ll also love my bone-in chicken breast slow cooker recipe, which uses similar techniques.
Copycat Chicken Stew In Dutch Oven Recipe That Tastes Better Than the Restaurant Version
I became obsessed with this dish years ago. There’s something about the way a restaurant creates that perfectly balanced broth—rich but not heavy, deeply flavorful but still letting the chicken shine. I’d order it every time I ate out, and my family would laugh at my predictability. But here’s the truth: I wasn’t being predictable. I was being smart. I knew what I loved, and I wanted to understand why.
So I started testing. I made batch after batch in my own kitchen, adjusting seasonings, changing cooking methods, experimenting with ingredient ratios. What I learned changed everything. The secret isn’t in some mystical technique—it’s in understanding the fundamentals of braising, respecting the ingredients, and building layers of flavor slowly and intentionally. This is how we create meals that taste like love.
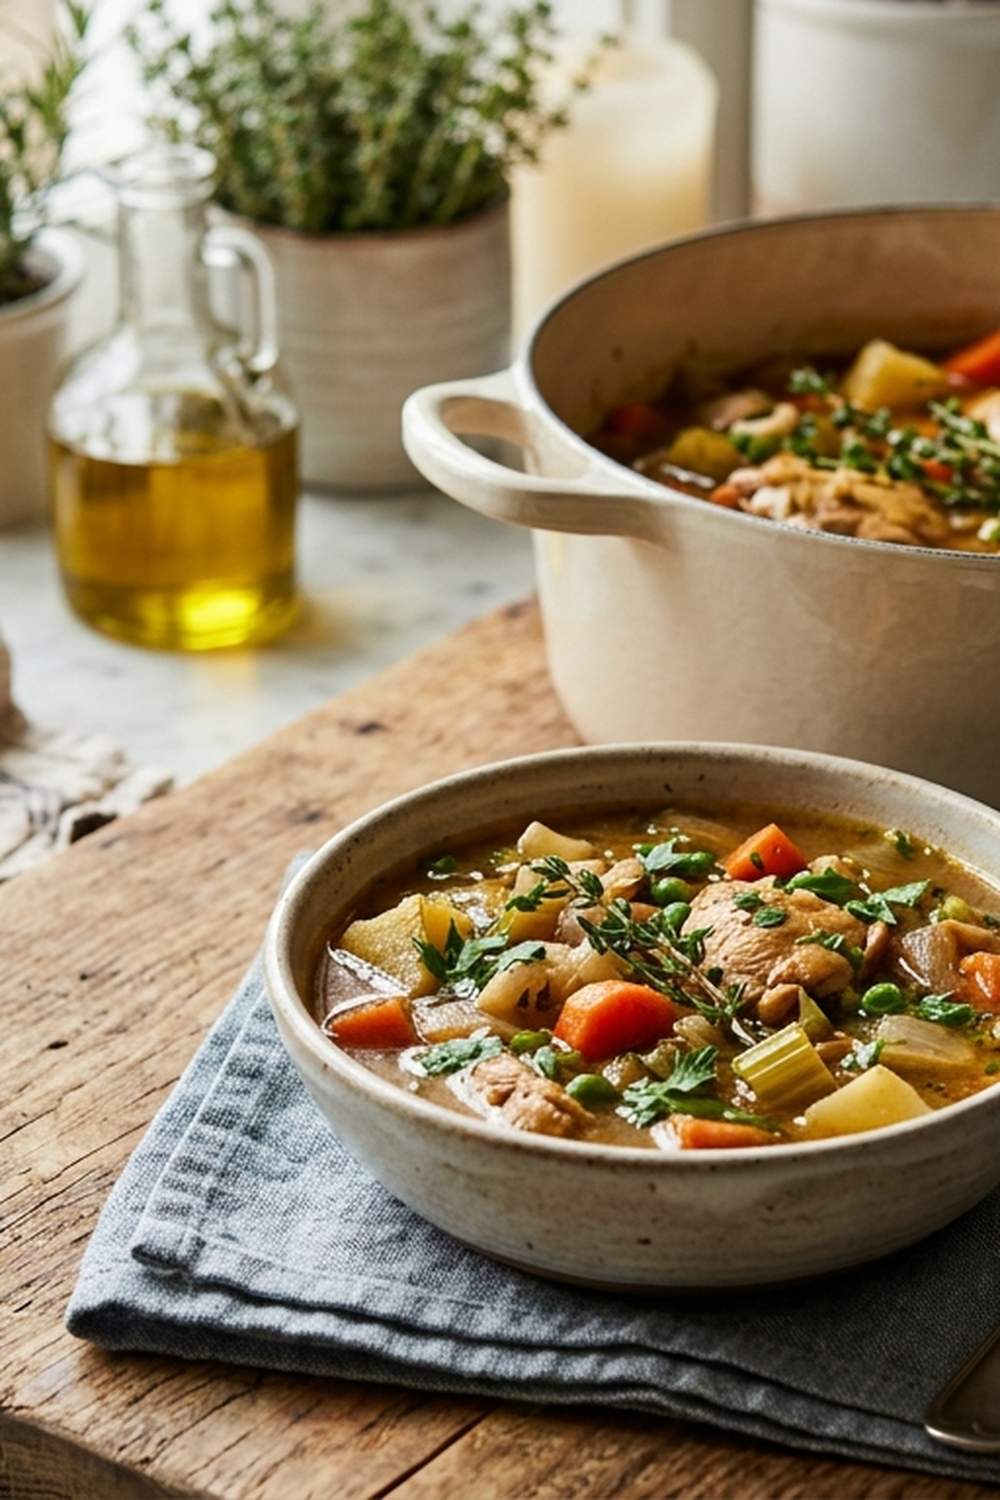
What Makes the Restaurant Version So Good
Let me break down what makes that restaurant version so craveable. First, there’s the depth of broth. It’s not thin or watery—it coats your spoon with silky richness. Second, the chicken texture. It’s impossibly tender, falling apart just from the heat of the broth, never dry or stringy. Third, the vegetable integration. The carrots and potatoes don’t feel like afterthoughts; they’re infused with the same rich flavor as the broth itself.
I identified several specific techniques restaurants use to achieve this:
- Building a flavor base through searing – browning chicken first develops deep, complex flavors that water-based broth alone can never achieve
- The holy trinity of vegetables – onions, carrots, and celery create an aromatic foundation that restaurants have perfected for generations
- Layered seasoning approach – not dumping everything in at once, but adding herbs and spices at strategic points to maximize their impact
- Long, gentle simmering – rushing this step ruins everything; the slow melding of flavors is where the magic lives
- A touch of richness – cream or butter added at the end creates that silky mouthfeel that makes you want another spoonful
How This Homemade Version Compares
Here’s my honest assessment. The homemade version wins in several critical ways. Your broth tastes fresher because you control every ingredient—no mystery additives or preservatives hiding in there. You save money, sometimes 60-70% per serving compared to restaurant pricing. You customize everything: want more herbs? Go for it. Prefer thighs over breast? Your kitchen, your rules. The entire process takes about two hours from start to finish, and most of that is hands-off simmering.
Where restaurants still have an edge? Consistency and speed. They’ve made this dish ten thousand times. Their kitchen is calibrated for it. But here’s what I want you to know: that edge disappears after you make this recipe three or four times. Once you understand the rhythm, you’ll actually make a better version than most restaurants because you’ll taste as you go, adjusting seasoning to perfection.
The Ingredients – Reverse-Engineered
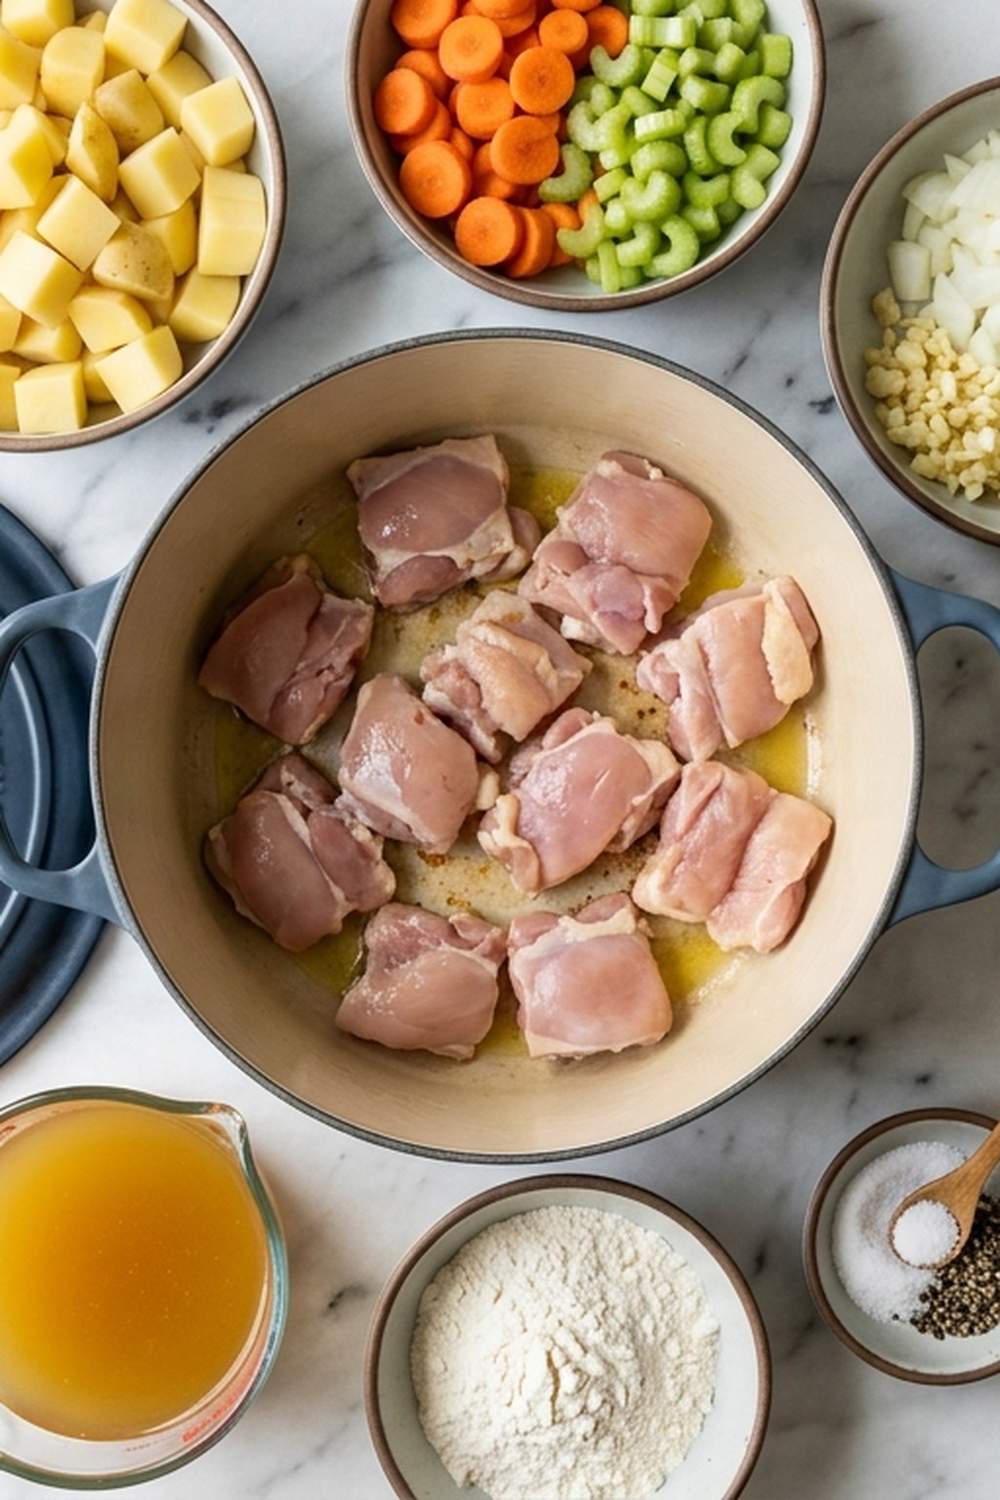
Each ingredient serves a specific purpose in replicating that restaurant magic. I identified these through careful tasting and testing, often making two batches side-by-side to understand what created certain flavors or textures. Let me walk you through exactly why each one matters:
- 1 teaspoon dried parsley (brightens the final flavor profile)
- 2 tablespoons extra-virgin olive oil (for searing the chicken with a high smoke point)
- 1½ pounds red potatoes, left whole initially then chunked (absorb flavor and provide substance)
- 1 chicken bouillon cube or 1 teaspoon better-than-bouillon chicken base (intensifies chicken flavor)
- ½ teaspoon mustard powder (adds subtle tang and complexity)
- 2-3 drops gravy master, optional (adds subtle color and deepens the visual appeal)
- 1½ cups carrots, diced into bite-sized pieces (adds natural sweetness and body)
- 1 medium yellow onion, diced (the aromatic foundation of the stew)
- ¼ teaspoon ground sage (adds earthy warmth)
- Salt and freshly ground black pepper (for seasoning each stage of cooking)
- 5 tablespoons unsalted butter (creates richness without overpowering)
- 2 teaspoons Italian seasoning blend (the restaurant’s signature herb backbone)
- ⅛ teaspoon ground black pepper (layered seasoning for depth)
- 1 teaspoon hot sauce (adds subtle heat and complexity)
- 2 celery ribs, diced (completes the classic aromatic trio)
- ½ teaspoon onion powder (enhances the aromatic base without raw onion bite)
- ½ cup heavy cream, optional but recommended (the finishing touch that makes it restaurant-quality)
- 2 pounds bone-in chicken breasts or thighs (bones add collagen and gelatin for silky broth)
- ½ cup dry white wine (adds acidity and sophistication to the broth)
- ½ teaspoon each of dried basil, rosemary, and thyme (the herb trio that creates that restaurant signature)
- 6 cups chicken broth, homemade or quality store-bought (the foundation of everything)
- 1 teaspoon Worcestershire sauce (the secret umami booster restaurants rely on)
- 4 cloves fresh garlic, minced (intensifies depth without being sharp)
- ⅓ cup all-purpose flour (creates the silky thickening base)
- ¼ teaspoon celery salt (reinforces the vegetable flavors)
The Copycat Method: How to Recreate Chicken Stew In Dutch Oven Recipe at Home
Now we crack the code. This is where technique meets intention. Follow these steps carefully—they’re ordered this way for a reason. Each step builds on the last, creating layers of flavor that develop into something truly special.
Step 1: Prepare Your Ingredients and Kitchen
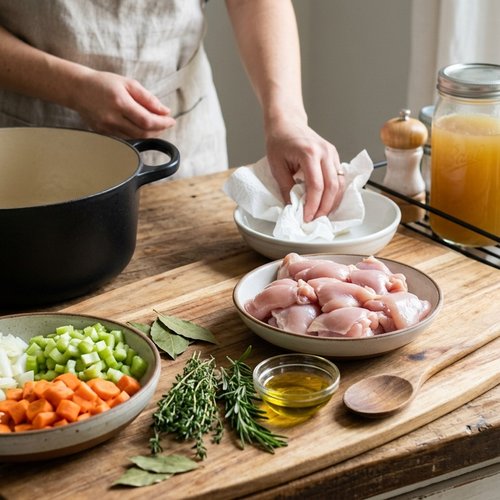
This first step sounds simple, but it changes everything. I want you to measure out every single ingredient before you start cooking. Line them up on your counter in the order you’ll use them. This is called mise en place, and restaurant kitchens use it for a reason: it keeps you calm and prevents mistakes. Don’t cut your potatoes yet—they go in later. Pat your chicken completely dry with paper towels. Moisture is the enemy of proper searing, and proper searing is the foundation of deep flavor. Seasoning the chicken now with salt, pepper, and Italian seasoning means the flavors will penetrate the meat as it cooks.
Step 2: Sear the Chicken for Deep Flavor
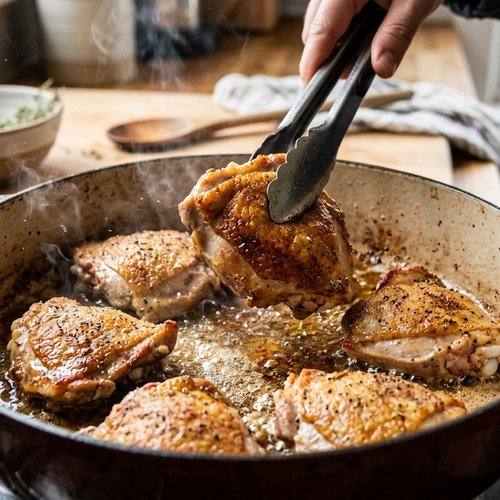
Heat your olive oil in a large Dutch oven over medium-high heat. Wait for the oil to shimmer—this is crucial. A properly heated pan is the difference between searing and steaming. When you add the chicken, it should sizzle immediately. Cook for 3-4 minutes per side, just until the outside is golden brown. We’re not cooking it through; we’re developing flavor through the Maillard reaction. Remove the chicken to a clean plate and set aside. This step is non-negotiable for restaurant-quality depth.
Step 3: Deglaze and Reduce the Wine
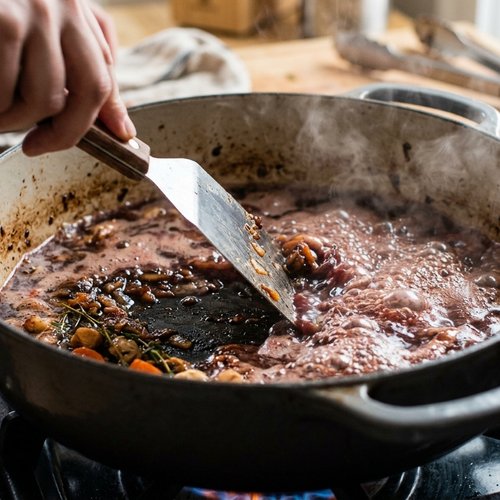
Turn off the heat for a moment. Add the dry white wine to the hot pot—it’ll sizzle and steam dramatically, which is exactly what you want. Turn the heat to medium and use a silicone spatula to scrape the bottom and sides of the pot, releasing all those caramelized bits stuck to the surface. Those browned bits are concentrated flavor gold. Let the wine reduce by half, which takes about 4 minutes. You’ll see the liquid decrease and become more concentrated. This is when your broth starts becoming something special.
Step 4: Build Your Aromatic Base
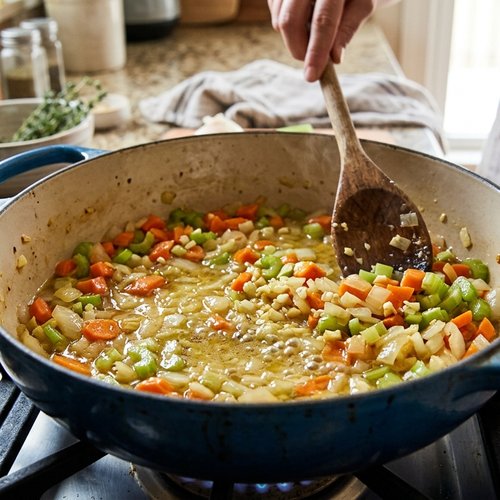
Add the butter and let it melt into the reduced wine, creating a silky base. Now add your diced onions, carrots, and celery—this is the holy trinity of professional cooking. Toss everything together, coating all the vegetables in the butter and wine mixture. Let them soften for 5 minutes, stirring occasionally. You’re not looking for browning here; you want them to soften and release their natural sugars into the pot. This creates the aromatic foundation that makes your kitchen smell like a restaurant.
Step 5: Layer in Flavor with Seasonings
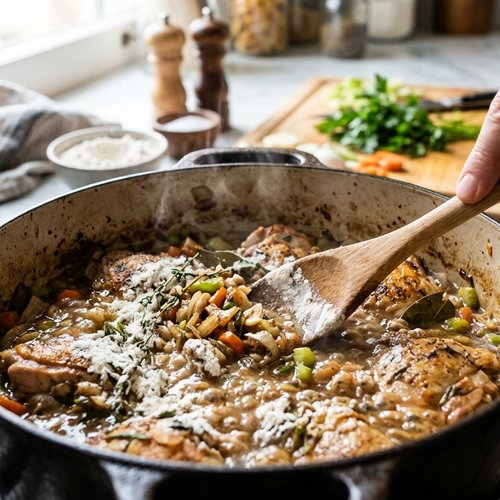
Add the minced garlic, Worcestershire sauce, and hot sauce. Cook for exactly 1 minute—this is long enough for the garlic to become fragrant without burning. Now add your flour and stir constantly for 2 minutes. The flour needs to cook in the fat to develop what’s called a roux, which will thicken your stew. Watch it turn from white to light golden brown. This is the precise moment when raw flour flavor disappears and it becomes a powerful thickening agent.
Step 6: Gradually Introduce the Broth
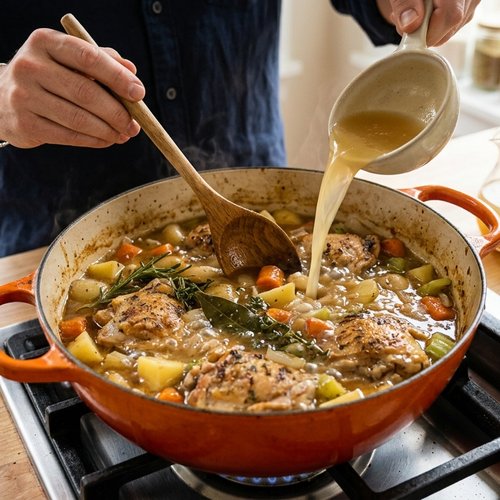
Here’s where patience becomes essential. Don’t dump all the broth in at once. Add it slowly in small splashes, stirring continuously after each addition. This prevents lumps from forming and ensures the roux fully incorporates. After you’ve added about half the broth, do the same with the heavy cream, adding it in small portions while stirring. Then add the bouillon cube, stirring until it dissolves completely. This gradual method is how restaurants achieve that silky, lump-free texture that home cooks often miss.
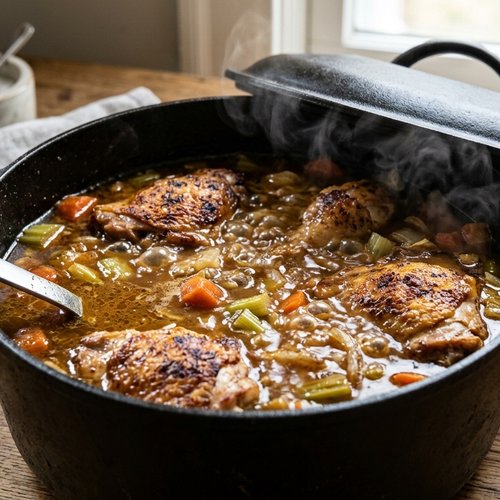
Step 7: Return the Chicken and Begin the Braise
Bring the mixture to a boil, then immediately reduce the heat to a gentle simmer. This is critical: add the chicken pieces back to the pot along with any juices that accumulated on the plate. Cover the pot partially with a lid—you want some steam to escape so the broth concentrates, but not so much that it dries out. Let this bubble very gently for 45-60 minutes. Gentle bubbles are your friend; a rolling boil will make the chicken tough and stringy. Stir occasionally as it cooks. This is when magic happens as the flavors meld and deepen.
Step 8: Add the Potatoes at the Right Time
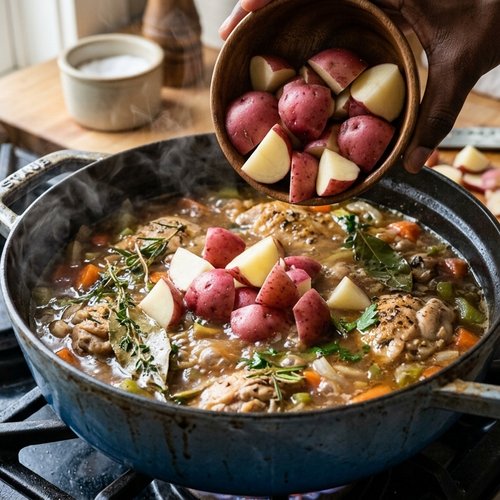
After the chicken has cooked for 45-60 minutes, use kitchen tongs to carefully remove the pieces to a clean plate. Let them rest for a few minutes. Now cut your red potatoes into ¾-inch chunks and add them to the simmering broth. They’ll need about 20 minutes to become fork-tender. This timing is important: adding potatoes too early means they fall apart into the broth; adding them too late means the chicken gets overcooked while you wait.
Step 9: Finish and Taste
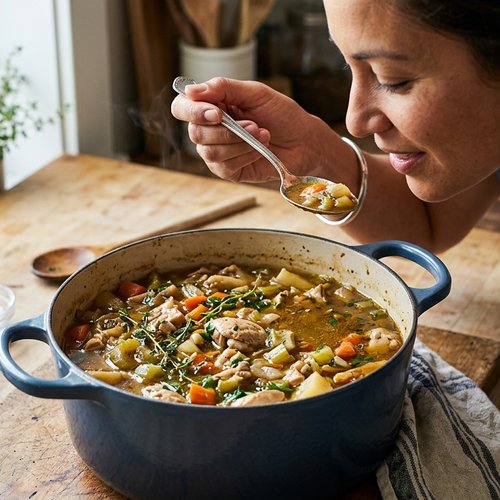
Once the potatoes are tender, dice or shred the chicken, discarding any bones. Return it to the pot. If you want a slightly darker, richer appearance, add 2-3 drops of gravy master and stir well. Now taste your creation. This is the most important step. Add more salt, pepper, or herbs if needed. The seasoning should taste intentional and balanced—not too salty, not too bland, with herbs you can actually taste. This final tasting is what separates restaurant-quality stew from average stew.
The Secret Sauce/Seasoning Blend
The heart of this copycat recipe is the seasoning blend, and I want you to understand exactly how it works. It’s not random spices thrown together—it’s a calculated combination where each herb plays a specific role. The base is dried Italian seasoning, which gives you that familiar restaurant herbal note. But here’s what restaurants do that most home cooks miss: they layer their herbs.
The Italian seasoning at the beginning creates the first flavor note. Then, the specific combination of basil, rosemary, and thyme added with the aromatics creates a deeper, more complex herbal foundation. The sage brings earthiness, the mustard powder adds subtle tang and complexity, and the onion powder reinforces the aromatic base without adding raw bite. The celery salt ties everything back to the vegetables themselves.
The magic is in the proportions and the timing. If you dump all these spices in at once, they’ll compete. By adding them in stages—first the Italian seasoning on the chicken, then the herb blend with the aromatics—each addition layers on top of the previous one, creating depth that tastes sophisticated without being overly herbal. This is exactly what fine restaurants do, and now you’ll do it too.
How to Make It Even Better Than the Original
Once you’ve mastered the base recipe, here’s how I elevate it beyond what most restaurants serve:
- Use homemade chicken broth – restaurants often use commercial broth for consistency, but homemade broth (made with chicken bones, aromatics, and time) creates a silkier, more nuanced final product that shows the care you put in
- Add fresh thyme at the end – one teaspoon of fresh thyme stirred in during the final minute of cooking brings brightness that dried herbs can’t match, waking up all the other flavors
- Customize your vegetables – want to add mushrooms? Parsnips? Tender greens like spinach at the very end? Your kitchen lets you personalize in ways restaurants never can
- Use a mix of chicken parts – combining bone-in breasts with bone-in thighs creates more complex flavor and better texture than either alone
- Make it ahead and reheat – stew tastes even better the next day after flavors have completely melded together overnight
Cost Comparison: Home vs Restaurant
Let me give you the actual numbers, because this is important. A restaurant serving of this stew—generous, but not massive—costs between $14-18 depending on your location and the establishment. That’s just the entree, not including sides, drinks, or tip.
My homemade version, making enough for 6-8 generous servings: bone-in chicken ($6-8), vegetables ($3-4), broth and pantry items ($2-3), cream ($1), herbs and seasonings (about $0.50). Total cost: roughly $12-16 for the entire pot. That’s $1.50-2.50 per serving—about one-eighth of the restaurant price.
If your family eats this stew twice a month, you’re saving roughly $240-400 annually by making it at home. But beyond the money, you’re investing in something more valuable: the confidence that comes from knowing you can recreate restaurant magic in your own kitchen. That’s worth more than any discount.
Can I Store Chicken Stew In Dutch Oven Recipe?
Refrigerator storage: This stew keeps beautifully for 3-4 days in an airtight container. The flavors actually improve as they marry together, making it perfect for meal prep. Simply reheat gently on the stovetop over medium heat, stirring occasionally, until warmed through.
Freezer storage: You can freeze this stew for up to 3 months in freezer-safe containers or bags. Leave about an inch of headspace for expansion. Thaw overnight in the refrigerator, then reheat as you would fresh stew. The texture remains excellent even after freezing because the broth-based nature of this dish handles freezing beautifully.
Pro tip from my years in nutrition counseling: portion the stew into individual containers before freezing. Then you can grab one serving for lunch or quickly reheat just what you need without thawing the entire batch. This has changed how my own family eats—they’re more likely to choose the homemade option if it’s already in convenient portions.
Nutrition Information
Based on USDA food composition data, one serving (approximately 1.5 cups with generous chicken and vegetables) of this stew contains roughly:
- Calories: 420-450 (varies based on cream amount and chicken portion size)
- Protein: 28-32 grams (excellent for muscle repair and satiety)
- Carbohydrates: 22-25 grams (mostly from potatoes and vegetables)
- Fat: 18-22 grams (from butter, cream, and chicken skin)
- Fiber: 2-3 grams (from vegetables)
- Sodium: 850-950 mg (adjust salt to your preferences)
For comparison, a typical restaurant version contains 480-550 calories with slightly higher sodium due to added preservatives and over-salting. My homemade version actually comes out ahead nutritionally because you control the salt and can reduce cream if desired.
Expert’s Nutritional Tip: The bone-in chicken in this recipe provides gelatin and collagen from the bones, which supports joint and gut health in ways boneless chicken can’t match. This isn’t just about taste—it’s about nutrition. The bones create a broth that’s more than just flavorful; it’s genuinely nourishing in ways our bodies recognize and appreciate.
What to Order/Make Alongside for the Full Experience
To create that complete restaurant dinner experience at home, you need the right sides. This stew is substantial enough to be the main course, but it deserves accompaniments that complement without competing.
- Cheddar bay biscuits – warm, buttery biscuits with cheddar cheese melted inside are the perfect vehicle for soaking up every bit of that silky broth; serve them warm from the oven
- Buttermilk biscuits or crusty bread – if you want something simpler, fresh-baked buttermilk biscuits or a warm, crusty roll does the same job with less effort
- Simple green salad – after the richness of the stew, a crisp salad with acid from lemon vinaigrette or red wine vinegar provides balance and cuts through the richness beautifully
- Roasted vegetables as a side vegetable – if you’d like more vegetables alongside your main stew (though the stew itself is vegetable-rich), consider my carrots and potatoes roasted recipe for a completely different texture
For dessert, something light is perfect after a hearty stew. My butter tart recipe is rich but small enough to satisfy without overwhelming after this meal.
Common Mistakes to Avoid
I’ve learned these through testing, and I want to save you the frustration:
- Not searing the chicken properly – if your pan isn’t hot enough, you’ll steam instead of sear, losing all that deep flavor. Wait for the oil to shimmer, and don’t move the chicken until it’s golden.
- Adding broth too quickly – this is the number one reason for lumpy stew. Add slowly, stir constantly, and be patient. The extra 2 minutes of care creates the difference between restaurant-quality and average.
- Boiling instead of simmering – a rolling boil toughens chicken and breaks down vegetables into mush. Gentle bubbles are all you need. You should barely see movement in the broth.
- Skipping the final taste test – this stew’s flavor varies slightly based on your broth and seasoning. Always taste at the end and adjust. This final moment is where you personalize it to your preference.
Make-Ahead Guide
This recipe is brilliantly designed for meal prep and advance preparation. Here’s how I handle it in my own kitchen:
Prep Stage (1 day ahead): Dice all your vegetables and store them in separate containers in the refrigerator. Pat your chicken dry and season it, then wrap it and refrigerate. Measure out your herbs and spices into one small bowl. This takes about 20 minutes and means your cooking day is streamlined.
Full Cook-Ahead (2-3 days ahead): Make the entire stew completely, cool it to room temperature, then refrigerate. The flavors actually deepen as it sits, making this even better than serving it fresh. Reheat gently on the stovetop, adjusting seasoning as needed.
Freezer Meal Prep (up to 3 months ahead): Cool the stew completely, then portion it into individual freezer containers or family-size containers. Label with the date. On busy evenings, you have a complete, restaurant-quality dinner that just needs reheating.
Seasonal Variations
Once you master the base recipe, you can adapt it throughout the year:
Spring: Replace some of the carrots with tender baby peas and fresh asparagus added in the last 5 minutes of cooking. Use fresh tarragon instead of dried herbs for brightness. Add fresh lemon zest at the end.
Summer: Lighten it by using less cream or omitting it entirely. Add fresh green beans, summer squash, and fresh dill. Serve it slightly cooler—it’s still comforting but less heavy in warm weather.
Fall: Add diced parsnips with the potatoes for earthy sweetness. Increase the sage and add a pinch of nutmeg. The deeper spice profile feels perfect as weather cools.
Winter: Stick with the classic version or add diced rutabaga and increase the cream for maximum comfort. Consider adding dried mushrooms for deeper earthiness on cold nights.
Chicken Stew In Dutch Oven Recipe
Ingredients
- 1 teaspoon dried parsley brightens the final flavor profile
- 2 tablespoon extra-virgin olive oil for searing the chicken with a high smoke point
- 1½ pound red potatoes, left whole initially then chunked absorb flavor and provide substance
- 1 chicken bouillon cube or 1 teaspoon better-than-bouillon chicken base intensifies chicken flavor
- ½ teaspoon mustard powder adds subtle tang and complexity
- 2-3 drops gravy master, optional adds subtle color and deepens the visual appeal
- 1½ cup carrots, diced into bite-sized pieces adds natural sweetness and body
- 1 medium yellow onion, diced the aromatic foundation of the stew
- ¼ teaspoon ground sage adds earthy warmth
- Salt and freshly ground black pepper for seasoning each stage of cooking
- 5 tablespoon unsalted butter creates richness without overpowering
- 2 teaspoon Italian seasoning blend the restaurant's signature herb backbone
- ⅛ teaspoon ground black pepper layered seasoning for depth
- 1 teaspoon hot sauce adds subtle heat and complexity
- 2 celery ribs, diced completes the classic aromatic trio
- ½ teaspoon onion powder enhances the aromatic base without raw onion bite
- ½ cup heavy cream, optional but recommended the finishing touch that makes it restaurant-quality
- 2 pound bone-in chicken breasts or thighs bones add collagen and gelatin for silky broth
- ½ cup dry white wine adds acidity and sophistication to the broth
- ½ teaspoon each of dried basil, rosemary, and thyme the herb trio that creates that restaurant signature
- 6 cup chicken broth, homemade or quality store-bought the foundation of everything
- 1 teaspoon Worcestershire sauce the secret umami booster restaurants rely on
- 4 clove fresh garlic, minced intensifies depth without being sharp
- ⅓ cup all-purpose flour creates the silky thickening base
- ¼ teaspoon celery salt reinforces the vegetable flavors
Instructions
Step 1: Prepare Your Ingredients and Kitchen
- This first step sounds simple, but it changes everything. I want you to measure out every single ingredient before you start cooking. Line them up on your counter in the order you'll use them. This is called mise en place, and restaurant kitchens use it for a reason: it keeps you calm and prevents mistakes. Don't cut your potatoes yet—they go in later. Pat your chicken completely dry with paper towels. Moisture is the enemy of proper searing, and proper searing is the foundation of deep flavor. Seasoning the chicken now with salt, pepper, and Italian seasoning means the flavors will penetrate the meat as it cooks.
Step 2: Sear the Chicken for Deep Flavor
- Heat your olive oil in a large Dutch oven over medium-high heat. Wait for the oil to shimmer—this is crucial. A properly heated pan is the difference between searing and steaming. When you add the chicken, it should sizzle immediately. Cook for 3-4 minutes per side, just until the outside is golden brown. We're not cooking it through; we're developing flavor through the Maillard reaction. Remove the chicken to a clean plate and set aside. This step is non-negotiable for restaurant-quality depth.
Step 3: Deglaze and Reduce the Wine
- Turn off the heat for a moment. Add the dry white wine to the hot pot—it'll sizzle and steam dramatically, which is exactly what you want. Turn the heat to medium and use a silicone spatula to scrape the bottom and sides of the pot, releasing all those caramelized bits stuck to the surface. Those browned bits are concentrated flavor gold. Let the wine reduce by half, which takes about 4 minutes. You'll see the liquid decrease and become more concentrated. This is when your broth starts becoming something special.
Step 4: Build Your Aromatic Base
- Add the butter and let it melt into the reduced wine, creating a silky base. Now add your diced onions, carrots, and celery—this is the holy trinity of professional cooking. Toss everything together, coating all the vegetables in the butter and wine mixture. Let them soften for 5 minutes, stirring occasionally. You're not looking for browning here; you want them to soften and release their natural sugars into the pot. This creates the aromatic foundation that makes your kitchen smell like a restaurant.
Step 5: Layer in Flavor with Seasonings
- Add the minced garlic, Worcestershire sauce, and hot sauce. Cook for exactly 1 minute—this is long enough for the garlic to become fragrant without burning. Now add your flour and stir constantly for 2 minutes. The flour needs to cook in the fat to develop what's called a roux, which will thicken your stew. Watch it turn from white to light golden brown. This is the precise moment when raw flour flavor disappears and it becomes a powerful thickening agent.
Step 6: Gradually Introduce the Broth
- Here's where patience becomes essential. Don't dump all the broth in at once. Add it slowly in small splashes, stirring continuously after each addition. This prevents lumps from forming and ensures the roux fully incorporates. After you've added about half the broth, do the same with the heavy cream, adding it in small portions while stirring. Then add the bouillon cube, stirring until it dissolves completely. This gradual method is how restaurants achieve that silky, lump-free texture that home cooks often miss.
Step 7: Return the Chicken and Begin the Braise
- Bring the mixture to a boil, then immediately reduce the heat to a gentle simmer. This is critical: add the chicken pieces back to the pot along with any juices that accumulated on the plate. Cover the pot partially with a lid—you want some steam to escape so the broth concentrates, but not so much that it dries out. Let this bubble very gently for 45-60 minutes. Gentle bubbles are your friend; a rolling boil will make the chicken tough and stringy. Stir occasionally as it cooks. This is when magic happens as the flavors meld and deepen.
Step 8: Add the Potatoes at the Right Time
- After the chicken has cooked for 45-60 minutes, use kitchen tongs to carefully remove the pieces to a clean plate. Let them rest for a few minutes. Now cut your red potatoes into ¾-inch chunks and add them to the simmering broth. They'll need about 20 minutes to become fork-tender. This timing is important: adding potatoes too early means they fall apart into the broth; adding them too late means the chicken gets overcooked while you wait.
Step 9: Finish and Taste
- Once the potatoes are tender, dice or shred the chicken, discarding any bones. Return it to the pot. If you want a slightly darker, richer appearance, add 2-3 drops of gravy master and stir well. Now taste your creation. This is the most important step. Add more salt, pepper, or herbs if needed. The seasoning should taste intentional and balanced—not too salty, not too bland, with herbs you can actually taste. This final tasting is what separates restaurant-quality stew from average stew.
Notes
FAQs
Can I use boneless chicken instead of bone-in?
You can, but I don’t recommend it without adjustment. Bone-in chicken creates a more silky broth and stays more tender during the long simmer. If you must use boneless, reduce the cooking time in the broth from 45-60 minutes to 30-35 minutes, and watch carefully so it doesn’t dry out. The final result won’t be quite as impressive, but it will still taste good.
What if I don’t have dry white wine?
You can substitute with chicken broth (use an extra ½ cup broth instead of wine), or you can use apple cider vinegar (1 tablespoon) mixed with water to get some acidity. You’ll lose some sophistication, but the stew will still taste delicious. Don’t use sweet wine or juice—the acidity is what matters.
Why does my stew taste too salty?
Commercial broth is often quite salty, and then we add bouillon cube and regular salt. Reduce the bouillon cube to ½ cube next time, and hold off on salt until the final tasting. You can always add more salt, but you can’t remove it. Also, using lower-sodium broth completely changes the salt balance.
How do I make this thicker or thinner?
Thinner: Add more broth in ½ cup increments and simmer for 5 minutes after each addition. Thicker: Mix 1 tablespoon cornstarch with 2 tablespoons cold water, then stir it into the simmering stew. The stew will thicken as it simmers for another 3-5 minutes. You can also simmer it uncovered longer to reduce and concentrate.
Can I make this in a slow cooker instead of a Dutch oven?
The short answer is no, not the same way. You’d miss the crucial searing step that develops deep flavor. However, you can sear the chicken and vegetables in a regular pot first, then transfer everything to a slow cooker with the broth and cook on low for 6-8 hours. It’s different but still delicious. For more about slow cooker chicken preparations, check out my beef barley soup slow cooker recipe for similar technique ideas.
More Restaurant Copycat Recipes
- Red Wine Braised Pot Roast Recipe – uses similar braising techniques for beef that create that same restaurant-quality depth
- Crockpot Beef Chili – another slow-cooked comfort classic that tastes better homemade
- Baked Mac N Cheese Recipe – creamy, comforting, and infinitely better than restaurant versions
- Basic Bun Recipe – perfect fresh bread to serve alongside any stew or braised dish
I hope you make this stew this week. I hope your kitchen fills with those smells—the sizzle of chicken browning, the gentle aromatics of onions softening, the perfume of herbs releasing their essential oils. I hope your family sits around the table and someone asks for seconds. Most of all, I hope you feel that same sense of accomplishment I felt when I first cracked this code.
That’s what cooking is, really. It’s taking something you love, understanding it deeply, and then making it your own. It’s creating memories in your kitchen that taste like care. That’s the real copycat secret: restaurants don’t have magic. They have technique, quality ingredients, and intention. And now you do too.
Happy Cooking!