
This post contains affiliate links. As an Amazon Associate I earn from qualifying purchases.
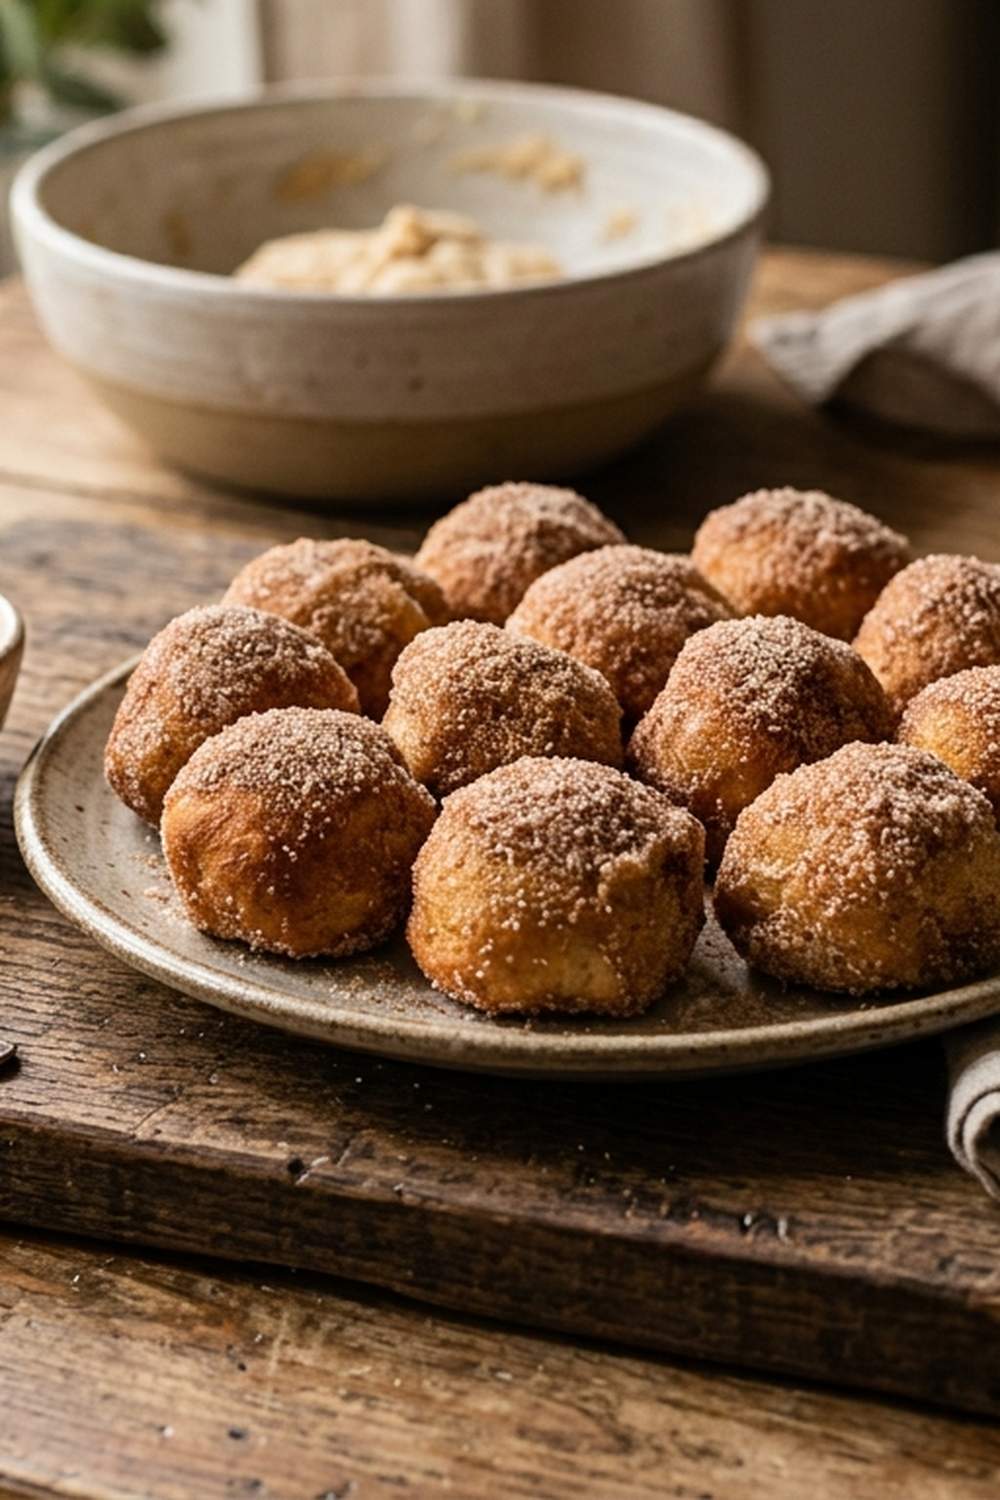
There’s something magical about pulling a warm, cinnamon-scented treat from the oven when you have just a few basic ingredients on hand. I remember standing in my mother’s kitchen on a cold Saint Louis morning, flour dusting the counter, and her showing me how to turn the simplest pantry staples into something that felt like pure love on a plate. These cinnamon balls are that same magic. Tender, warm, and coated in sweet spiced sugar, they’re the kind of recipe that reminds us we don’t need fancy ingredients to create moments worth savoring. Whether you’re looking for a simple dessert to share or a weeknight treat that feels special, this recipe is here for you.
How These Warm Cinnamon Balls Became My Go-To Comfort Recipe
I developed this recipe during those seasons of life when I wanted something homemade but didn’t have the energy for complexity. As a registered dietitian, I’m always thinking about how to make nourishing food accessible. These cinnamon balls struck that perfect balance—simple enough to make on a Tuesday evening, yet elegant enough to serve when someone stops by unexpectedly.
What I love most is how they come together. You’re not fussing with yeast or waiting for long rise times. Instead, you’re creating something warm and wonderful in about thirty minutes total. The dough is forgiving, the coating is foolproof, and the result tastes like you spent far more time than you actually did. That’s the kind of cooking I believe in—honest, straightforward, and deeply satisfying.
My mother always said that the best meals don’t require perfection; they require presence. These cinnamon balls are proof of that philosophy. They’re meant to be made with whatever you have, adjusted to suit your preferences, and shared generously.
What Makes This Recipe So Accessible
I’ve designed this recipe with real life in mind. You likely have most of these ingredients already. The flour comes from your pantry. The butter and milk are staples in most kitchens. The cinnamon, sugar, and baking powder are the bridge ingredients that transform the basic into the beautiful.
What matters most is that you show up in the kitchen willing to try. You don’t need special equipment. A fork works just as well as a pastry cutter. Your hands are the best tool you have. This recipe celebrates resourcefulness, not perfection.
The Ingredients You’ll Need
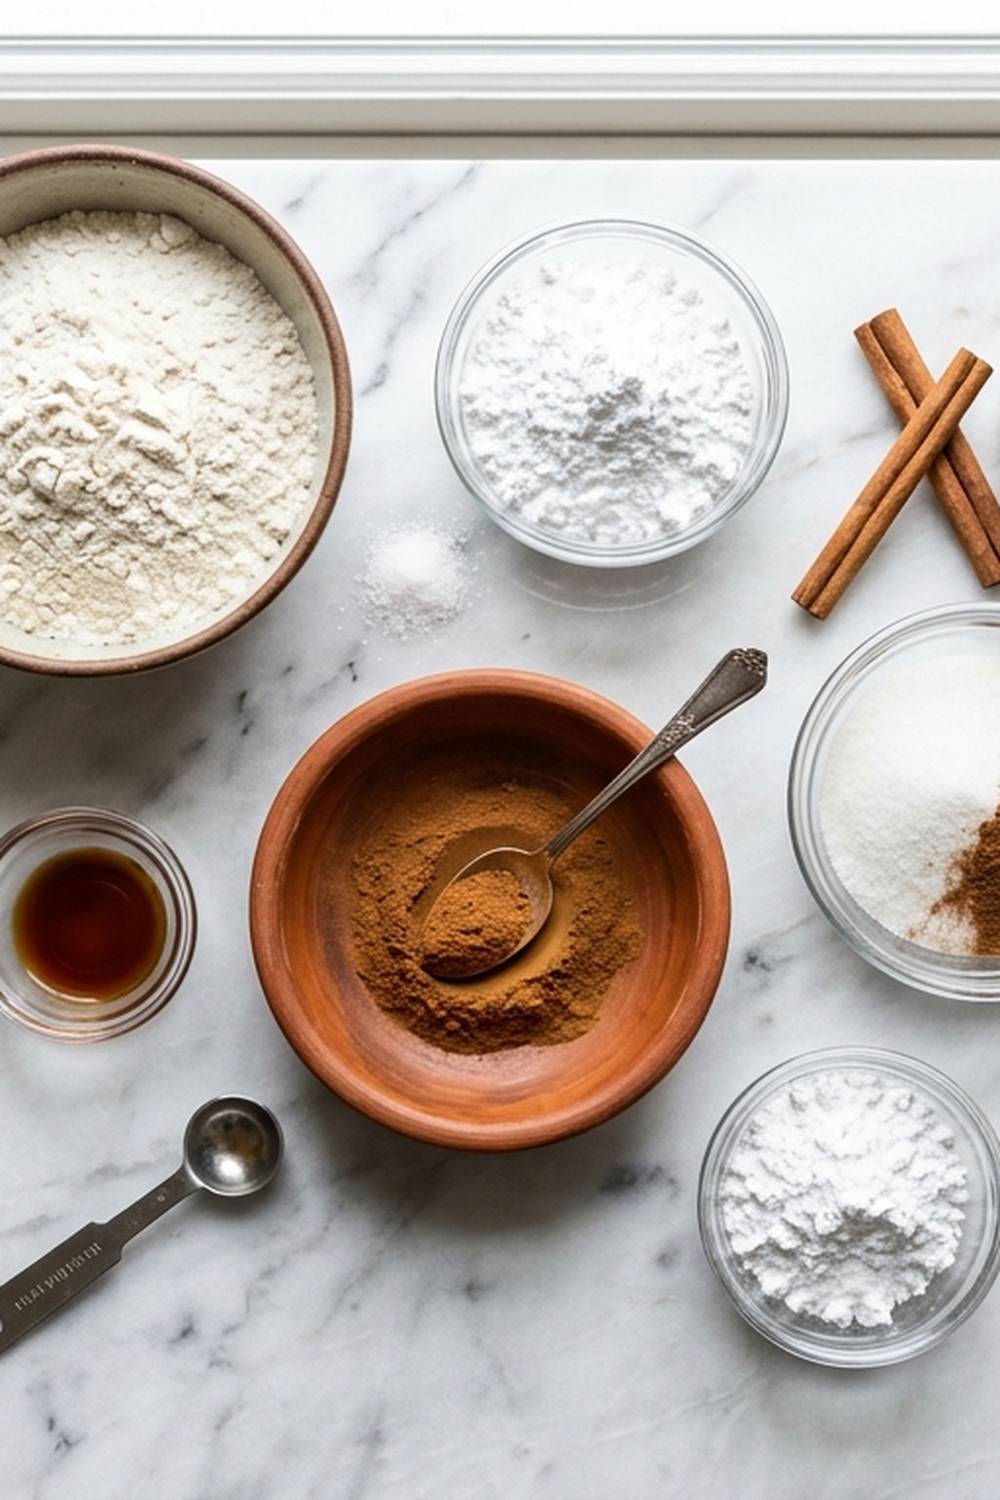
These ingredients work together to create tender, spiced biscuit balls with a sweet glaze. I’ve chosen measurements that are flexible because home kitchens aren’t laboratories—they’re places where love happens. If your milk is slightly warmer or cooler, your butter is a touch softer, these adjustments won’t derail your success.
For the Dough
- ½ cup unsalted butter (cold, cut into cubes)
- 2 cups all-purpose flour (or whole wheat, or a blend for more nutrition)
- ¼ teaspoon salt (enhances all the flavors)
- ¾ to 1 cup cold whole milk (full-fat creates better texture than skim)
- 1 tablespoon baking powder (this is what creates the tender lift)
For the Cinnamon Coating
- 3 tablespoons packed brown sugar (adds moisture and depth)
- ½ cup unsalted butter (melted and slightly cooled)
- 1 teaspoon ground cinnamon (Ceylon cinnamon has a more delicate flavor if you prefer)
- 2 tablespoons granulated sugar (for sweetness and texture)
For the Glaze
- ⅓ cup powdered sugar (sifted if it’s lumpy)
- 1 to 2 tablespoons whole milk (just enough to create a drizzleable consistency)
Yield: Makes approximately 24 warm cinnamon balls, which serves 6 to 8 people generously.
The Transformation: How to Make Cinnamon Balls Step by Step
Making these cinnamon balls is less about following rigid rules and more about understanding the principles behind each step. I’ll walk you through my process, and then I’ll show you where you have flexibility to adjust based on what you have and what you prefer.
Step 1: Combine Your Dry Ingredients
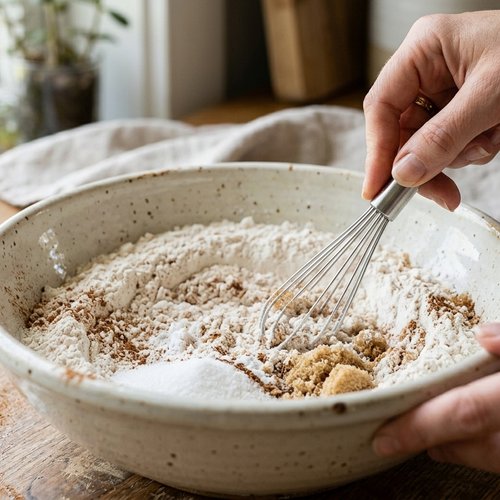
Start by getting a large mixing bowl and adding your flour, baking powder, and salt. Whisk these together gently. Why? Because whisking aerates the flour slightly and ensures your baking powder is evenly distributed throughout. You want every bite to have that tender lift.
I recommend using a fork or whisk for about thirty seconds. You’re not creating a cloud of flour here—just a gentle, even blend. This is where the foundation of your success is built.
Step 2: Cut In the Cold Butter
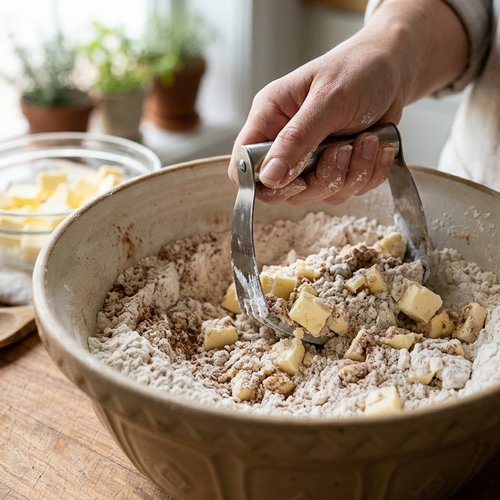
Cut your cold butter into small cubes—roughly the size of peas. Add these to your flour mixture. Now comes the important part: work the butter into the flour using a pastry cutter, two knives, or even a fork. The goal is to create pea-sized pieces of butter throughout the flour.
Why cold butter? Because when those small butter pieces hit the hot oven, they create steam pockets. Those pockets are what make your cinnamon balls tender and fluffy instead of dense and heavy. If your kitchen is warm, refrigerate your bowl for five minutes before this step.
This should take about two to three minutes of gentle work. Your mixture will look crumbly and uneven—that’s exactly what you want.
Step 3: Add Your Milk Gradually
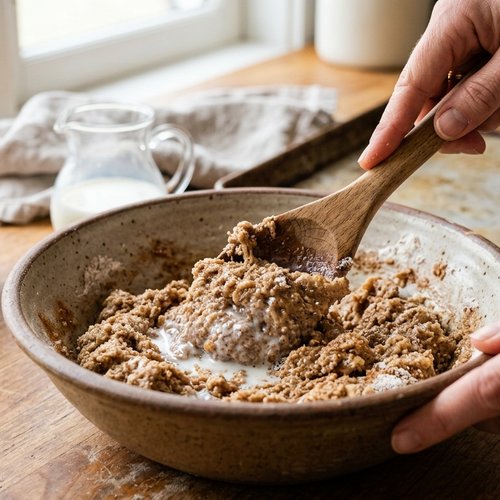
Pour about half your milk into the flour mixture and stir gently with a fork. Add more milk slowly, a few tablespoons at a time, until the dough just comes together. This is where many home bakers add too much liquid too quickly.
Less milk is better than more. If your dough seems dry, add one more tablespoon. If it becomes sticky, just sprinkle a little more flour over the top and gently fold it in. The dough should be slightly moist but not wet.
Once it’s coming together, use your hands to bring it into a ball. Warm hands will warm the dough slightly, which is fine. You’re not kneading here—just gathering the shaggy dough into a cohesive ball in about one minute of gentle work.
Step 4: Prepare Your Baking Vessel
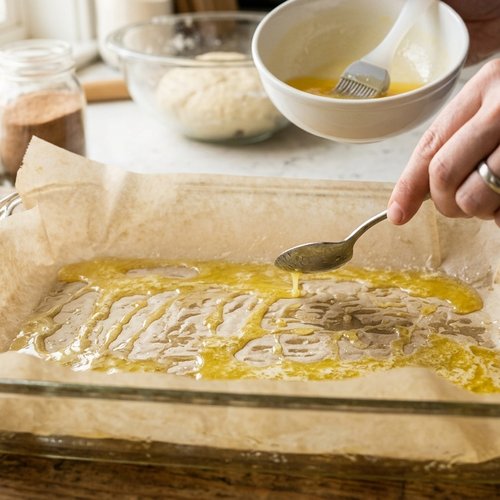
Preheat your oven to 350 degrees Fahrenheit. While it’s heating, prepare a 10-inch pie plate or 9×9-inch baking dish by lightly greasing it or lining it with parchment paper. Drizzle about 2 tablespoons of your melted butter across the bottom of the pan.
This butter creates a protective layer that prevents sticking and adds richness to the bottoms of your cinnamon balls. It also helps the coating adhere beautifully.
Step 5: Shape Your Dough Balls
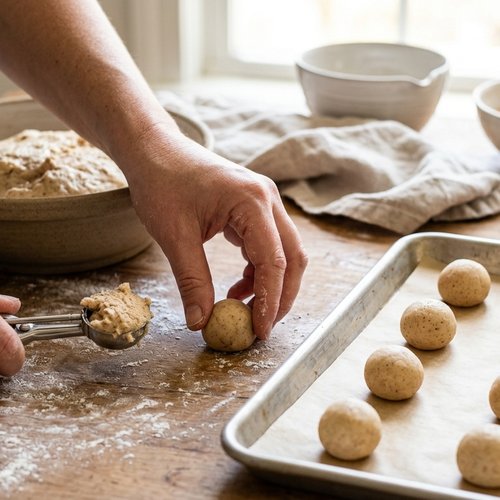
Here’s where I want you to embrace imperfection. Roll your dough into balls roughly 1 inch in diameter. They don’t need to be perfect spheres. Some will be slightly oblong. Some will be rounder. They’ll all bake beautifully and taste wonderful.
I use a small cookie scoop if I have one—it makes the work faster and more even. If you don’t have a scoop, just pinch off pieces of dough about the size of a walnut and roll them gently between your palms.
This step usually takes me about five minutes for a full batch.
Step 6: Coat with Cinnamon Sugar
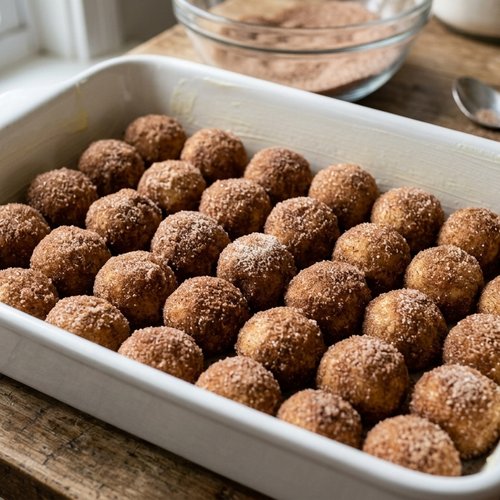
In a small bowl, combine your brown sugar, granulated sugar, and cinnamon. Stir well. Now, take each dough ball and dip it briefly into your melted butter, then immediately roll it in the cinnamon sugar mixture, coating all sides.
Place each coated ball into your prepared baking dish. They can be touching slightly—they’ll puff up as they bake, but they won’t merge into one solid mass. Arrange them in a roughly even layer.
Drizzle any remaining melted butter and cinnamon sugar over the top of the balls. Don’t waste a drop of that cinnamon goodness.
Step 7: Bake Until Puffed and Golden
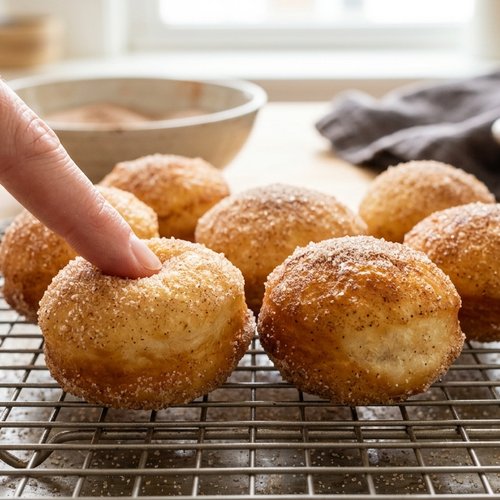
Place your baking dish in the preheated 350-degree oven for 20 to 25 minutes. They’re done when the balls are visibly puffed and feel firm to the touch when you gently press one. The tops should have just a hint of golden color.
Don’t overbake them—you want them tender and moist inside, not dry. If you have a quick-read thermometer, the internal temperature should be about 190 degrees Fahrenheit.
Step 8: Make Your Simple Glaze
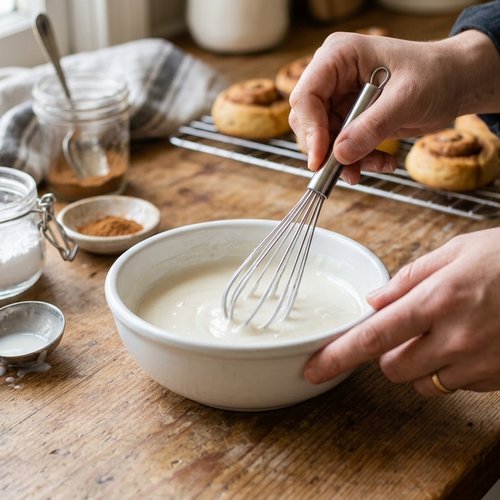
While your cinnamon balls are baking, prepare the glaze. Sift your powdered sugar into a small bowl (this removes lumps). Add 1 tablespoon of milk and whisk until smooth. If the glaze seems too thick to drizzle, add another half tablespoon of milk.
You want something that flows easily from a spoon but isn’t so thin it runs off immediately. Think of the consistency of thin honey.
Step 9: Finish and Serve
Remove your cinnamon balls from the oven and let them cool for about five minutes. This cooling time is important—it lets them set slightly so the glaze adheres beautifully without running off.
Drizzle your glaze generously over the warm cinnamon balls. The warmth of the baked goods will help the glaze set to a light coating. Serve them warm, preferably within the first hour of baking when they’re at their best.
Expert’s Nutritional Insight
As a registered dietitian, I want to share something important: these cinnamon balls contain real cinnamon, which research shows may help support healthy blood sugar levels. Cinnamon contains polyphenols—compounds with antioxidant properties—that your body recognizes and uses.
The whole wheat flour option I’ve included isn’t just a health trend. It adds fiber, which supports digestive health and helps you feel satisfied longer. If you blend whole wheat and all-purpose flour equally, you get the nutrition boost without sacrificing the tender texture that makes these special.
One serving (approximately 3 balls) contains roughly 180 calories, with about 8 grams of fat, 24 grams of carbohydrates, and 2 grams of protein. The butter and milk provide fat-soluble vitamins like vitamin A and vitamin D, which your body needs for nutrient absorption and bone health.
How to Adapt Based on What You Have
- If you only have buttermilk – use it in place of regular milk. The tanginess creates an even more tender crumb. You may need slightly less since buttermilk is thicker.
- If you don’t have baking powder – you can substitute with ¼ teaspoon baking soda plus ½ teaspoon cream of tartar, whisked together with your dry ingredients.
- If you prefer less sugar in the coating – reduce the brown and granulated sugars to 2 tablespoons combined. The cinnamon flavor will come through more prominently.
- If your dough seems dry after mixing – add milk one tablespoon at a time. Cold milk takes longer to incorporate than room temperature milk.
- If you don’t have powdered sugar for the glaze – whisk regular granulated sugar with a tiny amount of milk. It won’t be as smooth, but it still tastes wonderful.
- If you want to make these dairy-free – use plant-based butter and unsweetened plant milk. The texture will be slightly different but still delicious.
Make-Ahead Guide for Busy Weeks
I created this recipe with busy people in mind. Here’s how to make it work with your real life schedule:
Prepare the dough up to 2 hours ahead: Mix and shape your dough balls, place them on a plate, cover with plastic wrap, and refrigerate. When you’re ready to bake, remove them from the refrigerator, coat them with cinnamon sugar, and proceed with baking. You may need to add 2 to 3 minutes to the baking time since they’ll be cold.
Bake ahead and reheat: Make the cinnamon balls completely, cool them, and store in an airtight container at room temperature for up to 2 days. Warm them in a 300-degree oven for about 5 minutes before serving. The glaze can be reapplied after warming.
Freeze the shaped dough balls: After rolling the dough balls and coating them with cinnamon sugar, freeze them on a baking sheet for 2 hours, then transfer to a freezer bag. They’ll keep for up to 1 month. Bake directly from frozen, adding about 5 minutes to the baking time.
Common Mistakes to Avoid
Mistake 1: Using warm butter. If your butter is soft or melted when you’re cutting it into the flour, you won’t get those steam pockets that create tenderness. Always use cold butter. If your kitchen is warm, refrigerate your butter cubes for a few minutes before starting.
Mistake 2: Adding too much milk at once. This is the most common error I see. Too much milk creates a sticky, difficult-to-handle dough. Start with ¾ cup and add gradually. You can always add more, but you can’t remove it easily.
Mistake 3: Overbaking them. These bake quickly—don’t wander away. Set a timer for 20 minutes and check. If they’re still quite pale, give them 3 to 5 more minutes. But once they’re puffed and light golden, remove them. Overbaking creates dryness.
Mistake 4: Skipping the cooling time. Trying to glaze them while they’re piping hot causes the glaze to melt right off. Five minutes of cooling is all you need, and it makes a real difference in the finished appearance.
Seasonal Variations to Try
Fall: Add ¼ teaspoon of nutmeg and ⅛ teaspoon of ground cloves to your cinnamon coating. Include 1 tablespoon of vanilla extract in your glaze. The result tastes like autumn in a bite.
Winter: Substitute 2 tablespoons of the milk in your dough with strong brewed coffee (cooled). Add ½ teaspoon of espresso powder to your cinnamon sugar coating. This creates a mocha-cinnamon flavor that’s sophisticated and warming.
Spring: Reduce the cinnamon to ½ teaspoon and add ½ teaspoon of cardamom to your coating. Cardamom is bright and floral, perfect for lighter seasons. Use lemon juice in your glaze instead of milk for extra brightness.
Summer: Keep the classic cinnamon but brush your warm baked balls with honey mixed with a pinch of sea salt instead of making the traditional glaze. Serve them slightly cooler, almost room temperature, as an afternoon treat.
Zero Waste: Using Every Last Bit
I believe in cooking with intention, which means using what we prepare. If you have leftover cinnamon sugar coating, don’t toss it. Sprinkle it over oatmeal, toast, or yogurt. It keeps well in an airtight container for weeks.
Any leftover glaze can be thinned with a touch more milk and used as a drizzle for morning toast or coffee cake. If your cinnamon balls dry out slightly during storage, crumble them and layer them in a parfait glass with yogurt and fresh fruit for a delicious textured dessert.
The crumbs from any broken or imperfect balls can be mixed with a touch of butter and used as a crumb topping for other baked goods, or folded into vanilla ice cream for a homemade cinnamon crunch treat.
Can I Store Cinnamon Balls?
Absolutely. These keep beautifully. Store them in an airtight container at room temperature for up to 2 days. The texture will be softest on day one, but they’re still enjoyable on day two.
To freeze them: cool completely, arrange in a single layer on a baking sheet, freeze for 2 hours, then transfer to a freezer bag. They’ll keep for up to 1 month in the freezer. Thaw at room temperature for about 30 minutes, then warm in a 300-degree oven for 5 minutes before serving.
If you’ve stored them without the glaze, you can add the glaze right before serving. If they’re already glazed, reglaze them lightly after warming for the best appearance.
I don’t recommend refrigerating these, as the cold accelerates staleness. Room temperature or freezer storage is your best bet.
Nutrition Information
Per serving (3 cinnamon balls with glaze): 180 calories, 8g total fat, 5g saturated fat, 24g carbohydrates, 1g dietary fiber, 12g sugar, 2g protein, 280mg sodium, 85mg calcium.
This data is based on USDA nutritional guidelines and may vary slightly depending on specific brands and preparation methods. The nutritional value assumes a yield of 8 servings per batch.
What I appreciate about this recipe from a nutritional standpoint is the balance. The butter provides fat-soluble vitamins and satiety. The whole milk (if you choose it) adds calcium and vitamin D. The cinnamon brings its own polyphenol compounds. Even the simple sugar in the glaze serves a purpose—it’s part of what makes sharing food joyful, and joy has nutritional value too.
What to Serve With Cinnamon Balls
These cinnamon balls are wonderful on their own, but they’re even better when paired thoughtfully. I like serving them alongside something that contrasts with their warmth and sweetness.
Fresh fruit is my first choice. A simple Blueberry Pie With Frozen Berries or a bowl of fresh berries provides brightness. The tartness of blueberries or raspberries cuts through the richness beautifully.
Marinated Cherry Tomatoes and Burrata might seem like an unusual pairing, but if you’re serving these as a brunch item, that fresh, bright salad beside warm cinnamon balls creates a wonderful balance.
Strong black coffee or chai tea is the beverage I reach for most often. The warmth and slight bitterness of good coffee pairs perfectly with the sweetness of these balls.
- Unsweetened whipped cream – adds creaminess without competing for sweetness
- A simple green salad – the acidity and freshness balance the richness
- Vanilla Greek yogurt – provides creaminess and protein, turning this into more of a complete meal
- Strong coffee or tea – essential for cutting through the sweetness
Cinnamon Balls Recipe
Ingredients
For the Dough
- ½ cup unsalted butter cold, cut into cubes
- 2 cup all-purpose flour or whole wheat, or a blend for more nutrition
- ¼ teaspoon salt enhances all the flavors
- ¾ to 1 cup cold whole milk full-fat creates better texture than skim
- 1 tablespoon baking powder this is what creates the tender lift
For the Cinnamon Coating
- 3 tablespoon packed brown sugar adds moisture and depth
- ½ cup unsalted butter melted and slightly cooled
- 1 teaspoon ground cinnamon Ceylon cinnamon has a more delicate flavor if you prefer
- 2 tablespoon granulated sugar for sweetness and texture
For the Glaze
- ⅓ cup powdered sugar sifted if it's lumpy
- 1 to 2 tablespoons whole milk just enough to create a drizzleable consistency
Instructions
Step 1: Combine Your Dry Ingredients
- Start by getting a large mixing bowl and adding your flour, baking powder, and salt. Whisk these together gently. Why? Because whisking aerates the flour slightly and ensures your baking powder is evenly distributed throughout. You want every bite to have that tender lift. I recommend using a fork or whisk for about thirty seconds. You're not creating a cloud of flour here—just a gentle, even blend. This is where the foundation of your success is built.
Step 2: Cut In the Cold Butter
- Cut your cold butter into small cubes—roughly the size of peas. Add these to your flour mixture. Now comes the important part: work the butter into the flour using a pastry cutter, two knives, or even a fork. The goal is to create pea-sized pieces of butter throughout the flour. Why cold butter? Because when those small butter pieces hit the hot oven, they create steam pockets. Those pockets are what make your cinnamon balls tender and fluffy instead of dense and heavy. If your kitchen is warm, refrigerate your bowl for five minutes before this step. This should take about two to three minutes of gentle work. Your mixture will look crumbly and uneven—that's exactly what you want.
Step 3: Add Your Milk Gradually
- Pour about half your milk into the flour mixture and stir gently with a fork. Add more milk slowly, a few tablespoons at a time, until the dough just comes together. This is where many home bakers add too much liquid too quickly. Less milk is better than more. If your dough seems dry, add one more tablespoon. If it becomes sticky, just sprinkle a little more flour over the top and gently fold it in. The dough should be slightly moist but not wet. Once it's coming together, use your hands to bring it into a ball. Warm hands will warm the dough slightly, which is fine. You're not kneading here—just gathering the shaggy dough into a cohesive ball in about one minute of gentle work.
Step 4: Prepare Your Baking Vessel
- Preheat your oven to 350 degrees Fahrenheit. While it's heating, prepare a 10-inch pie plate or 9x9-inch baking dish by lightly greasing it or lining it with parchment paper. Drizzle about 2 tablespoons of your melted butter across the bottom of the pan. This butter creates a protective layer that prevents sticking and adds richness to the bottoms of your cinnamon balls. It also helps the coating adhere beautifully.
Step 5: Shape Your Dough Balls
- Here's where I want you to embrace imperfection. Roll your dough into balls roughly 1 inch in diameter. They don't need to be perfect spheres. Some will be slightly oblong. Some will be rounder. They'll all bake beautifully and taste wonderful. I use a small cookie scoop if I have one—it makes the work faster and more even. If you don't have a scoop, just pinch off pieces of dough about the size of a walnut and roll them gently between your palms. This step usually takes me about five minutes for a full batch.
Step 6: Coat with Cinnamon Sugar
- In a small bowl, combine your brown sugar, granulated sugar, and cinnamon. Stir well. Now, take each dough ball and dip it briefly into your melted butter, then immediately roll it in the cinnamon sugar mixture, coating all sides. Place each coated ball into your prepared baking dish. They can be touching slightly—they'll puff up as they bake, but they won't merge into one solid mass. Arrange them in a roughly even layer. Drizzle any remaining melted butter and cinnamon sugar over the top of the balls. Don't waste a drop of that cinnamon goodness.
Step 7: Bake Until Puffed and Golden
- Place your baking dish in the preheated 350-degree oven for 20 to 25 minutes. They're done when the balls are visibly puffed and feel firm to the touch when you gently press one. The tops should have just a hint of golden color. Don't overbake them—you want them tender and moist inside, not dry. If you have a quick-read thermometer, the internal temperature should be about 190 degrees Fahrenheit.
Step 8: Make Your Simple Glaze
- While your cinnamon balls are baking, prepare the glaze. Sift your powdered sugar into a small bowl (this removes lumps). Add 1 tablespoon of milk and whisk until smooth. If the glaze seems too thick to drizzle, add another half tablespoon of milk. You want something that flows easily from a spoon but isn't so thin it runs off immediately. Think of the consistency of thin honey.
Step 9: Finish and Serve
- Remove your cinnamon balls from the oven and let them cool for about five minutes. This cooling time is important—it lets them set slightly so the glaze adheres beautifully without running off. Drizzle your glaze generously over the warm cinnamon balls. The warmth of the baked goods will help the glaze set to a light coating. Serve them warm, preferably within the first hour of baking when they're at their best.
FAQs
Can I use whole wheat flour instead of all-purpose?
Absolutely, and I encourage it. Whole wheat flour adds nutrition and a slightly nuttier flavor. If you’re using 100% whole wheat, you may need to add slightly more milk (an extra tablespoon or two) since whole wheat absorbs more liquid. I prefer a 50/50 blend—it gives you the nutritional benefits without sacrificing the tender crumb you’re after.
What if my dough is too sticky to handle?
Sprinkle a little more flour over the top and gently fold it in. You want to work with barely damp hands, which actually helps prevent sticking. If you’ve already added too much milk, simply dust your work surface and your hands with flour as you shape the balls. It’s easier to manage than trying to fix the dough itself.
Do I have to use butter, or can I substitute with oil?
I recommend using butter. The solid fat creates the steam pockets that make these tender. If you use oil, the texture will be denser and more cake-like. If you must use oil, reduce it to ⅓ cup and your dough will work, but it won’t have quite the same light, flaky quality.
Can I make these without the glaze?
Yes. They’re delicious on their own, warm and cinnamon-sweet. The glaze adds extra sweetness and visual appeal, but it’s not essential. If you skip it, dust them lightly with powdered sugar right after they come out of the oven instead.
What’s the best way to reheat them if they’ve cooled?
Preheat your oven to 300 degrees Fahrenheit. Place the cinnamon balls on a baking sheet and cover loosely with foil. Warm for about 5 minutes until they’re heated through but not hot enough to be painful. This method restores the tender texture without drying them out. Microwaving is faster but can create a slightly rubbery texture, so I avoid it when possible.
More Recipes You’ll Love
- Butter Tart Recipe – another comforting baked good with that same warm, buttery richness
- my homemade ice cream – when you want something indulgent and impressive
- Baked Mac N Cheese Recipe – a different kind of comfort, savory and satisfying
Bringing It All Together
These cinnamon balls are proof of something I’ve believed my whole career as a dietitian: the best food doesn’t require complicated techniques or hard-to-find ingredients. It requires intention, presence, and a willingness to show up in the kitchen exactly as you are.
I think about my mother often when I make these. The way she taught me that cooking is a language of love. How she’d say that the most nourishing meals are the ones made with attention, even if they’re simple. Even if they’re humble. Maybe especially then.
These warm cinnamon balls carry that lesson. They’re meant to be made in twenty minutes on a Tuesday. They’re meant to fill your kitchen with the smell of cinnamon and butter and home. They’re meant to be shared, or tucked away for yourself on a morning when you need something that tastes like comfort.
I can’t wait for you to try them. I hope they become as much a part of your kitchen as they are mine. I hope they remind you that you already know how to make something wonderful.
Happy Cooking!
META DESCRIPTION: Easy Cinnamon Balls recipe with warm spiced coating and sweet glaze. Ready in 30 minutes with pantry staples. Perfect for weeknight desserts!