
This post contains affiliate links. As an Amazon Associate I earn from qualifying purchases.
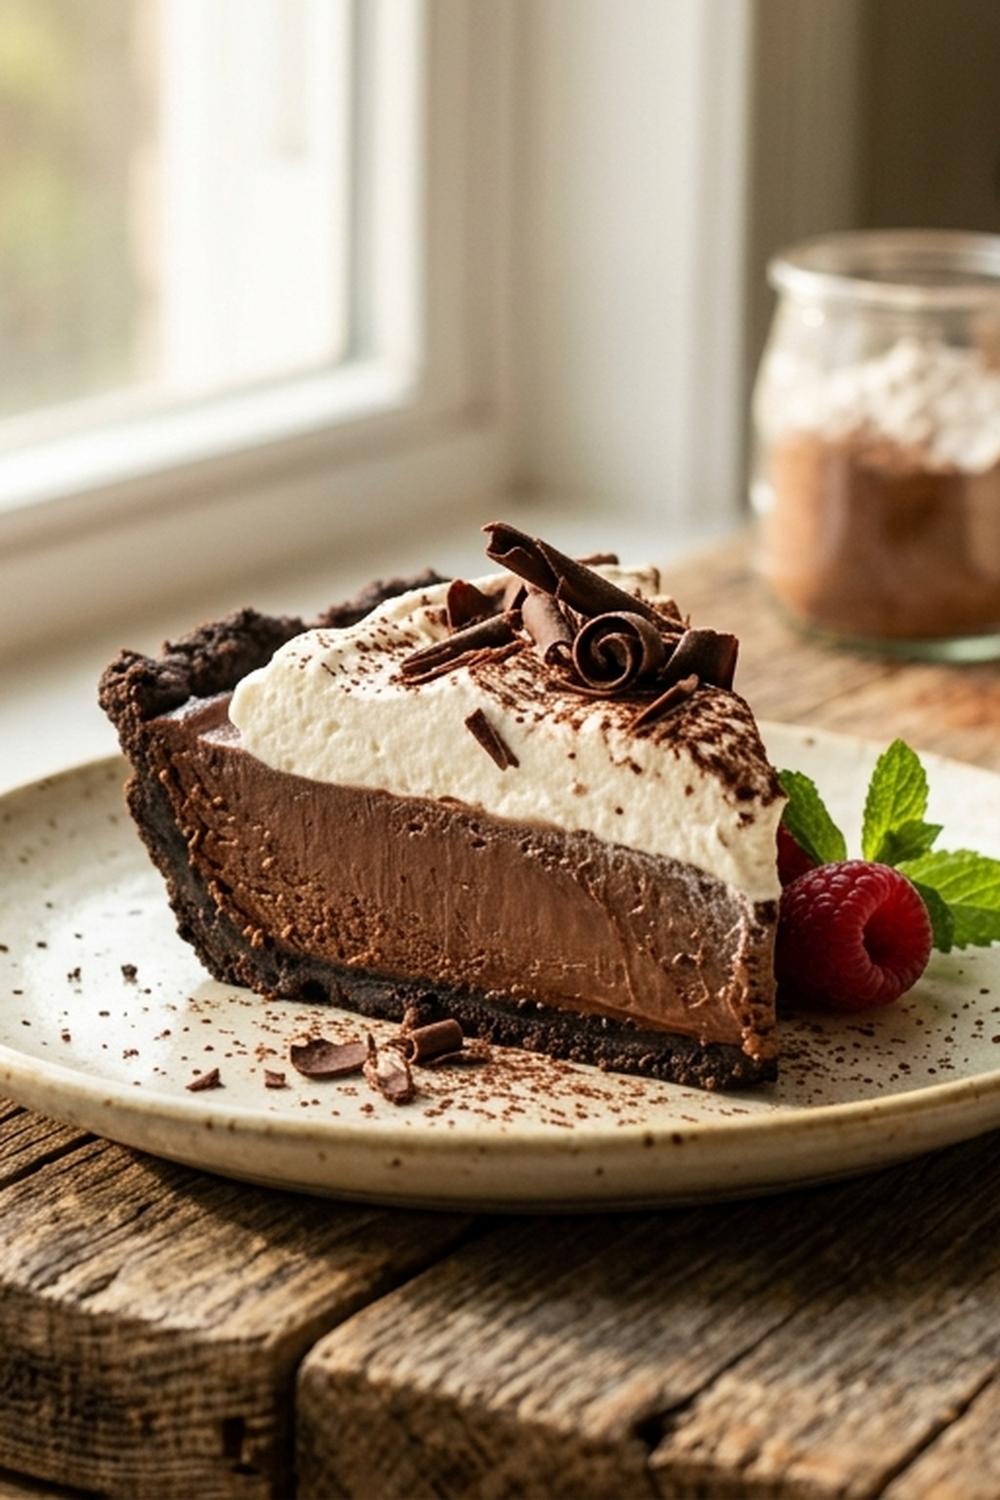
My mother taught me that the best desserts are the ones that look like you spent all day in the kitchen but taste like pure love. This Chocolate Silk Pie Recipe is exactly that kind of magic. It brings together the simplicity of American comfort baking with the elegance of French patisserie—creating something that honors both traditions while standing completely on its own. Whether you’re serving this at a holiday dinner or making it for someone special, this pie delivers restaurant-quality results without the restaurant-level stress. I’ve included practical tips throughout to make sure your pie turns out beautifully every single time.
Chocolate Silk Pie Recipe: Where American Comfort Meets French Elegance
I first fell in love with this pie at my neighbor’s kitchen table about fifteen years ago. She was a French pastry chef who’d moved to Saint Louis, and she was teaching me how a simple chocolate filling could become something silky and luxurious through patience and technique. What struck me most wasn’t just how delicious it was—it was how she made it accessible. She didn’t fuss over special equipment or hard-to-find ingredients. She used what was in her pantry and transformed it with care.
That’s when I realized: American baking loves its shortcuts and practicality, while French baking loves its precision and elegance. This pie is the beautiful conversation between the two. The Oreo crust gives us that nostalgic American sweetness and ease, while the silky chocolate filling is pure French technique—whipped and folded with the same care you’d find in a Parisian café.
I’ve adapted this recipe over the years for home kitchens, and I’m so excited to share it with you. This is the version my family requests on birthdays. This is the pie that makes people ask for the recipe before they even finish their first bite.
The Two Traditions Behind This Dish
When we bring American comfort baking together with French pastry traditions, we’re honoring two very different philosophies about food. American baking celebrates accessibility—it says “here’s what you have at home, let’s make something wonderful.” French patisserie celebrates technique and refinement—it says “let’s take simple ingredients and transform them through skill and patience.”
This chocolate silk pie respects both approaches completely.
- American Comfort Baking Tradition – contributes the Oreo cookie crust, which is nostalgic, fun, and requires just five minutes of preparation. It’s the tradition that says “dessert should be achievable for everyone.”
- French Pastry Tradition – contributes the silky mousse-like filling technique, where eggs and chocolate are carefully combined through whipping and folding. It’s the tradition that elevates simple ingredients into something transcendent.
Why This Fusion Works
The magic happens because these two traditions actually need each other. The American crust provides structure and that beloved cookie flavor that most people grew up with. The French filling technique creates a texture so smooth and creamy that every bite feels luxurious and special. Together, they create a pie that feels both familiar and impressive.
From a flavor science perspective, this works beautifully too. The cocoa solids in bittersweet chocolate develop deeper flavor notes when combined with whipped eggs, which add airiness and help distribute the chocolate’s richness evenly. The vanilla extract bridges both traditions—it’s essential in American baking for depth and in French pastry for its aromatic complexity.
The heavy cream topping becomes the final statement: American generosity meeting French sophistication. It’s luxurious but not pretentious. It’s rich but not heavy. It’s exactly what both traditions do best.
The Ingredients – A Tale of Two Traditions
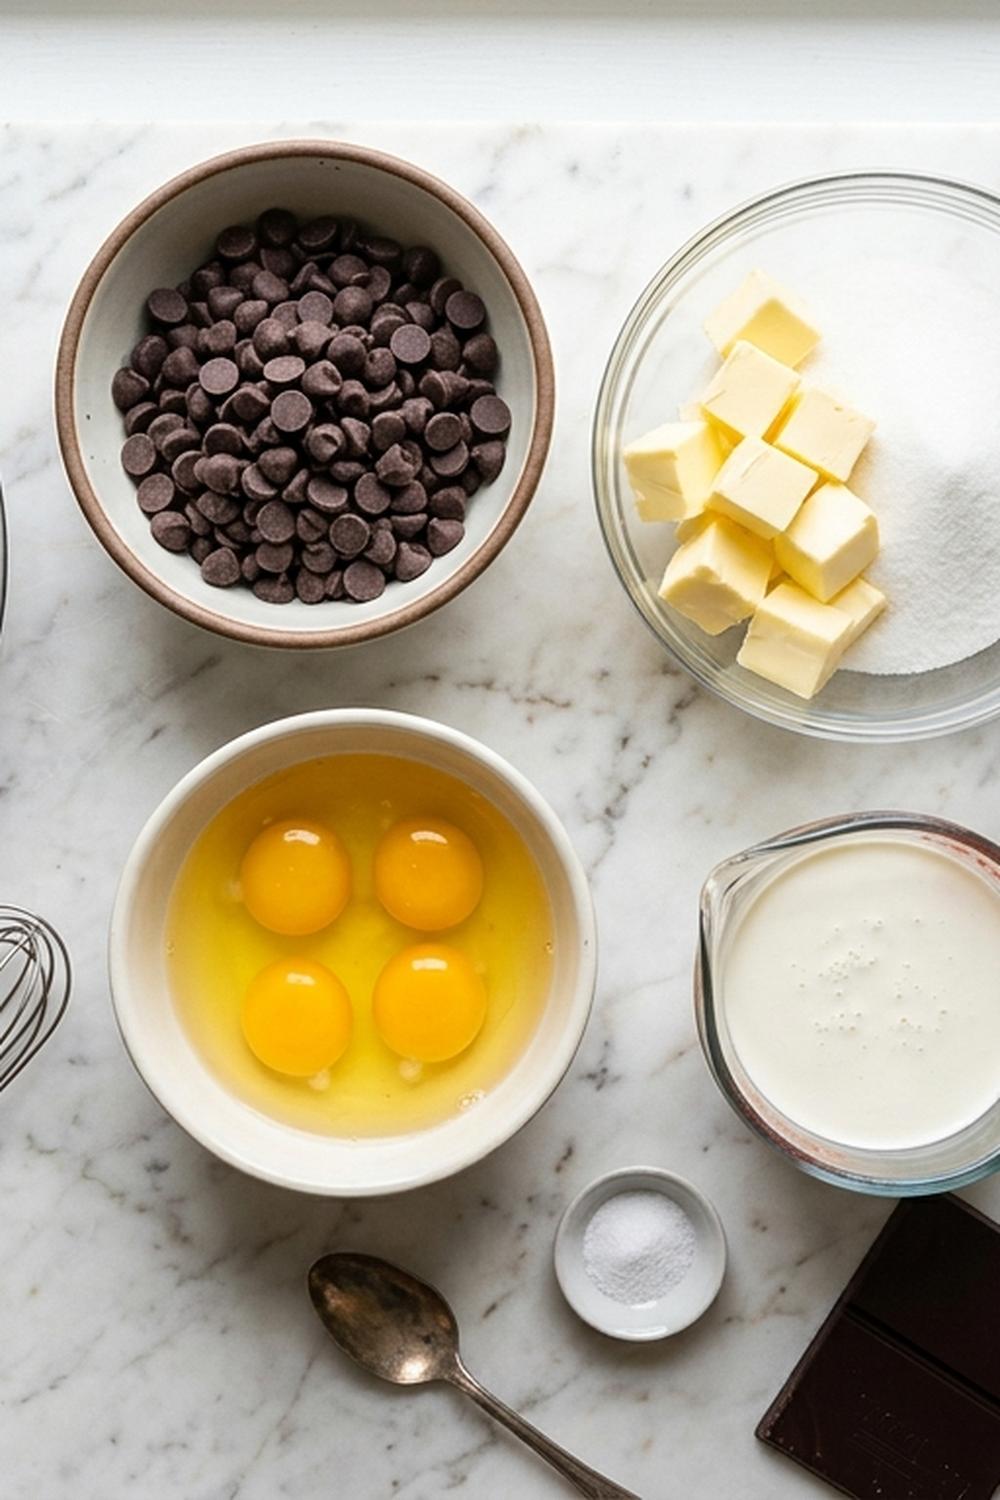
Each ingredient in this recipe tells a story about where it comes from and what it contributes to the final pie. I’ve sourced each item with care, thinking about both tradition and accessibility.
For the Crust
- 20 regular-stuffed Oreo cookies (230 grams total, with filling intact for maximum flavor and texture)
- 3 tablespoons unsalted butter (melted and slightly cooled so it binds the cookies without making them greasy)
For the Chocolate Silk Filling
- 2 teaspoons vanilla extract (pure extract, not imitation, for authentic depth)
- 1⅓ cups granulated sugar (266 grams, provides sweetness and helps create silky texture when whipped)
- 10 tablespoons unsalted butter (142 grams, at room temperature for creamy incorporation)
- 4 teaspoons powdered sugar (for the filling layer)
- 4 large eggs (room temperature, which helps them whip to maximum volume)
- 1⅓ cups heavy cream (cold, for whipping to stiff peaks)
- 8 ounces bittersweet baking chocolate (227 grams, finely chopped to melt evenly and smoothly)
For the Topping
- 2 tablespoons powdered sugar (adds sweetness without the graininess of granulated sugar)
- Chocolate shavings or cocoa powder (for optional garnish that adds visual elegance)
- Sea salt flakes (optional, a pinch brings out chocolate depth beautifully)
- 1 cup heavy cream (cold, for the final whipped cream)
- 1 teaspoon vanilla extract (for aromatic finishing touch)
This recipe makes one 9-inch pie, serving 10-12 people with generous slices.
Expert’s Nutritional Tip
As a registered dietitian, I want you to understand what’s happening in this pie nutritionally. The eggs in this recipe aren’t just texture—they’re providing choline, which supports brain health, and lutein, which protects eye health. The bittersweet chocolate provides flavonoids that have been shown in research to support heart health. While this is absolutely a treat to enjoy in moderation, the chocolate and eggs make it more nutrient-dense than many desserts. One slice delivers about 8 grams of protein, which helps keep you satisfied longer. I recommend enjoying a slice with fresh berries or a cup of tea to balance the richness.
How to Make This Fusion Chocolate Silk Pie Recipe
I’m going to walk you through this step-by-step. What makes this recipe beautiful is that it’s actually broken into manageable stages. You can make the crust one day and the filling the next. You can prepare everything ahead and assemble just before serving. This is a recipe that respects your time while delivering incredible results.
Step 1: Create Your Cookie Crust Foundation
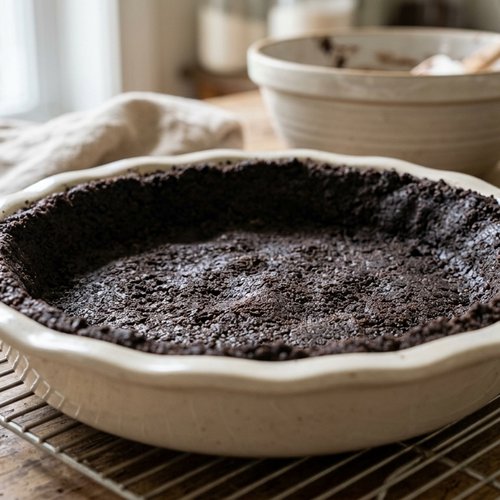
First, let’s honor the American tradition of easy preparation. Preheat your oven to 350°F. Place your 20 Oreo cookies (keeping those filled centers intact!) into a food processor. Pulse until you have fine crumbs—you want some texture here, not a powder. This takes about 20-30 seconds of pulsing. Don’t over-process or the oils will release and your crust will become too dense.
Pour your melted butter over the crumbs and mix gently with a fork until everything is moistened. The mixture should look like wet sand. Press this mixture firmly into a 9-inch pie pan, going up the sides with your fingers or the bottom of a measuring cup. This is where American practicality shines—no special equipment needed.
Bake for 8-10 minutes until the crust is set but not deeply browned. You’re looking for it to firm up, not to toast. Let it cool completely while you move on to the filling. This cooling step is crucial—it prevents your beautiful filling from melting into the warm crust.
Step 2: Melt Your Chocolate with French Precision
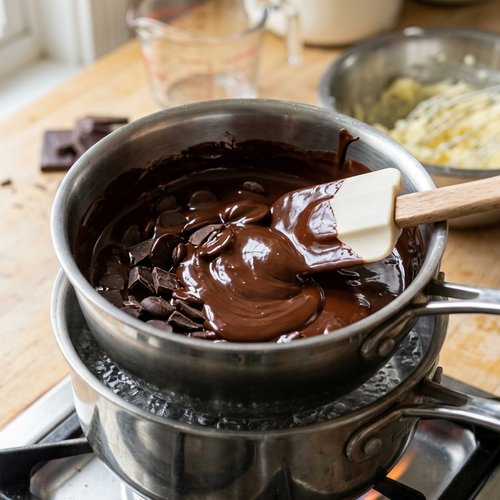
While your crust cools, prepare the chocolate filling—this is where French technique enters. Chop your 8 ounces of bittersweet chocolate into small, even pieces. This matters more than you might think. Even pieces melt evenly and smoothly.
Place your chocolate in a heat-safe bowl. Now, create a double boiler by placing this bowl over a pot of gently simmering water, making sure the bottom of the bowl doesn’t touch the water. Stir constantly and gently with a rubber spatula. This slow, attentive melting is the French pastry way—it prevents the chocolate from seizing and ensures silky smoothness.
Once melted and glossy, remove from heat and set aside to cool slightly. You want it warm but not hot. This takes about 5 minutes.
Step 3: Cream Butter and Sugar Until Fluffy
In a separate large bowl, combine your room-temperature butter and granulated sugar. Using an electric mixer on medium speed, beat for about 3-5 minutes until the mixture is pale, fluffy, and increased in volume. This is important—you’re incorporating air into the butter, which will eventually create that silky texture in your filling.
You’ll know it’s ready when it looks like fluffy clouds and a finger poked into it leaves a slight impression. This aeration is the secret to the silk in your silk pie.
Step 4: Add Eggs One at a Time with Patience
This step requires attention but rewards you with a perfect emulsion. Add your first room-temperature egg to the butter mixture and beat for about 1 minute until fully incorporated and the mixture looks smooth again. Repeat this process with each of the remaining three eggs, beating after each addition. This takes patience, but you’re creating an emulsion—you’re getting the eggs and butter to become one silky entity.
After all four eggs are incorporated, you should have a pale, fluffy mixture. This is the magic moment where technique transforms simple ingredients.
Step 5: Fold in the Chocolate with Love
Pour your slightly cooled melted chocolate into the egg mixture. Add your vanilla extract. Using a rubber spatula, fold gently—don’t stir. Folding is the French way of combining delicate mixtures. Use the spatula to cut down through the center, across the bottom, and up and over the top. Rotate the bowl slightly and repeat until no streaks of chocolate remain.
This folding technique keeps the air you’ve whipped into the egg mixture, which is exactly what creates the silk texture.
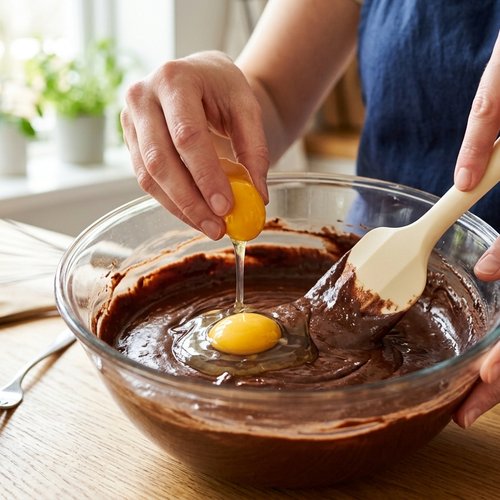
Step 6: Whip Your First Batch of Heavy Cream
In a separate clean bowl, pour 1⅓ cups of cold heavy cream. Using an electric mixer on high speed, whip until soft peaks form—this means the cream holds a shape but the peaks curl over when you lift the beaters. This takes about 2-3 minutes with a mixer.
Add 4 teaspoons of powdered sugar and whip for another 30 seconds just to combine. Don’t overbeat or you’ll have butter instead of whipped cream. This whipped cream is going to be folded into your chocolate mixture to make it light and airy.
Step 7: Fold in the Whipped Cream
Gently fold your whipped cream into the chocolate mixture in two additions. First, fold in about half of it. This lightens the chocolate mixture. Then fold in the remaining whipped cream. Again, use that gentle folding motion—cutting, sweeping, rotating. This is the critical moment where French delicacy meets American generosity to create pure silk.
Your filling should now be light, mousse-like, and absolutely beautiful.
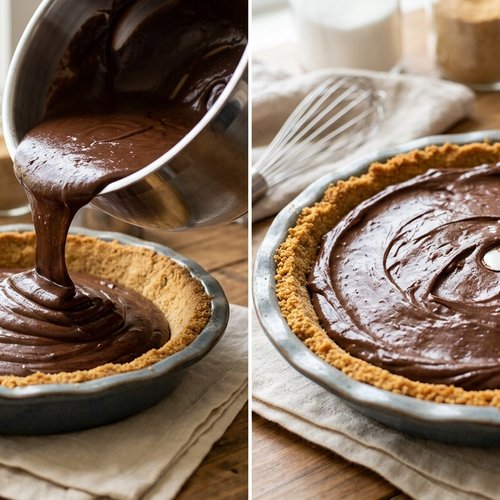
Step 8: Pour into Your Cooled Crust
Pour your chocolate silk filling into your completely cooled crust. Smooth the top with a spatula if you’d like a neat finish, or leave it slightly rustic—both are lovely. Refrigerate for at least 4 hours, but preferably overnight. This resting time lets the flavors meld and the texture set perfectly.
Step 9: Top with Final Whipped Cream
Just before serving, prepare your final topping. In a clean bowl, whip 1 cup of cold heavy cream with 2 tablespoons powdered sugar and 1 teaspoon vanilla extract until stiff peaks form. Spread or dollop this generously over your pie.
If desired, garnish with chocolate shavings (use a vegetable peeler on a chocolate bar) or a light dusting of cocoa powder. A tiny pinch of sea salt flakes brings out the chocolate beautifully and adds a touch of sophistication.
Make-Ahead Guide: Your Stress-Free Timeline
One of the reasons I love this recipe is how well it works with busy schedules. Let me give you the exact timeline I use:
- Two days before serving – Make the crust. Let it cool, wrap in plastic wrap, and store at room temperature. It stays fresh and crisp for 48 hours.
- One day before serving – Make the entire filling. Pour it into the cooled crust and refrigerate overnight. This actually improves the flavor as everything melds together.
- Just before serving – Whip the final cream topping and assemble. This takes exactly 5 minutes.
You can also make the complete pie (including the whipped cream topping) up to 12 hours ahead and refrigerate until serving. The whipped cream may weep slightly, but the pie itself only gets better with time.
Common Mistakes to Avoid
After years of teaching nutrition and cooking, I’ve seen the same beautiful mistakes happen again and again. Let me help you avoid them:
- Using cold eggs and butter – Cold eggs won’t incorporate smoothly into the butter, and cold butter won’t cream properly. Always use room temperature. Take them out of the refrigerator 30 minutes before you start. This matters.
- Stirring instead of folding – When you add whipped cream to chocolate, stirring will deflate all that beautiful air you just created. Use the folding motion—it’s gentle and preserves volume. This is the difference between mousse and pudding.
- Not cooling the crust completely – If you pour warm filling into a warm crust, the filling can sink and separate. Let that crust cool completely at room temperature, then chill it in the freezer for 15 minutes if you’re in a rush.
- Skipping the overnight rest – The filling needs time to set and let flavors marry. If you must serve it sooner, chill for at least 6 hours, but overnight is truly best.
Seasonal Variations: Making This Pie Year-Round
This classic recipe is perfect as-is, but here’s how I adjust it by season to keep it fresh:
- Spring version – Add ½ teaspoon of peppermint extract to the filling for a chocolate-mint pairing. Top with candied mint leaves instead of chocolate shavings.
- Summer version – Reduce the filling by 1 tablespoon and serve slices with fresh raspberries on the side. The brightness of berries cuts through the richness beautifully.
- Fall version – Replace 2 tablespoons of sugar with maple syrup in the filling. Add ¼ teaspoon of cinnamon. It becomes a chocolate-maple pie that feels seasonal and warm.
- Winter version – Add ¼ teaspoon of cayenne pepper to the filling. The subtle heat becomes very popular when it’s cold outside, and it deepens the chocolate flavor beautifully.
How to Customize the Fusion Ratio
Maybe you’re more of an American comfort baker, or maybe you prefer French elegance. Here’s how to shift the balance:
- Lean more American – Use a vanilla wafer crust instead of Oreo for lighter sweetness, reduce the chocolate filling by adding an extra ½ cup whipped cream for airier texture, and use milk chocolate instead of bittersweet. Serve with whipped cream and sprinkles.
- Lean more French – Use a butter shortbread crust instead of cookies, increase the chocolate filling proportion, add ¼ teaspoon of fleur de sel to the filling for sophisticated depth, and skip the whipped cream topping in favor of a simple chocolate glaze.
Other Great American-French Dessert Combinations
Once you discover how beautifully these two traditions work together, you’ll want to explore more. Here are some other fusions worth trying:
- Berry Cheesecake with French Crème Brûlée Topping – American cheesecake meets French caramelized custard. Try my this simple cake and adapt it with a burnt sugar topping.
- Brownie Ice Cream Sundae with French Sauce – American sundae simplicity with French hot chocolate sauce elegance. Check out my my homemade ice cream for inspiration.
- Lemon Donut with French Glaze – American breakfast pastry with French pastry technique. See how I do it in my Baked Lemon Donut Recipe.
- Butter Tart with Chocolate Ganache – American-Canadian comfort with French chocolate finishing. My Butter Tart Recipe takes on new elegance with this twist.
Can I Store Chocolate Silk Pie Recipe?
Yes, and I’m so glad you asked because storage is where this recipe truly shines.
The whole pie keeps beautifully in the refrigerator for up to 4 days when covered loosely with plastic wrap. The filling stays creamy and the crust stays crisp. If you haven’t added the whipped cream topping yet, it actually keeps even better—up to 5 days. Just add the fresh whipped cream right before serving.
For longer storage, you can freeze the entire pie (without the whipped cream topping) for up to 2 months. Wrap it well in plastic wrap and then aluminum foil. Thaw in the refrigerator overnight before serving. The texture will be slightly less silky than fresh, but still delicious. Add the fresh whipped cream topping after thawing.
Individual slices keep in an airtight container for 3 days. Perfect for grabbing throughout the week if you have the willpower!
Nutrition Information
Based on USDA nutritional database analysis, one slice (1/12 of pie with whipped cream topping) contains approximately:
- Calories: 385
- Total Fat: 28 grams (mostly from the chocolate, butter, and cream)
- Saturated Fat: 16 grams
- Cholesterol: 95 milligrams
- Sodium: 165 milligrams
- Total Carbohydrates: 38 grams
- Dietary Fiber: 2 grams (from the chocolate)
- Sugar: 32 grams
- Protein: 5 grams
From a nutritional perspective, the bittersweet chocolate provides flavonoids—plant compounds that research suggests may support cardiovascular health. The eggs contribute choline for brain function and lutein for eye health. The butter provides fat-soluble vitamins A, D, E, and K. While this is absolutely a dessert to enjoy in moderation, it’s more nutrient-dense than many sweet treats. The protein content from the eggs and chocolate helps maintain satiety. A slice paired with berries or served after a satisfying meal becomes part of a balanced eating approach.
What to Serve With Chocolate Silk Pie Recipe?
This pie is luxurious enough to stand alone, but I have some favorite accompaniments that make it feel even more special:
- Fresh raspberries or strawberries – The natural tartness cuts through the richness and adds brightness. A small handful on the side elevates the whole experience.
- Strong coffee or espresso – The bitterness of coffee beautifully complements chocolate. Serve with an after-dinner espresso and you have an authentic French moment.
- Vanilla ice cream – American comfort meeting chocolate elegance. A small scoop alongside becomes a sundae-like experience without being heavy.
- Homemade buns – If you’re serving pie as part of a dessert spread, my Basic Bun Recipe makes elegant small rolls that feel like a bakery experience.
- Sweet wine or dessert wine – A port or banyuls wine pairs beautifully with the chocolate notes. This is the French way of finishing a special meal.
- Whipped mascarpone with honey – For a richer option, serve whipped mascarpone cheese on the side with a drizzle of honey. It adds creaminess and sophistication.
Chocolate Silk Pie Recipe
Ingredients
For the Crust
- 20 regular-stuffed Oreo cookies 230 grams total, with filling intact for maximum flavor and texture
- 3 tablespoon unsalted butter melted and slightly cooled so it binds the cookies without making them greasy
For the Chocolate Silk Filling
- 2 teaspoon vanilla extract pure extract, not imitation, for authentic depth
- 1⅓ cup granulated sugar 266 grams, provides sweetness and helps create silky texture when whipped
- 10 tablespoon unsalted butter 142 grams, at room temperature for creamy incorporation
- 4 teaspoon powdered sugar for the filling layer
- 4 large eggs room temperature, which helps them whip to maximum volume
- 1⅓ cup heavy cream cold, for whipping to stiff peaks
- 8 ounce bittersweet baking chocolate 227 grams, finely chopped to melt evenly and smoothly
For the Topping
- 2 tablespoon powdered sugar adds sweetness without the graininess of granulated sugar
- Chocolate shavings or cocoa powder for optional garnish that adds visual elegance
- Sea salt flakes optional, a pinch brings out chocolate depth beautifully
- 1 cup heavy cream cold, for the final whipped cream
- 1 teaspoon vanilla extract for aromatic finishing touch
Instructions
Step 1: Create Your Cookie Crust Foundation
- First, let's honor the American tradition of easy preparation. Preheat your oven to 350°F. Place your 20 Oreo cookies (keeping those filled centers intact!) into a food processor. Pulse until you have fine crumbs—you want some texture here, not a powder. This takes about 20-30 seconds of pulsing. Don't over-process or the oils will release and your crust will become too dense. Pour your melted butter over the crumbs and mix gently with a fork until everything is moistened. The mixture should look like wet sand. Press this mixture firmly into a 9-inch pie pan, going up the sides with your fingers or the bottom of a measuring cup. This is where American practicality shines—no special equipment needed. Bake for 8-10 minutes until the crust is set but not deeply browned. You're looking for it to firm up, not to toast. Let it cool completely while you move on to the filling. This cooling step is crucial—it prevents your beautiful filling from melting into the warm crust.
Step 2: Melt Your Chocolate with French Precision
- While your crust cools, prepare the chocolate filling—this is where French technique enters. Chop your 8 ounces of bittersweet chocolate into small, even pieces. This matters more than you might think. Even pieces melt evenly and smoothly. Place your chocolate in a heat-safe bowl. Now, create a double boiler by placing this bowl over a pot of gently simmering water, making sure the bottom of the bowl doesn't touch the water. Stir constantly and gently with a rubber spatula. This slow, attentive melting is the French pastry way—it prevents the chocolate from seizing and ensures silky smoothness. Once melted and glossy, remove from heat and set aside to cool slightly. You want it warm but not hot. This takes about 5 minutes.
Step 3: Cream Butter and Sugar Until Fluffy
- In a separate large bowl, combine your room-temperature butter and granulated sugar. Using an electric mixer on medium speed, beat for about 3-5 minutes until the mixture is pale, fluffy, and increased in volume. This is important—you're incorporating air into the butter, which will eventually create that silky texture in your filling. You'll know it's ready when it looks like fluffy clouds and a finger poked into it leaves a slight impression. This aeration is the secret to the silk in your silk pie.
Step 4: Add Eggs One at a Time with Patience
- This step requires attention but rewards you with a perfect emulsion. Add your first room-temperature egg to the butter mixture and beat for about 1 minute until fully incorporated and the mixture looks smooth again. Repeat this process with each of the remaining three eggs, beating after each addition. This takes patience, but you're creating an emulsion—you're getting the eggs and butter to become one silky entity. After all four eggs are incorporated, you should have a pale, fluffy mixture. This is the magic moment where technique transforms simple ingredients.
Step 5: Fold in the Chocolate with Love
- Pour your slightly cooled melted chocolate into the egg mixture. Add your vanilla extract. Using a rubber spatula, fold gently—don't stir. Folding is the French way of combining delicate mixtures. Use the spatula to cut down through the center, across the bottom, and up and over the top. Rotate the bowl slightly and repeat until no streaks of chocolate remain. This folding technique keeps the air you've whipped into the egg mixture, which is exactly what creates the silk texture.
Step 6: Whip Your First Batch of Heavy Cream
- In a separate clean bowl, pour 1⅓ cups of cold heavy cream. Using an electric mixer on high speed, whip until soft peaks form—this means the cream holds a shape but the peaks curl over when you lift the beaters. This takes about 2-3 minutes with a mixer. Add 4 teaspoons of powdered sugar and whip for another 30 seconds just to combine. Don't overbeat or you'll have butter instead of whipped cream. This whipped cream is going to be folded into your chocolate mixture to make it light and airy.
Step 7: Fold in the Whipped Cream
- Gently fold your whipped cream into the chocolate mixture in two additions. First, fold in about half of it. This lightens the chocolate mixture. Then fold in the remaining whipped cream. Again, use that gentle folding motion—cutting, sweeping, rotating. This is the critical moment where French delicacy meets American generosity to create pure silk. Your filling should now be light, mousse-like, and absolutely beautiful.
Step 8: Pour into Your Cooled Crust
- Pour your chocolate silk filling into your completely cooled crust. Smooth the top with a spatula if you'd like a neat finish, or leave it slightly rustic—both are lovely. Refrigerate for at least 4 hours, but preferably overnight. This resting time lets the flavors meld and the texture set perfectly.
Step 9: Top with Final Whipped Cream
- Just before serving, prepare your final topping. In a clean bowl, whip 1 cup of cold heavy cream with 2 tablespoons powdered sugar and 1 teaspoon vanilla extract until stiff peaks form. Spread or dollop this generously over your pie. If desired, garnish with chocolate shavings (use a vegetable peeler on a chocolate bar) or a light dusting of cocoa powder. A tiny pinch of sea salt flakes brings out the chocolate beautifully and adds a touch of sophistication.
Notes
FAQs
Can I use regular chocolate chips instead of baking chocolate?
I don’t recommend it, and here’s why from a baker’s perspective: chocolate chips contain stabilizers that prevent them from melting as smoothly as pure baking chocolate. When you’re creating an emulsion like we are here, you need the chocolate to flow and distribute evenly. Baking chocolate gives you that silky result. If you must use chips, look for high-quality ones and melt them more carefully. The result won’t be quite as silk-like, but it will still be delicious.
What if I don’t have a food processor for the crust?
Put your Oreos in a sturdy plastic bag and crush them with a rolling pin, the bottom of a measuring cup, or even a hammer. This is the old-fashioned way, and honestly, it’s meditative. You’ll get a slightly chunkier crust, which many people prefer. The technique is just as valid.
Can I make this pie without eggs due to allergies?
Unfortunately, the eggs are crucial to the structure and texture of this pie. They create the emulsion that makes it silk. Without them, you’d have a very different dessert. However, if you have egg allergies, I’d suggest looking for pasteurized eggs, which are safe for recipes with raw eggs, or consulting with an allergist about options. Alternatively, a no-bake chocolate mousse with aquafaba (chickpea liquid) as a substitute could work—just know it will be a different recipe entirely.
Why do you chill the crust in the freezer before filling?
This is a technique I picked up from French pastry training. A cold crust stays crisp and doesn’t absorb moisture from the filling. It also helps keep the bottom of the crust structurally sound. If your crust is warm when the filling goes in, the butter in the crust can soften and the filling can start to sink. That 15-minute freeze is an investment in texture. You’ll notice the difference.
Can I make mini pies instead of one large pie?
Absolutely! This recipe works beautifully in a muffin tin lined with paper liners or in individual tartlet molds. You’ll get about 12 mini pies. Reduce the baking time for the crusts to 6-7 minutes (they’re smaller and cook faster). Everything else stays the same. Mini pies are perfect for portion control and make elegant individual servings for special dinners.
More Fusion Recipes You’ll Love
- this cozy soup – A different kind of fusion that combines slow-cooked comfort with nutritious grains
- Bone In Chicken Breast Slow Cooker Recipe – Learn about slow-cooking technique that respects traditional flavor building
- Blueberry Pie With Frozen Berries Recipe – Another pie option that brings together American comfort and fruit-forward elegance
Final Thoughts
I hope you make this pie. I hope you experience that moment when you pull it from the refrigerator and see how absolutely elegant it looks—like you spent all day in the kitchen when really, you just invested a little time and attention. That’s what good cooking is about. It’s not about complicated techniques or rare ingredients. It’s about respecting traditions while making something that’s genuinely yours.
My mother taught me in her kitchen that love shows up in food as care, as consistency, and as generosity. This chocolate silk pie carries all three. It says “you matter” to whoever gets to eat it. It brings together the best of what two cultures know about dessert and creates something that tastes like home and celebration at the same time.
Make this pie for someone you love. Serve it with strong coffee and good conversation. Notice how the silky filling feels on your tongue. That’s the conversation between two culinary traditions, speaking in chocolate and butter and eggs.
Happy Cooking!